
I’m a big fan of speedy craft projects. Even before I had a kid (and got way busier) I always gravitated toward simple DIYs… they seemed more approachable. I mean, who has the time (or the patience) for a seven hour project? And if you’re the same way, then this super easy DIY shirt is for you. It only requires two seams, and you could even do it without a sewing machine if you don’t have one. So let’s get started… keep reading to check out my tutorial!
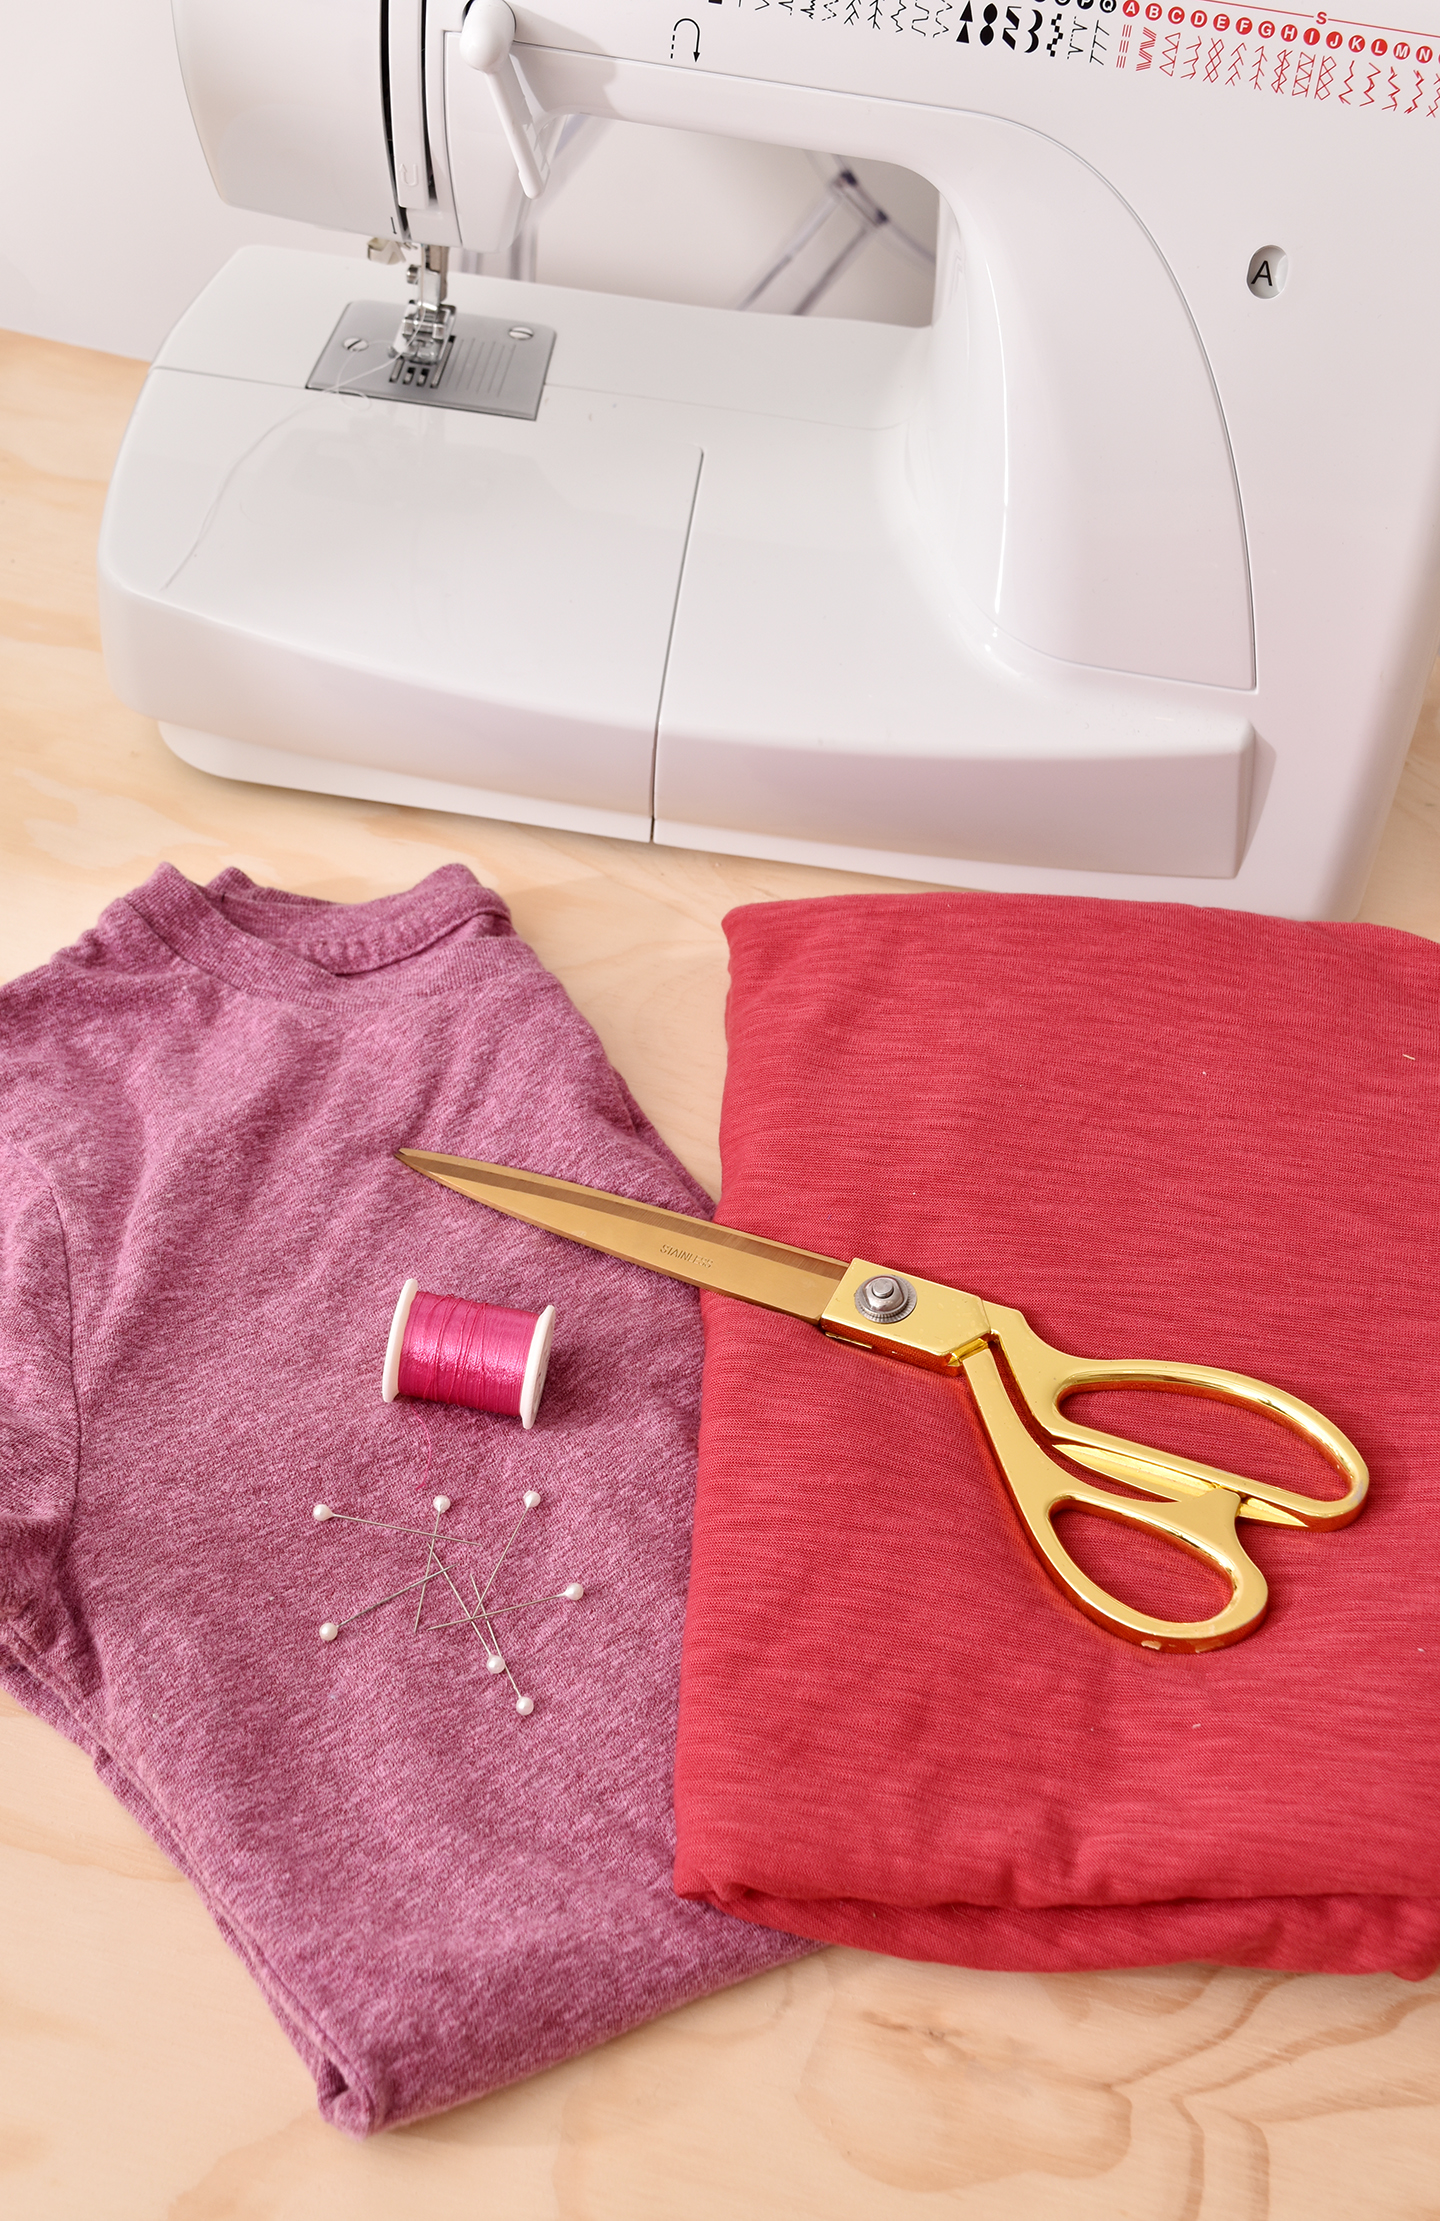
Here are the materials you’ll need for your DIY shirt:
- Lightweight jersey fabric (something like this)
- Sewing machine or a needle and thread
- Scissors
- Pins
- Existing shirt that fits well
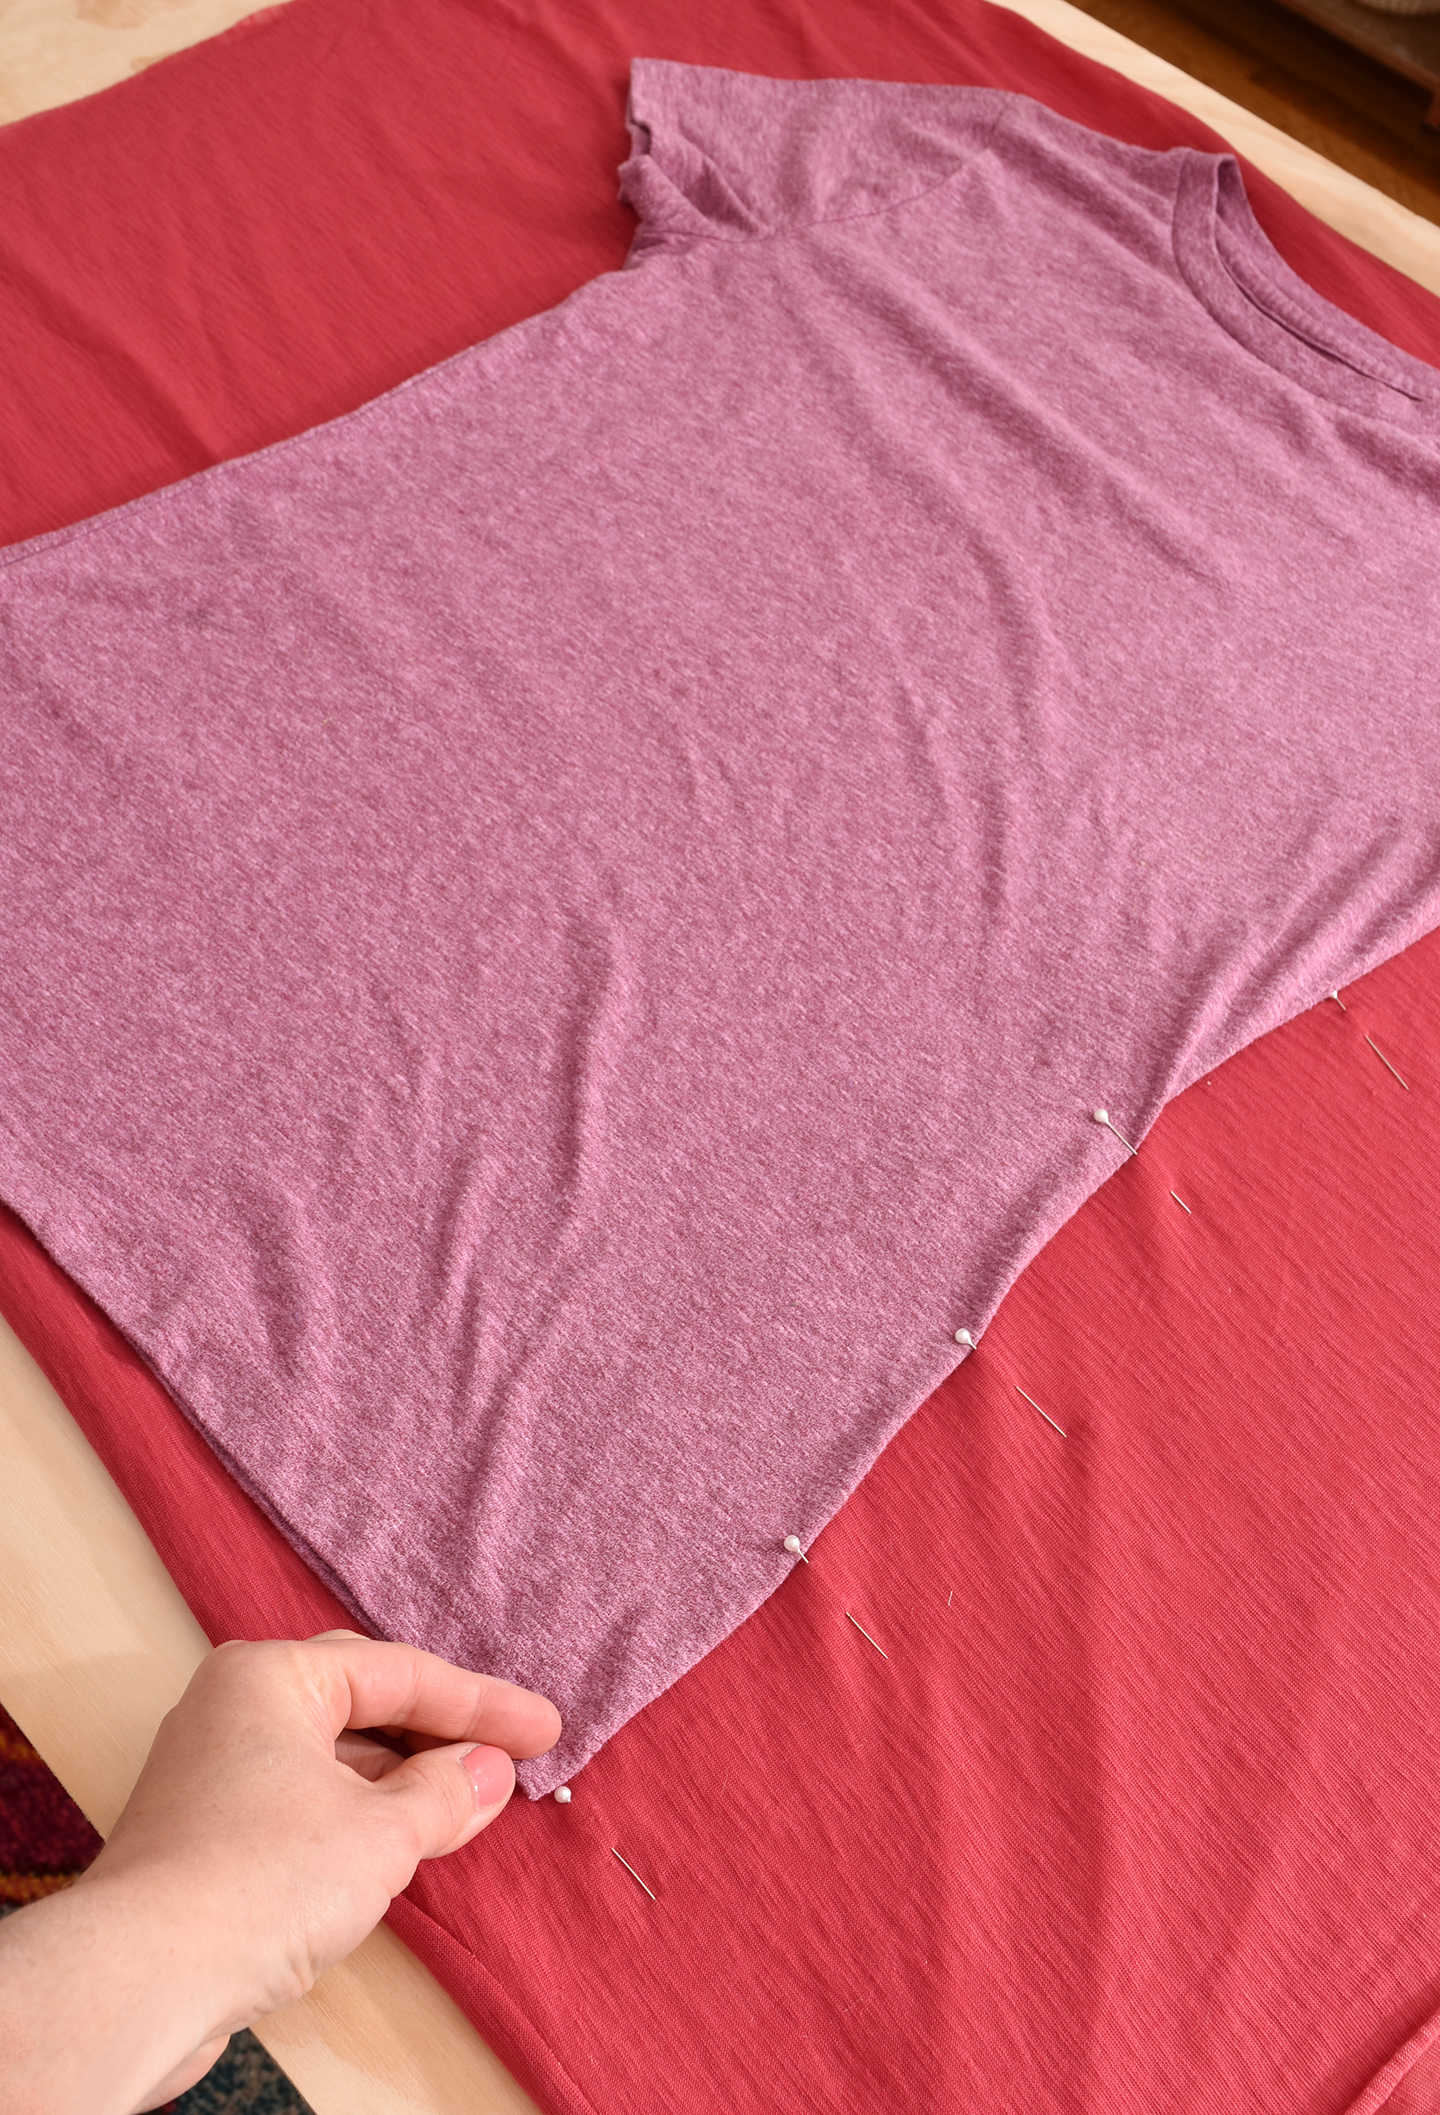
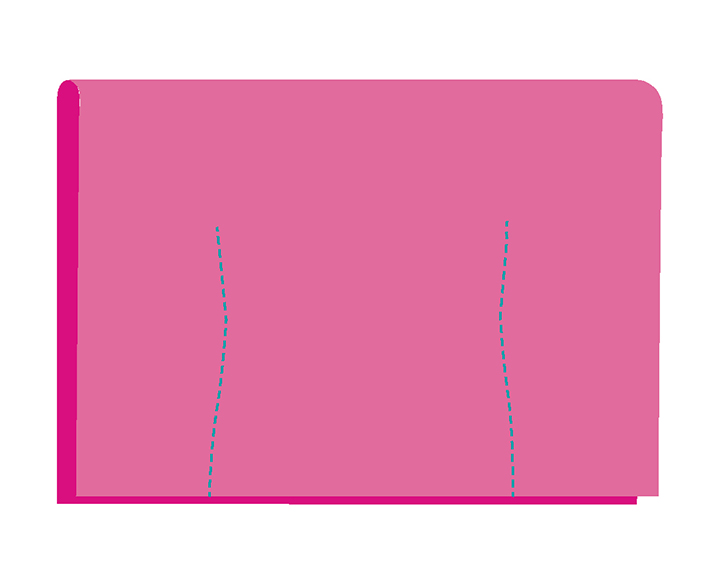
Begin by folding your fabric in half and centering an existing shirt on top of it, with the neckline positioned at the fold of the fabric (the fold will ultimately go across your shoulders). Place pins along the edge of the shirt as shown above… your seam will run down the holes nearest to the pinheads (see diagram below). Stop pinning once you get to the armpit of the shirt, and and make a mental note that that’s where you’ll need to end your seam once you start sewing. Repeat the same pinning process on the other side.
Cut any extra fabric off of the bottom edge that’s parallel to the bottom hem of the shirt so it’s straight and tidy-looking.
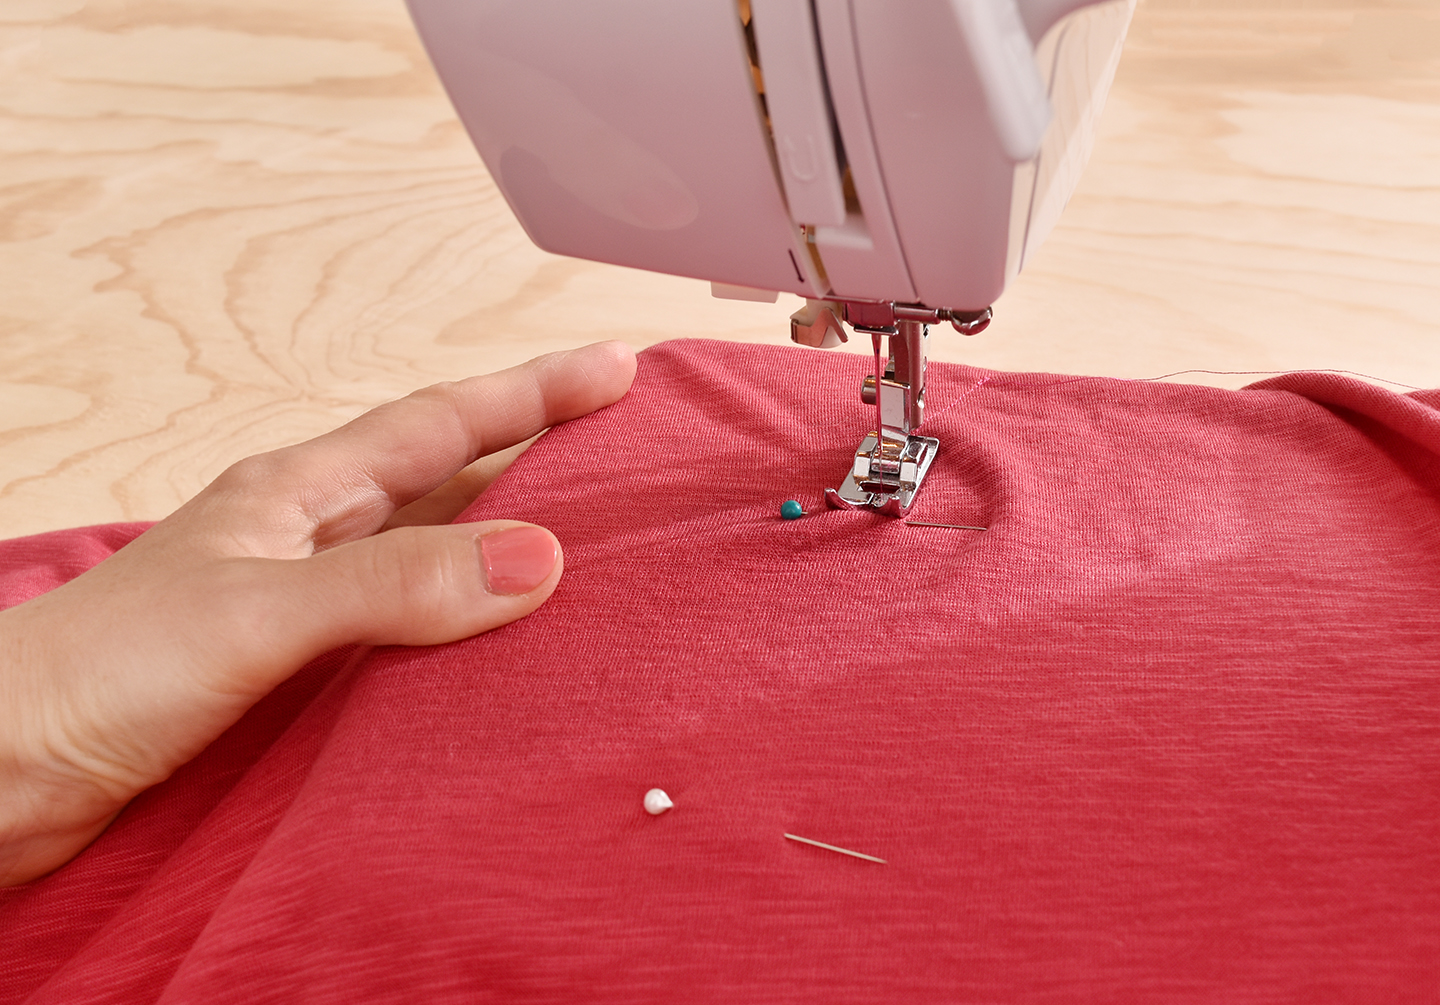
Now create the seam along the pinholes that are nearest to the pinheads. Remove the pins just before the presser foot runs over the pin so that you don’t break your sewing machine needle. Sew from the top pin all the way down to the open bottom of the folded fabric. Repeat the process on the other side.
Note: This project could be done by hand as well! You could sew a backstitch using a needle and thread, or you could even use a brightly colored embroidery floss for a fun alternative.
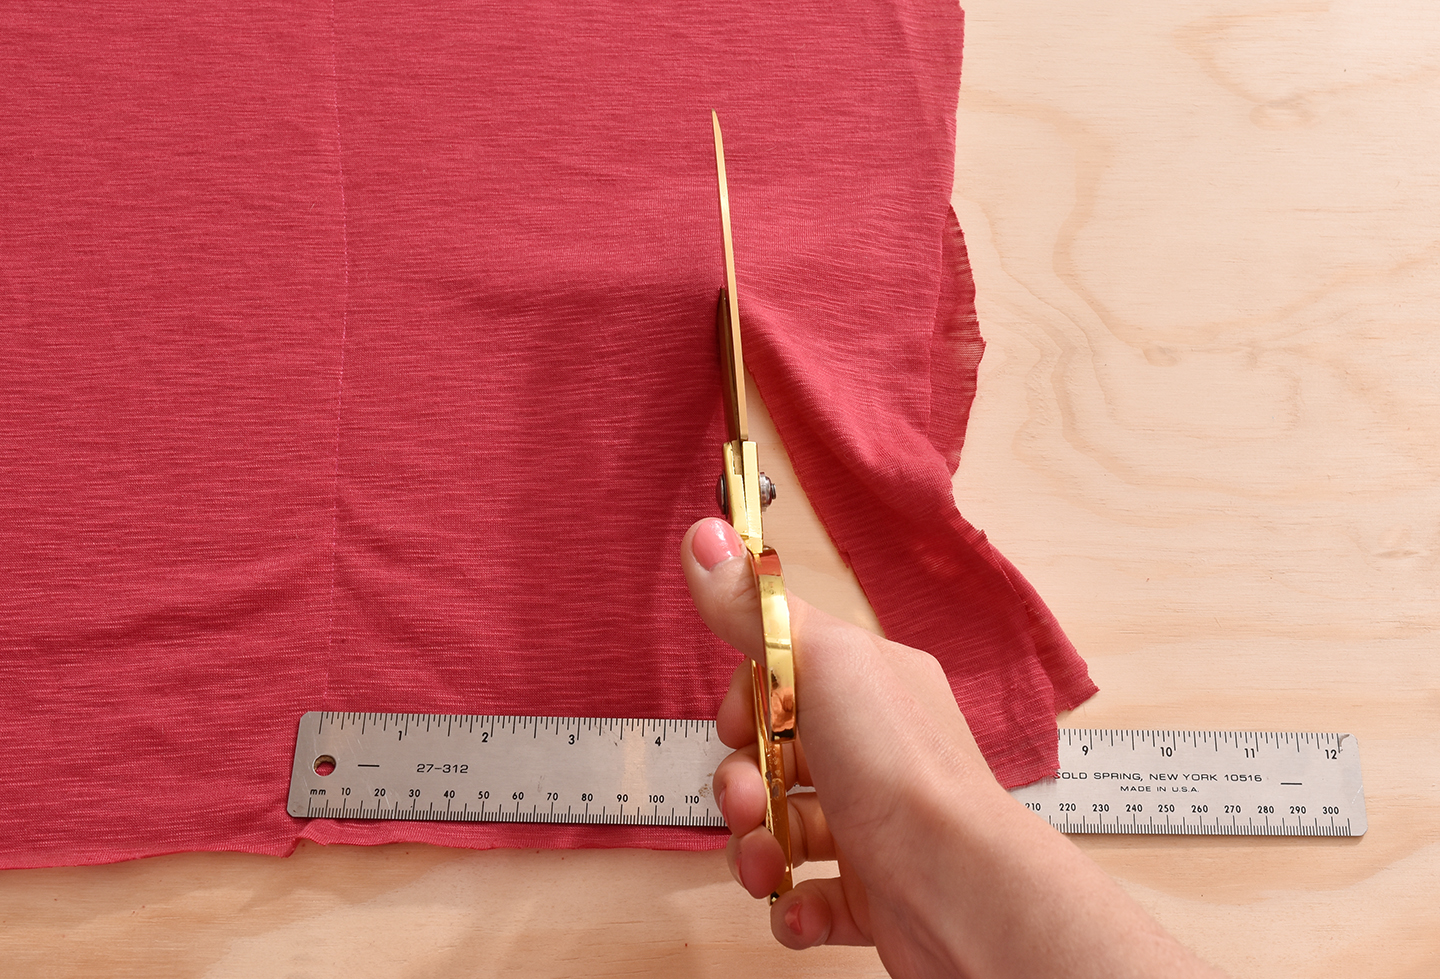
Once you’ve finished the seams on each side, trim the sides so they match the shape of the seams. I left about five inches of fabric on each side, but you could leave more if you like a more flowy look.
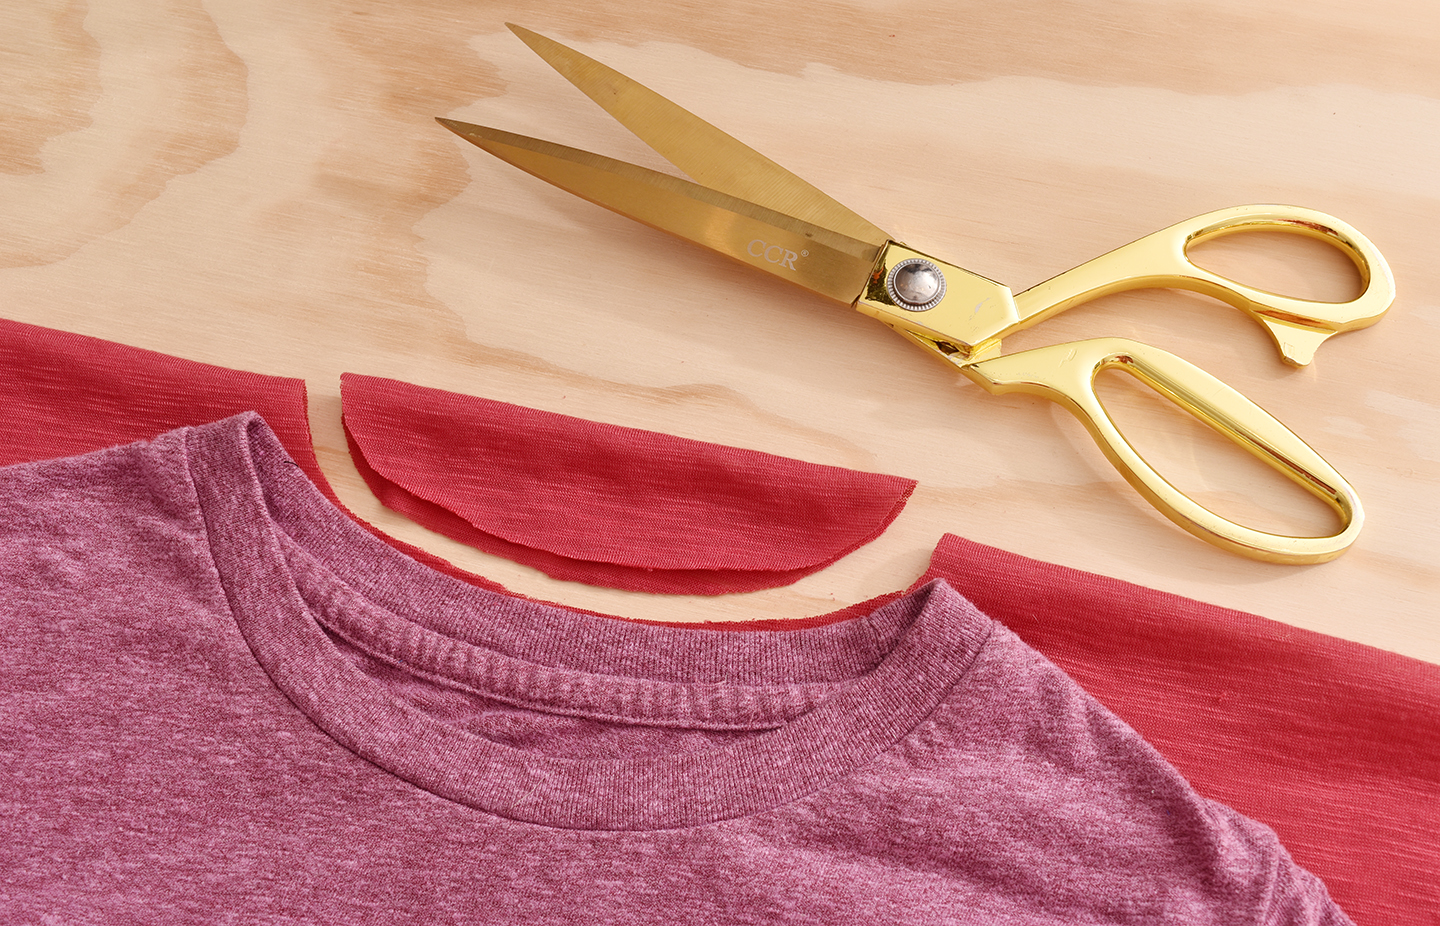
Last, trim the neckhole. This is just a half oval that you’ll cut from the center of the folded part of the fabric.

And that’s it, your DIY shirt is complete! This top is great for a night out… it’s soft and comfortable, and the flowy arms give it a dressy look. Or you could make it out of a sequined fabric for a fancier look.

Here I am looking wistfully off into the distance… I’ll have to hire a model after this pandemic is over 🙂
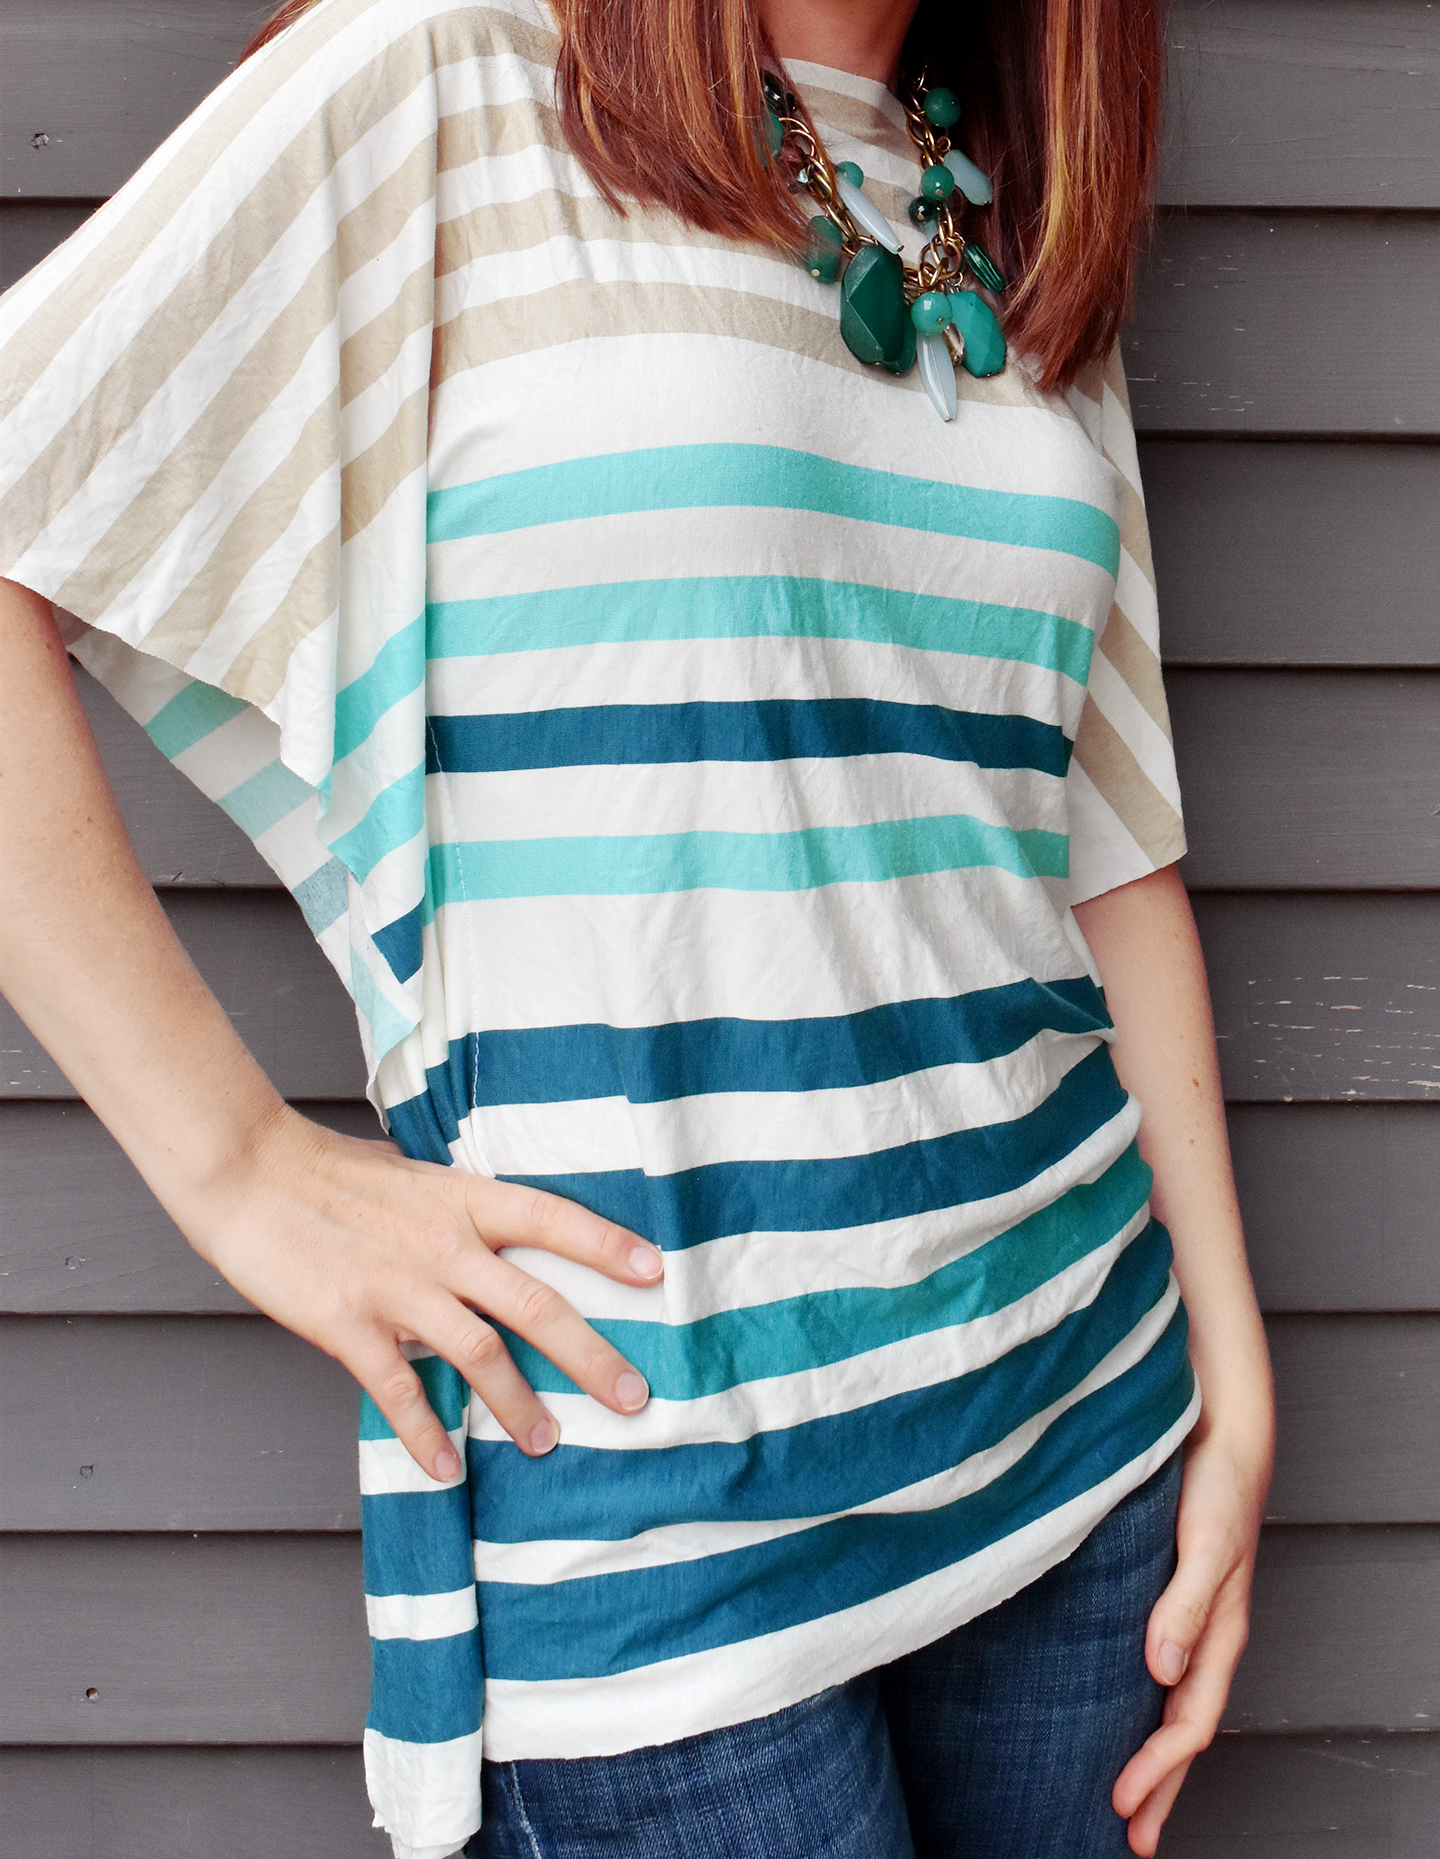
I made one out of a striped knit fabric as well, and I’m loving the way the stripes drape from the neckline over the shoulders. And the colors give it a beachy look!

If you’re on the hunt for more clothing DIYs, check out this pashmina refashion tutorial or my oldie but goodie 15 minute dress.
This post may contain affiliate links. This means that if you buy the cool stuff I recommend, I earn a small commission (but you still pay the same price). Thanks for helping me make a living doing my dream job!