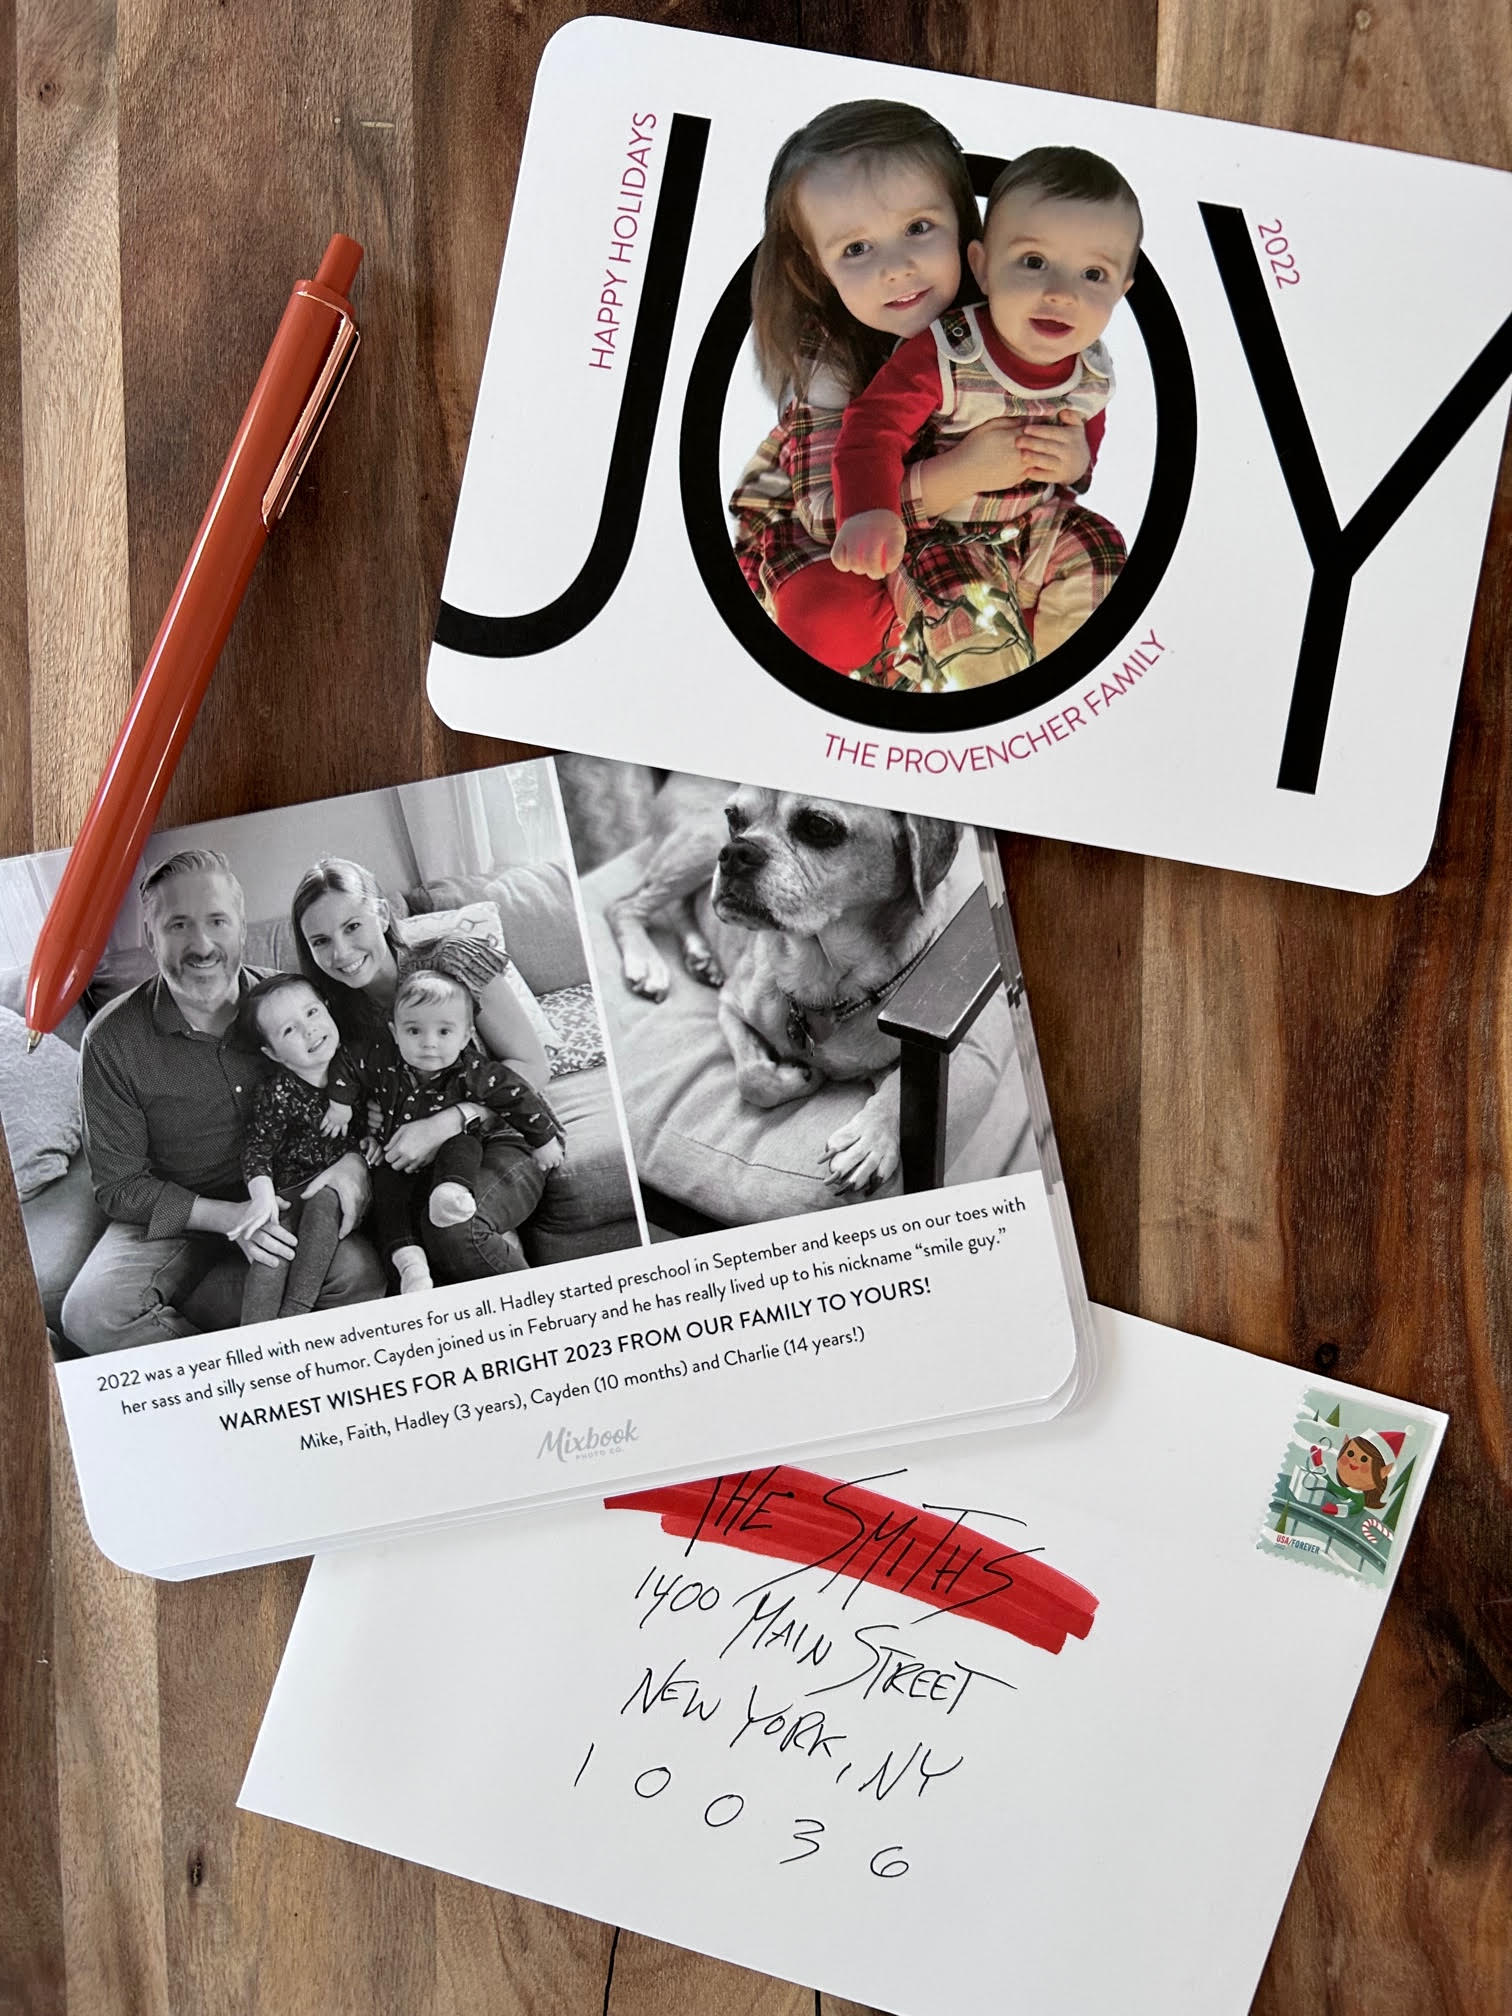
If you know me, you know that I’ve always enjoyed graphic design and I love to custom design anything I can get my hands on. But the daunting part has always been figuring out how to get things printed… so when I found out that Mixbook offers a blank card option, I knew how I would be making my holiday cards this year! And I wanted to share the process with you all too. Keep reading to check out my tutorial, complete with screenshots.
The first thing you’ll need is the link… here’s where you can find the blank card to start your project. From this page, you can select the size and shape that you’d like to use for your card.
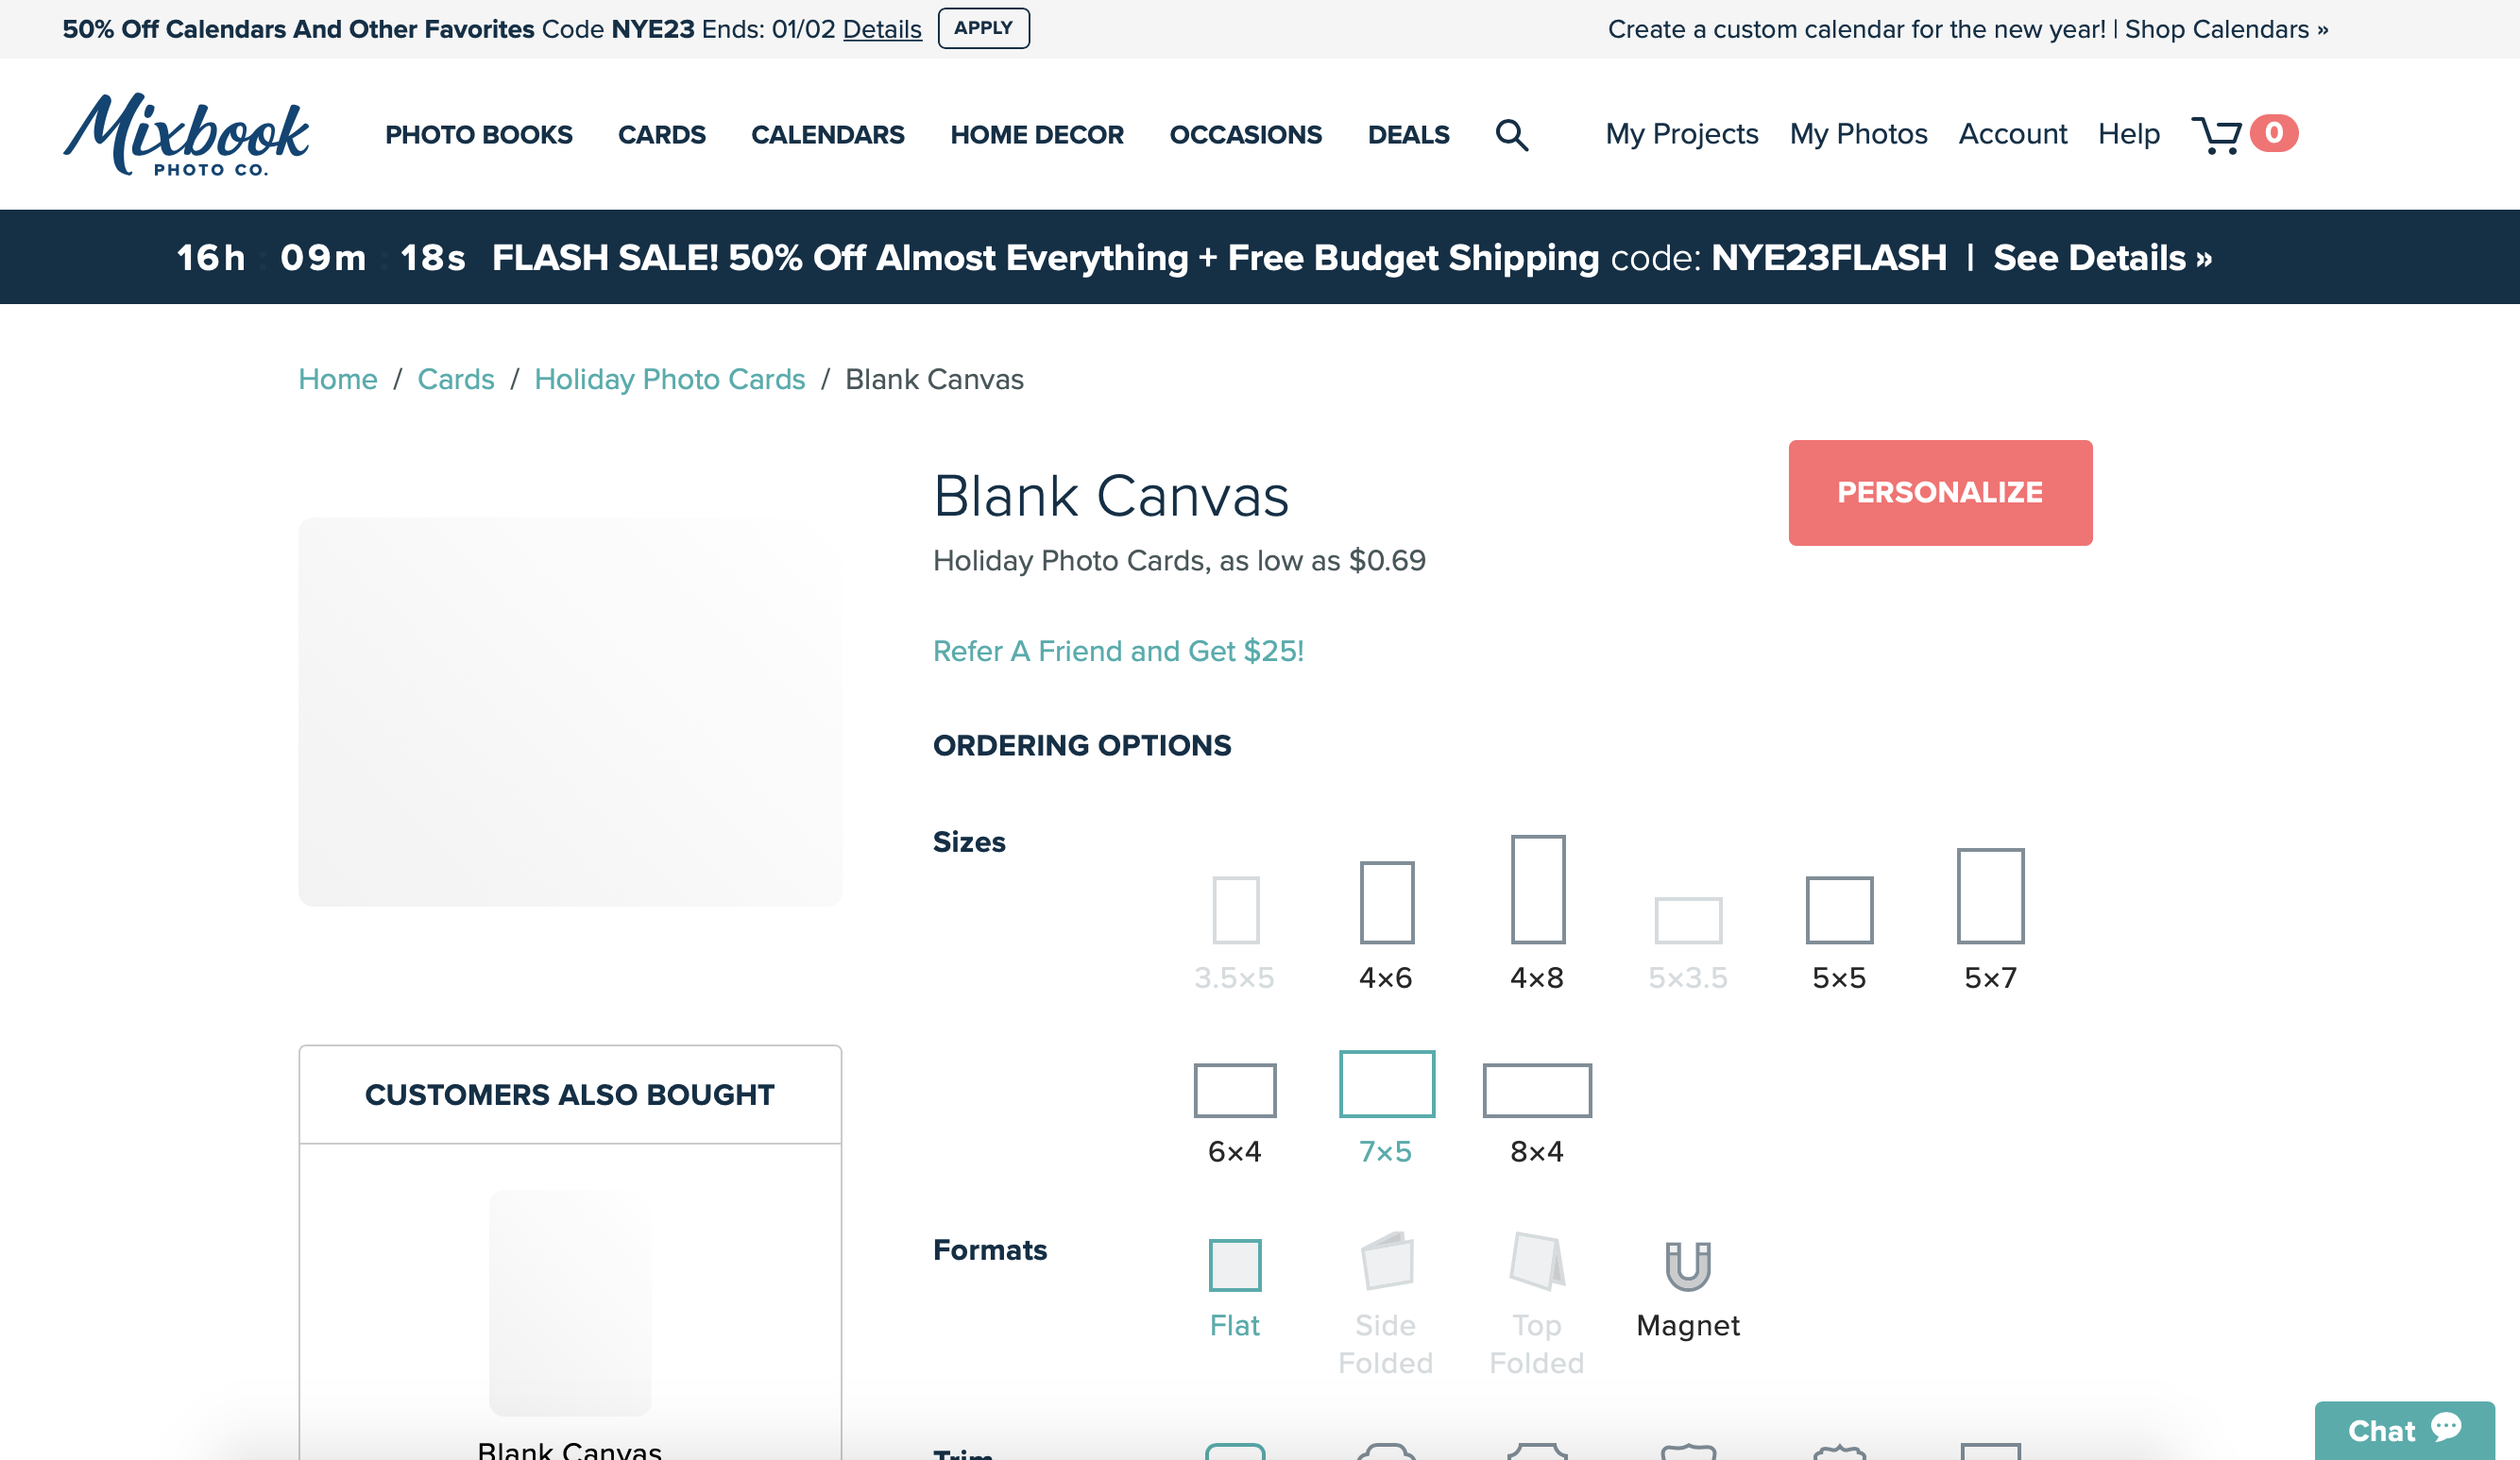
If you want a horizontal card, you can select that in the second row. You can also pick whether you’d like square corners or some other shape – I went with rounded. Hit “personalize” once you have everything the way you want it.
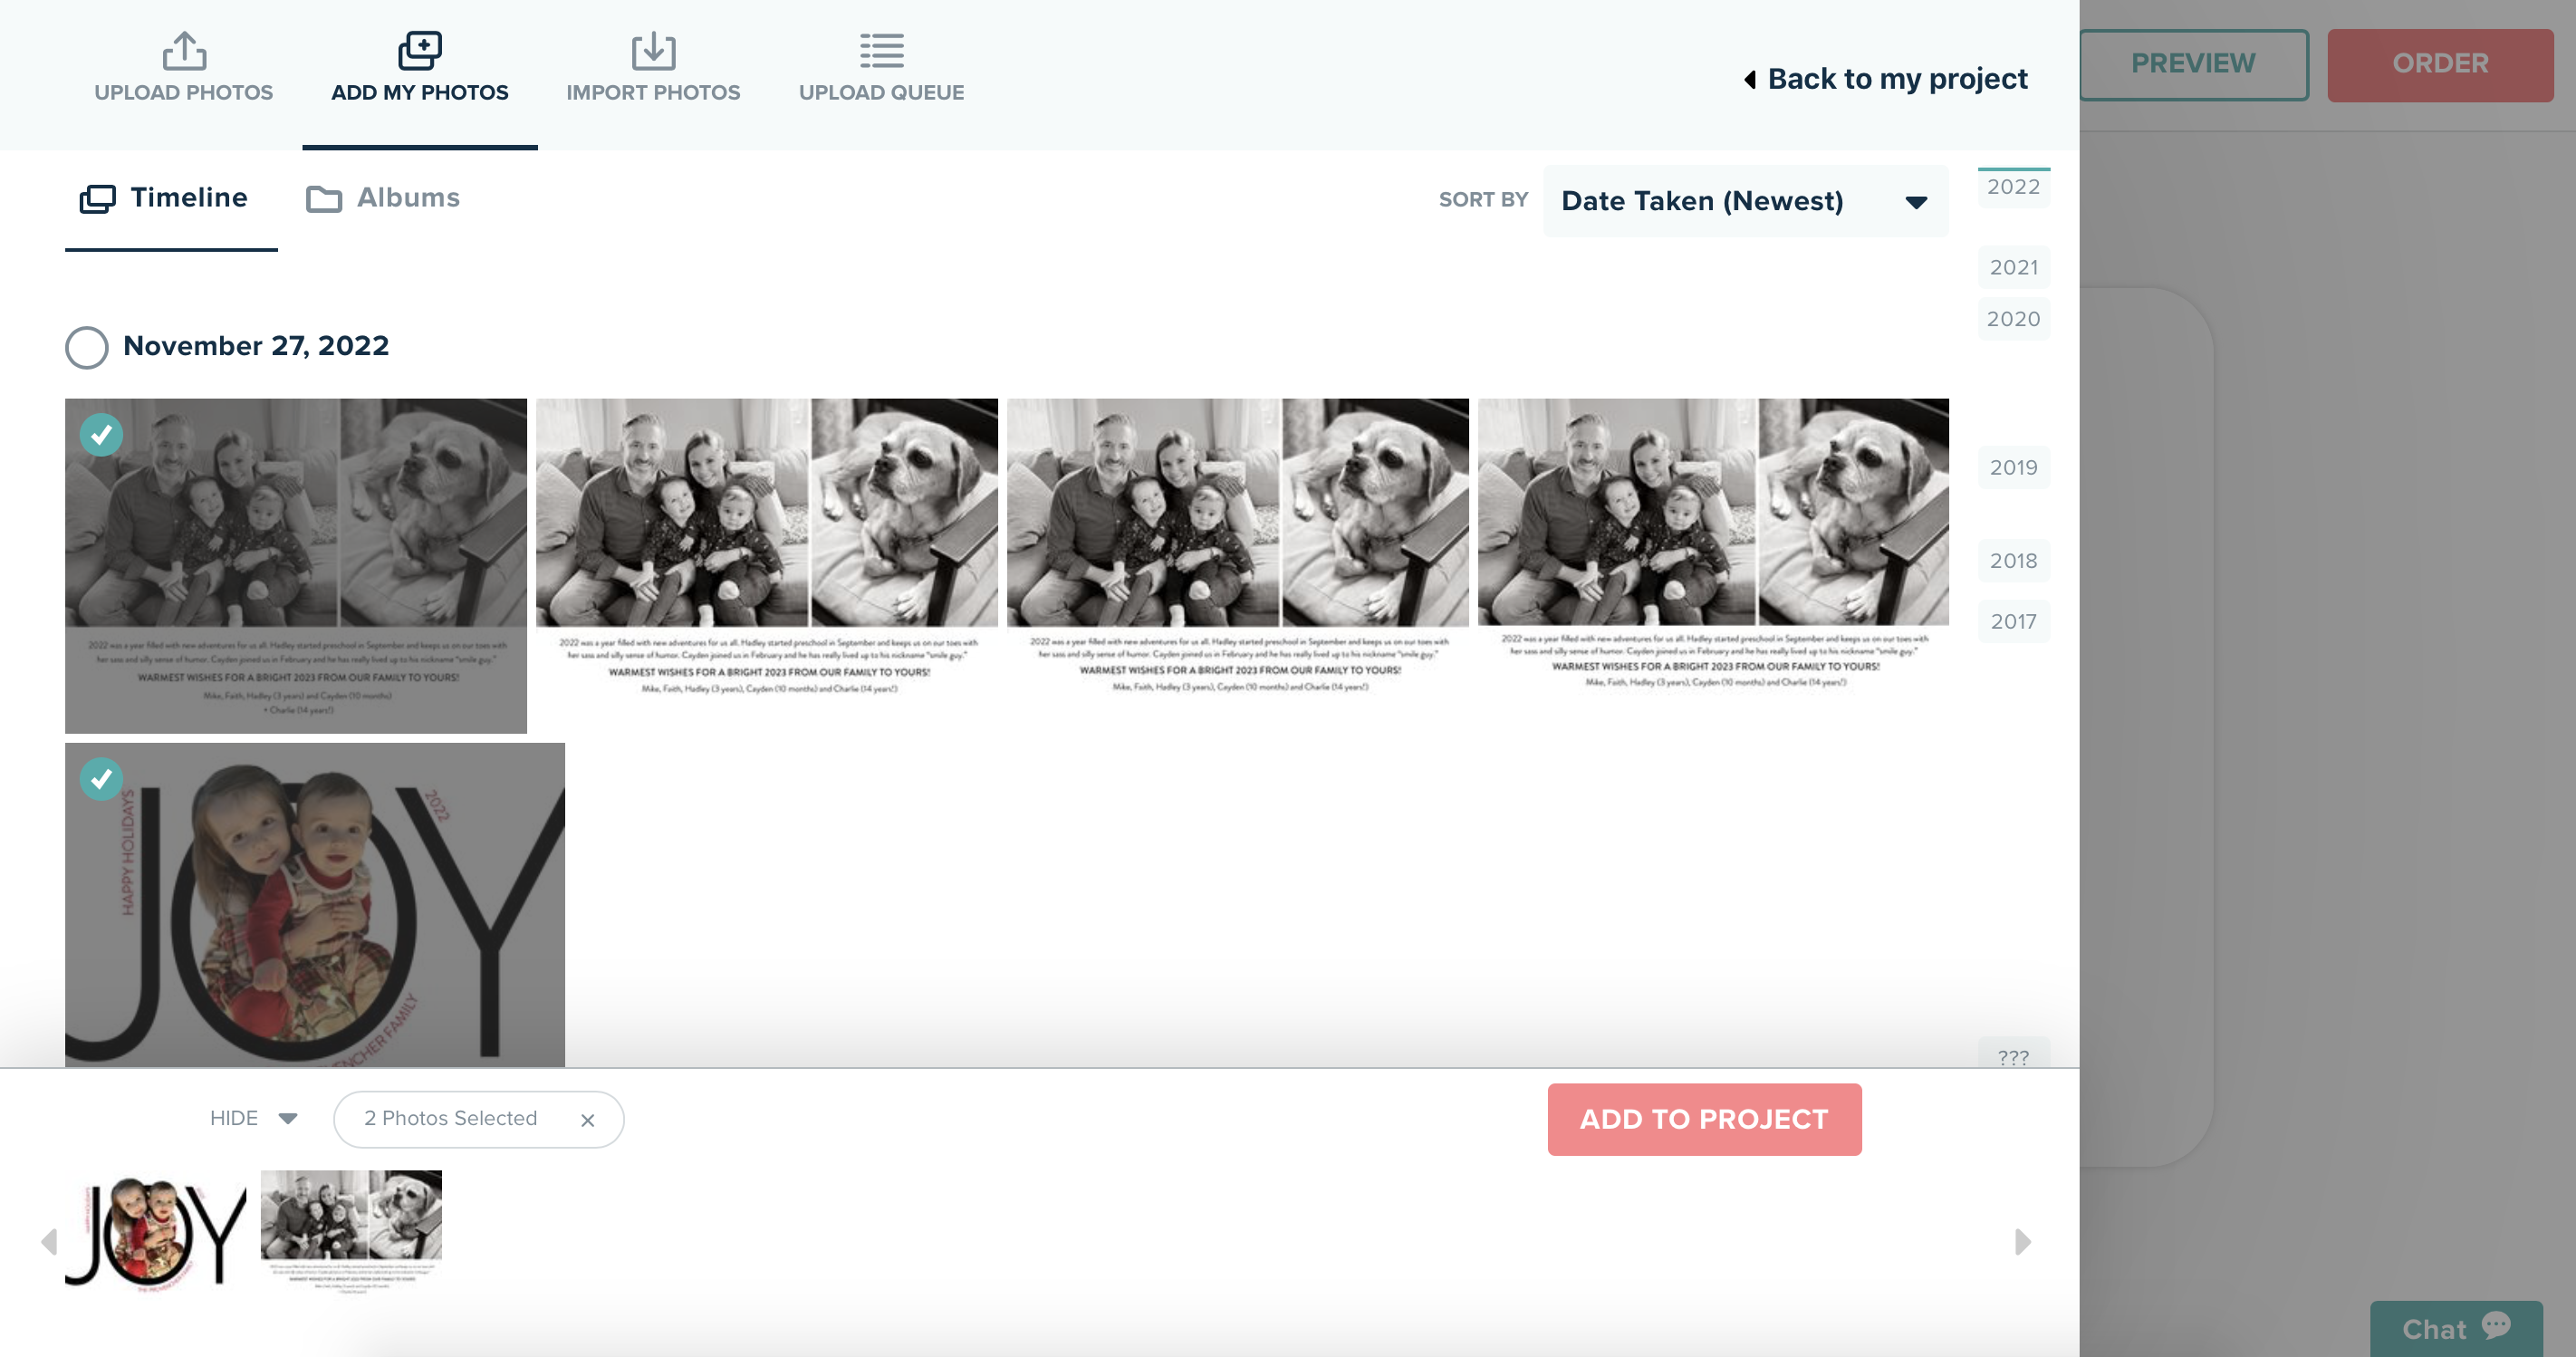
Next, it will prompt you to upload photos. I made my designs in Photoshop and saved them as JPEGS… then I was able to easily upload them to Mixbook. Click “Add To Project.”
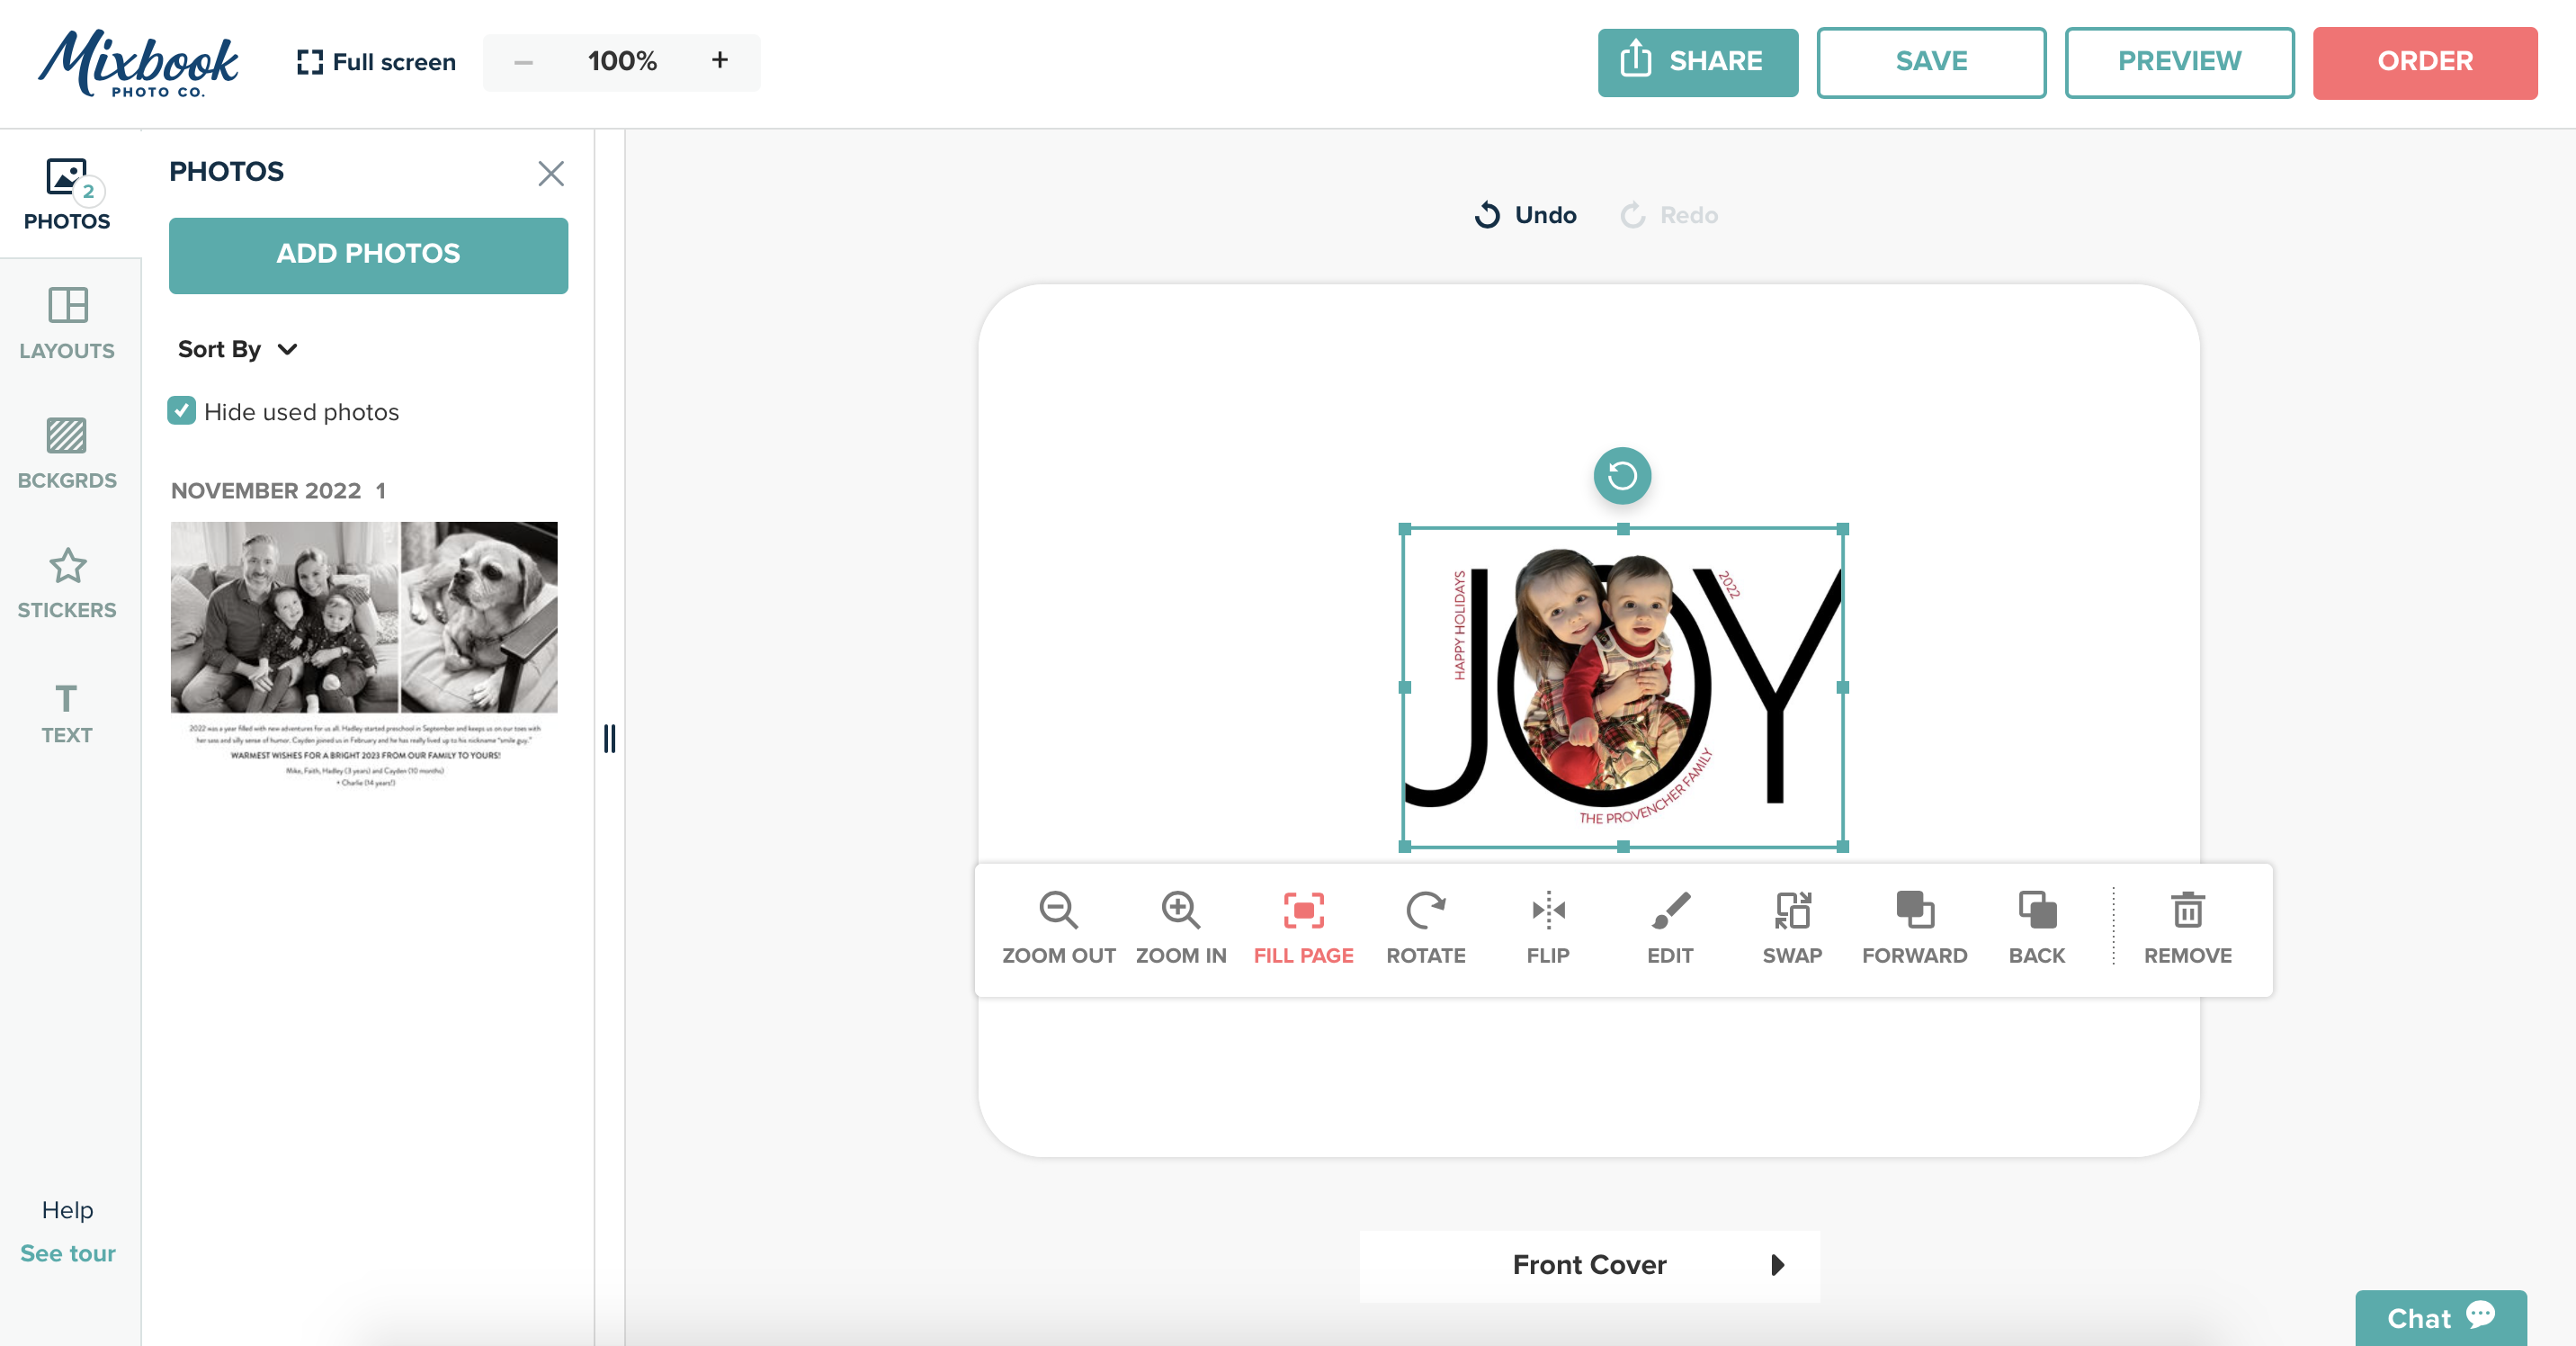
Then you can drag and drop your front image onto the front cover. Then once you click on the image, you can select “Fill Page” so it fits perfectly.
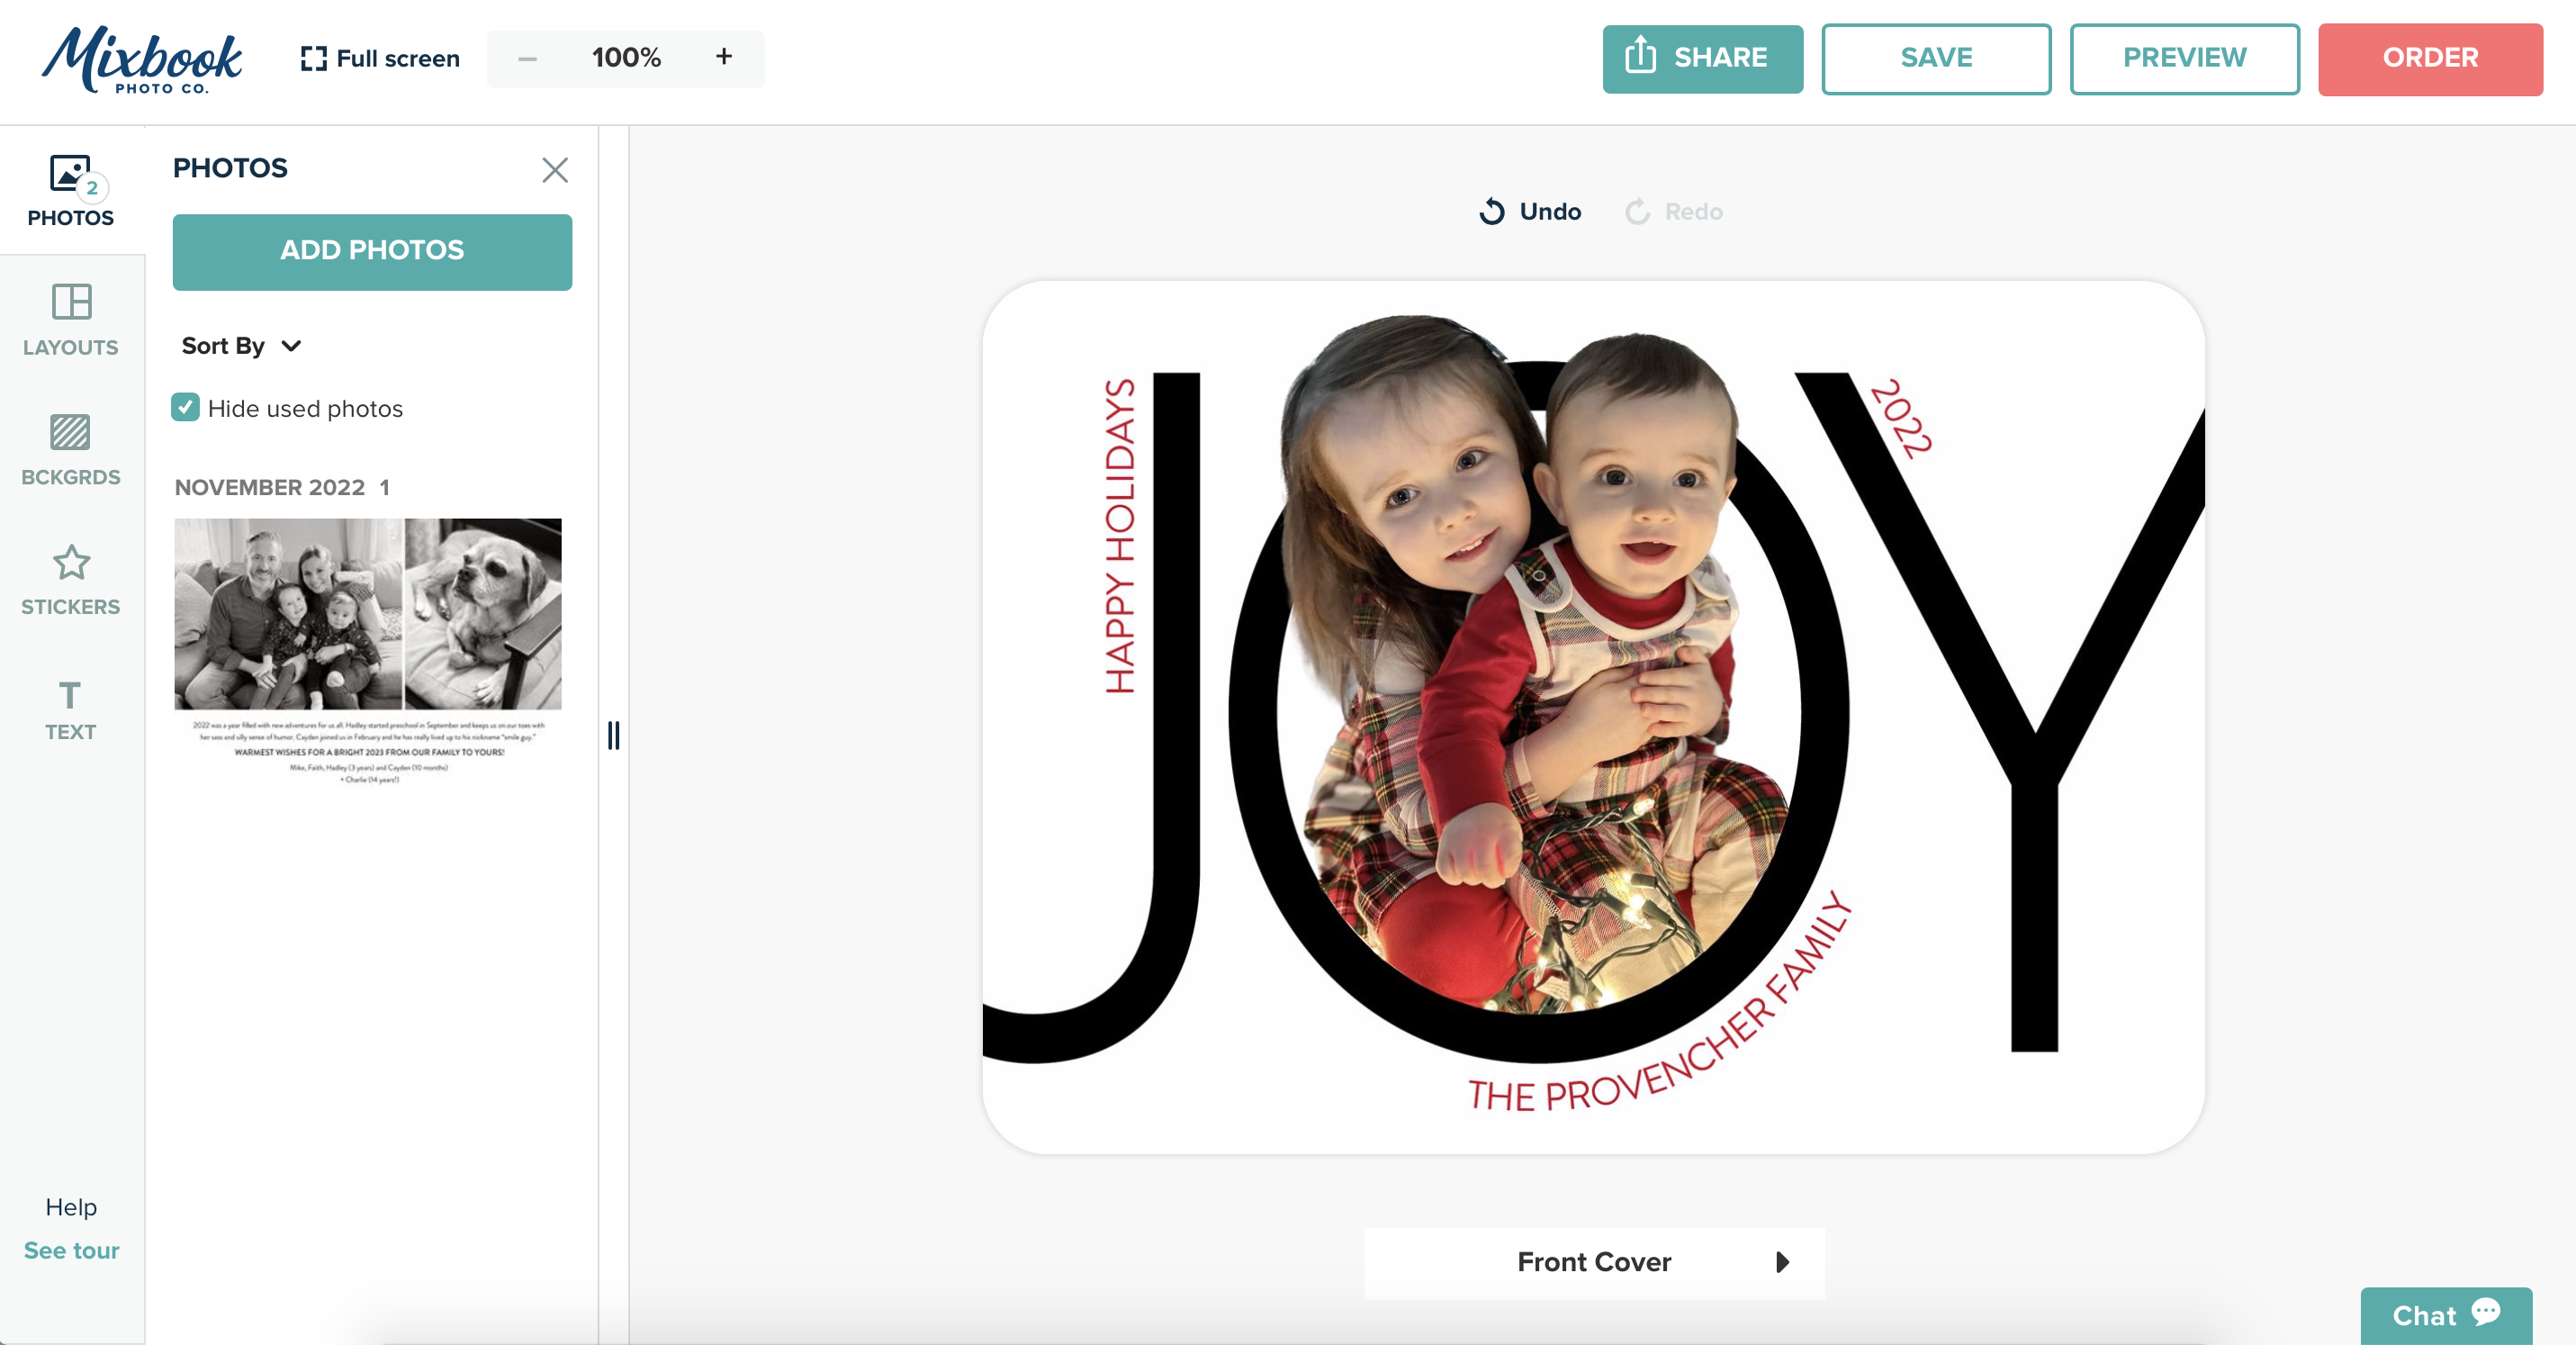
Here is what it will look like once the image is enlarged. Click the arrow next to “Front Cover” to toggle to the back.
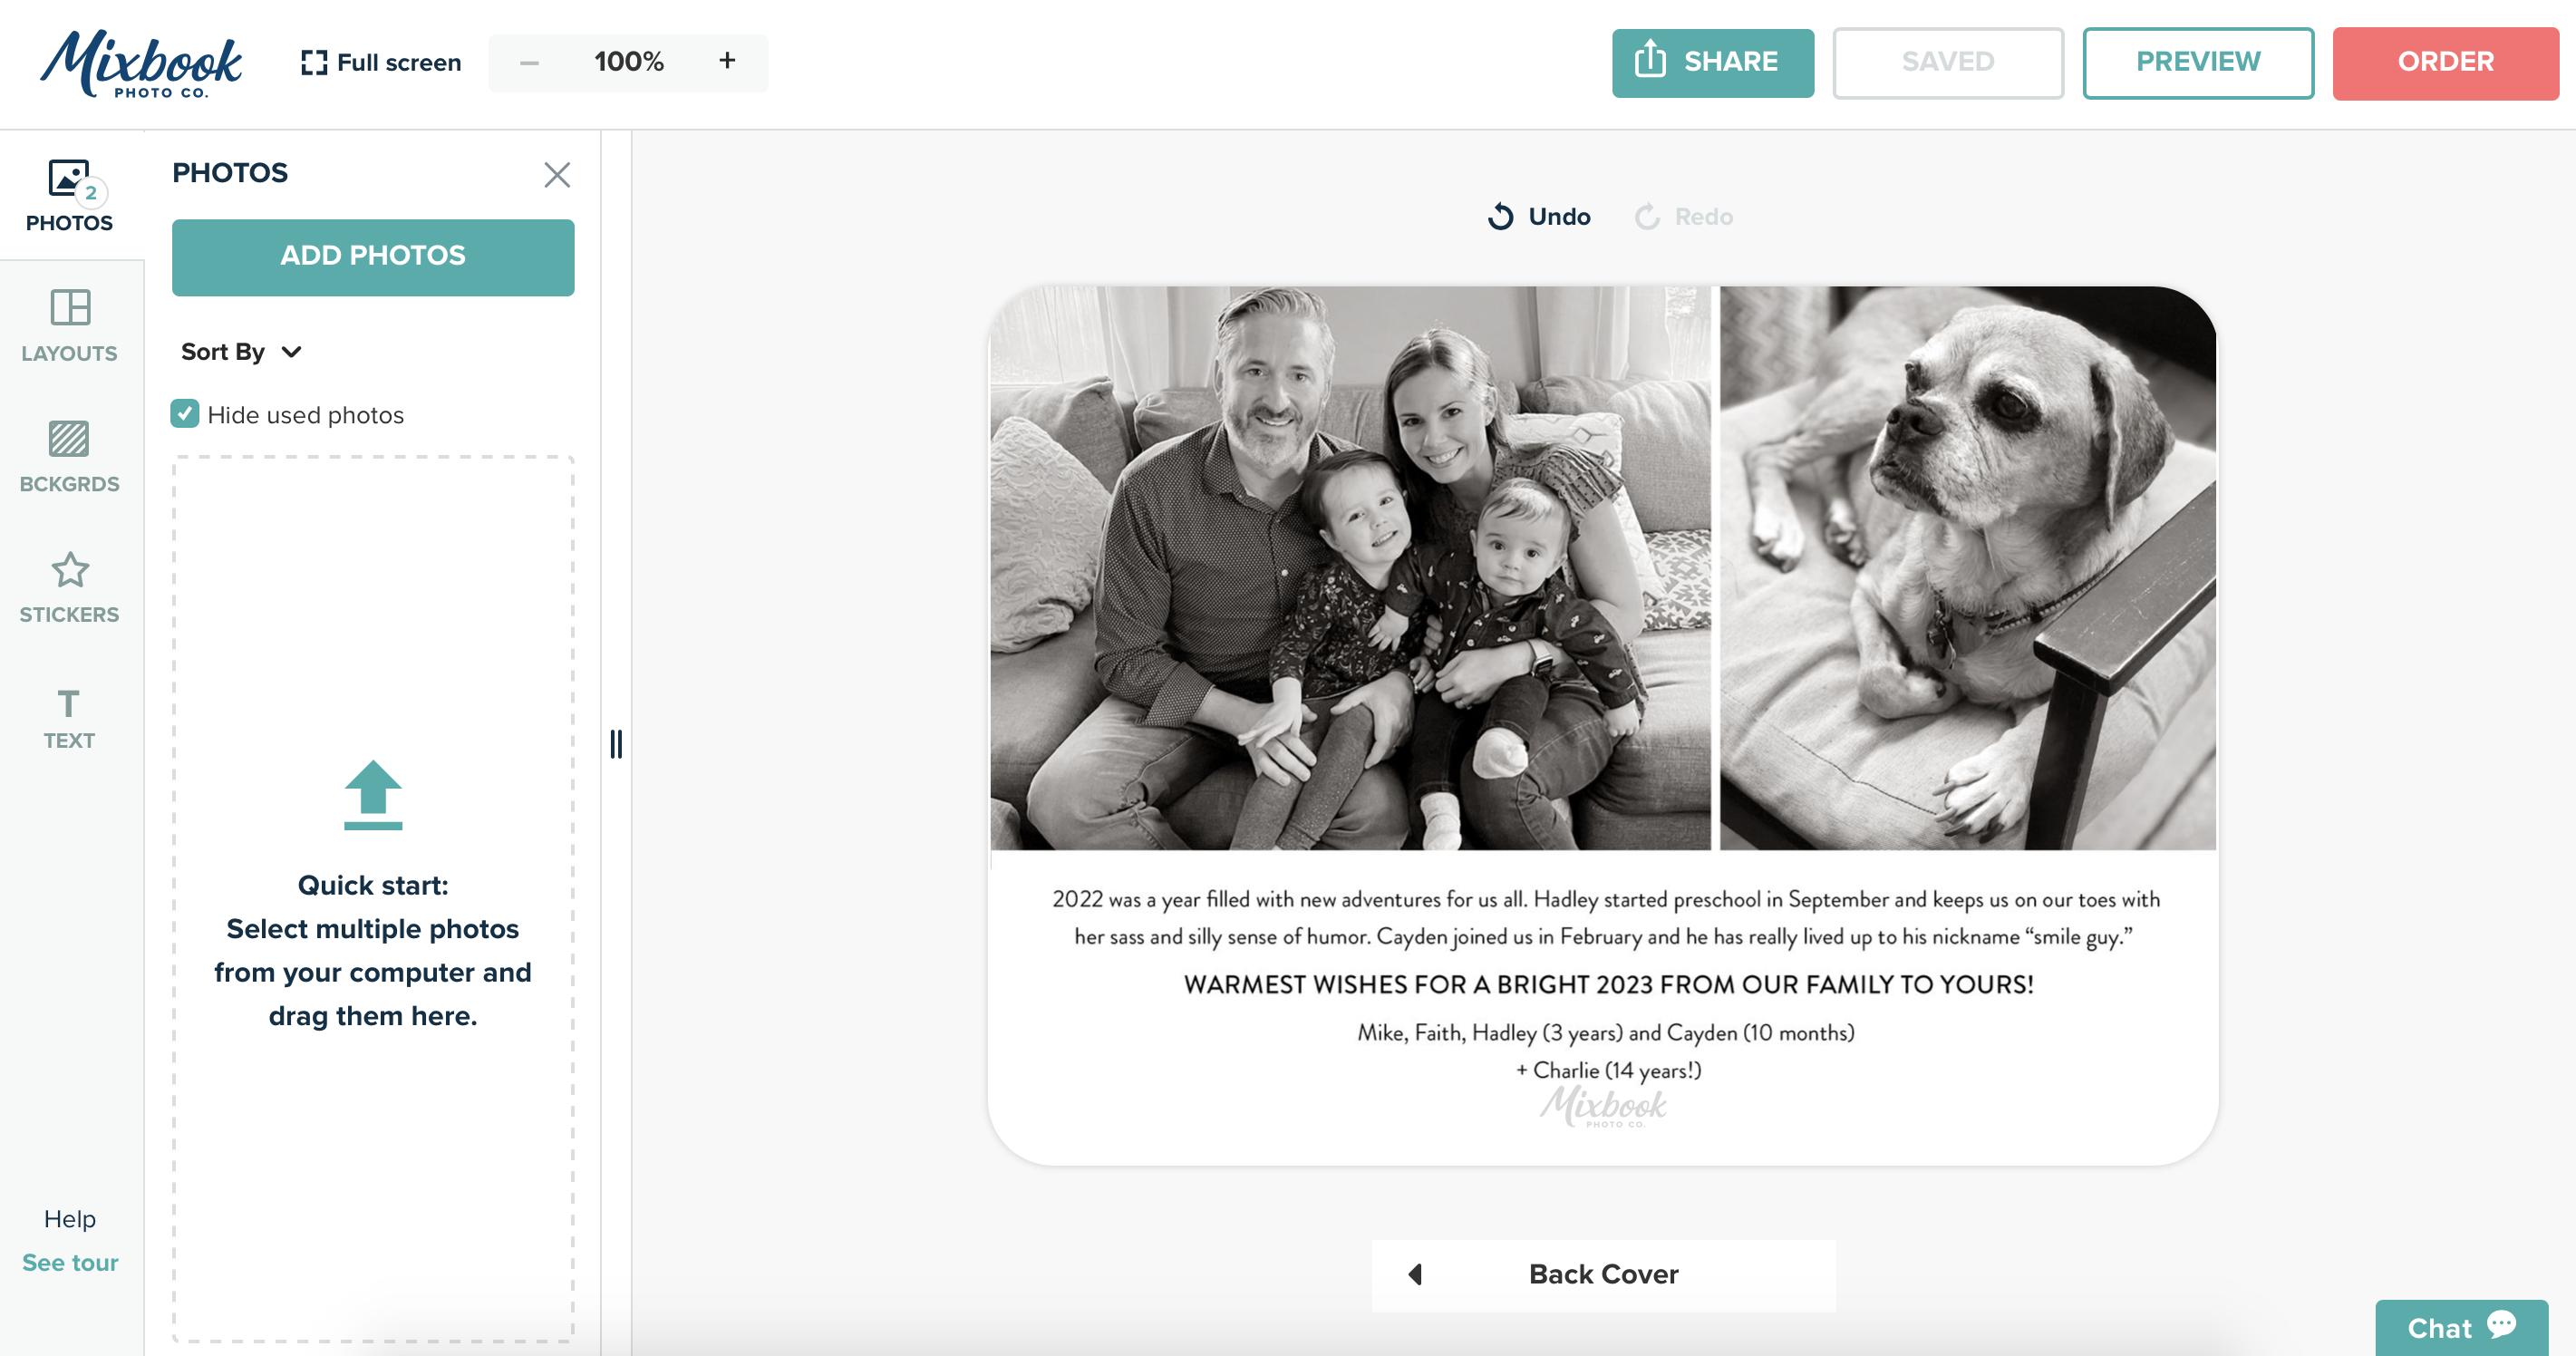
Repeat the drag and page fill process on the back and choose what you want the Mixbook logo to look like (you can select the color and placement). Click “Order.”
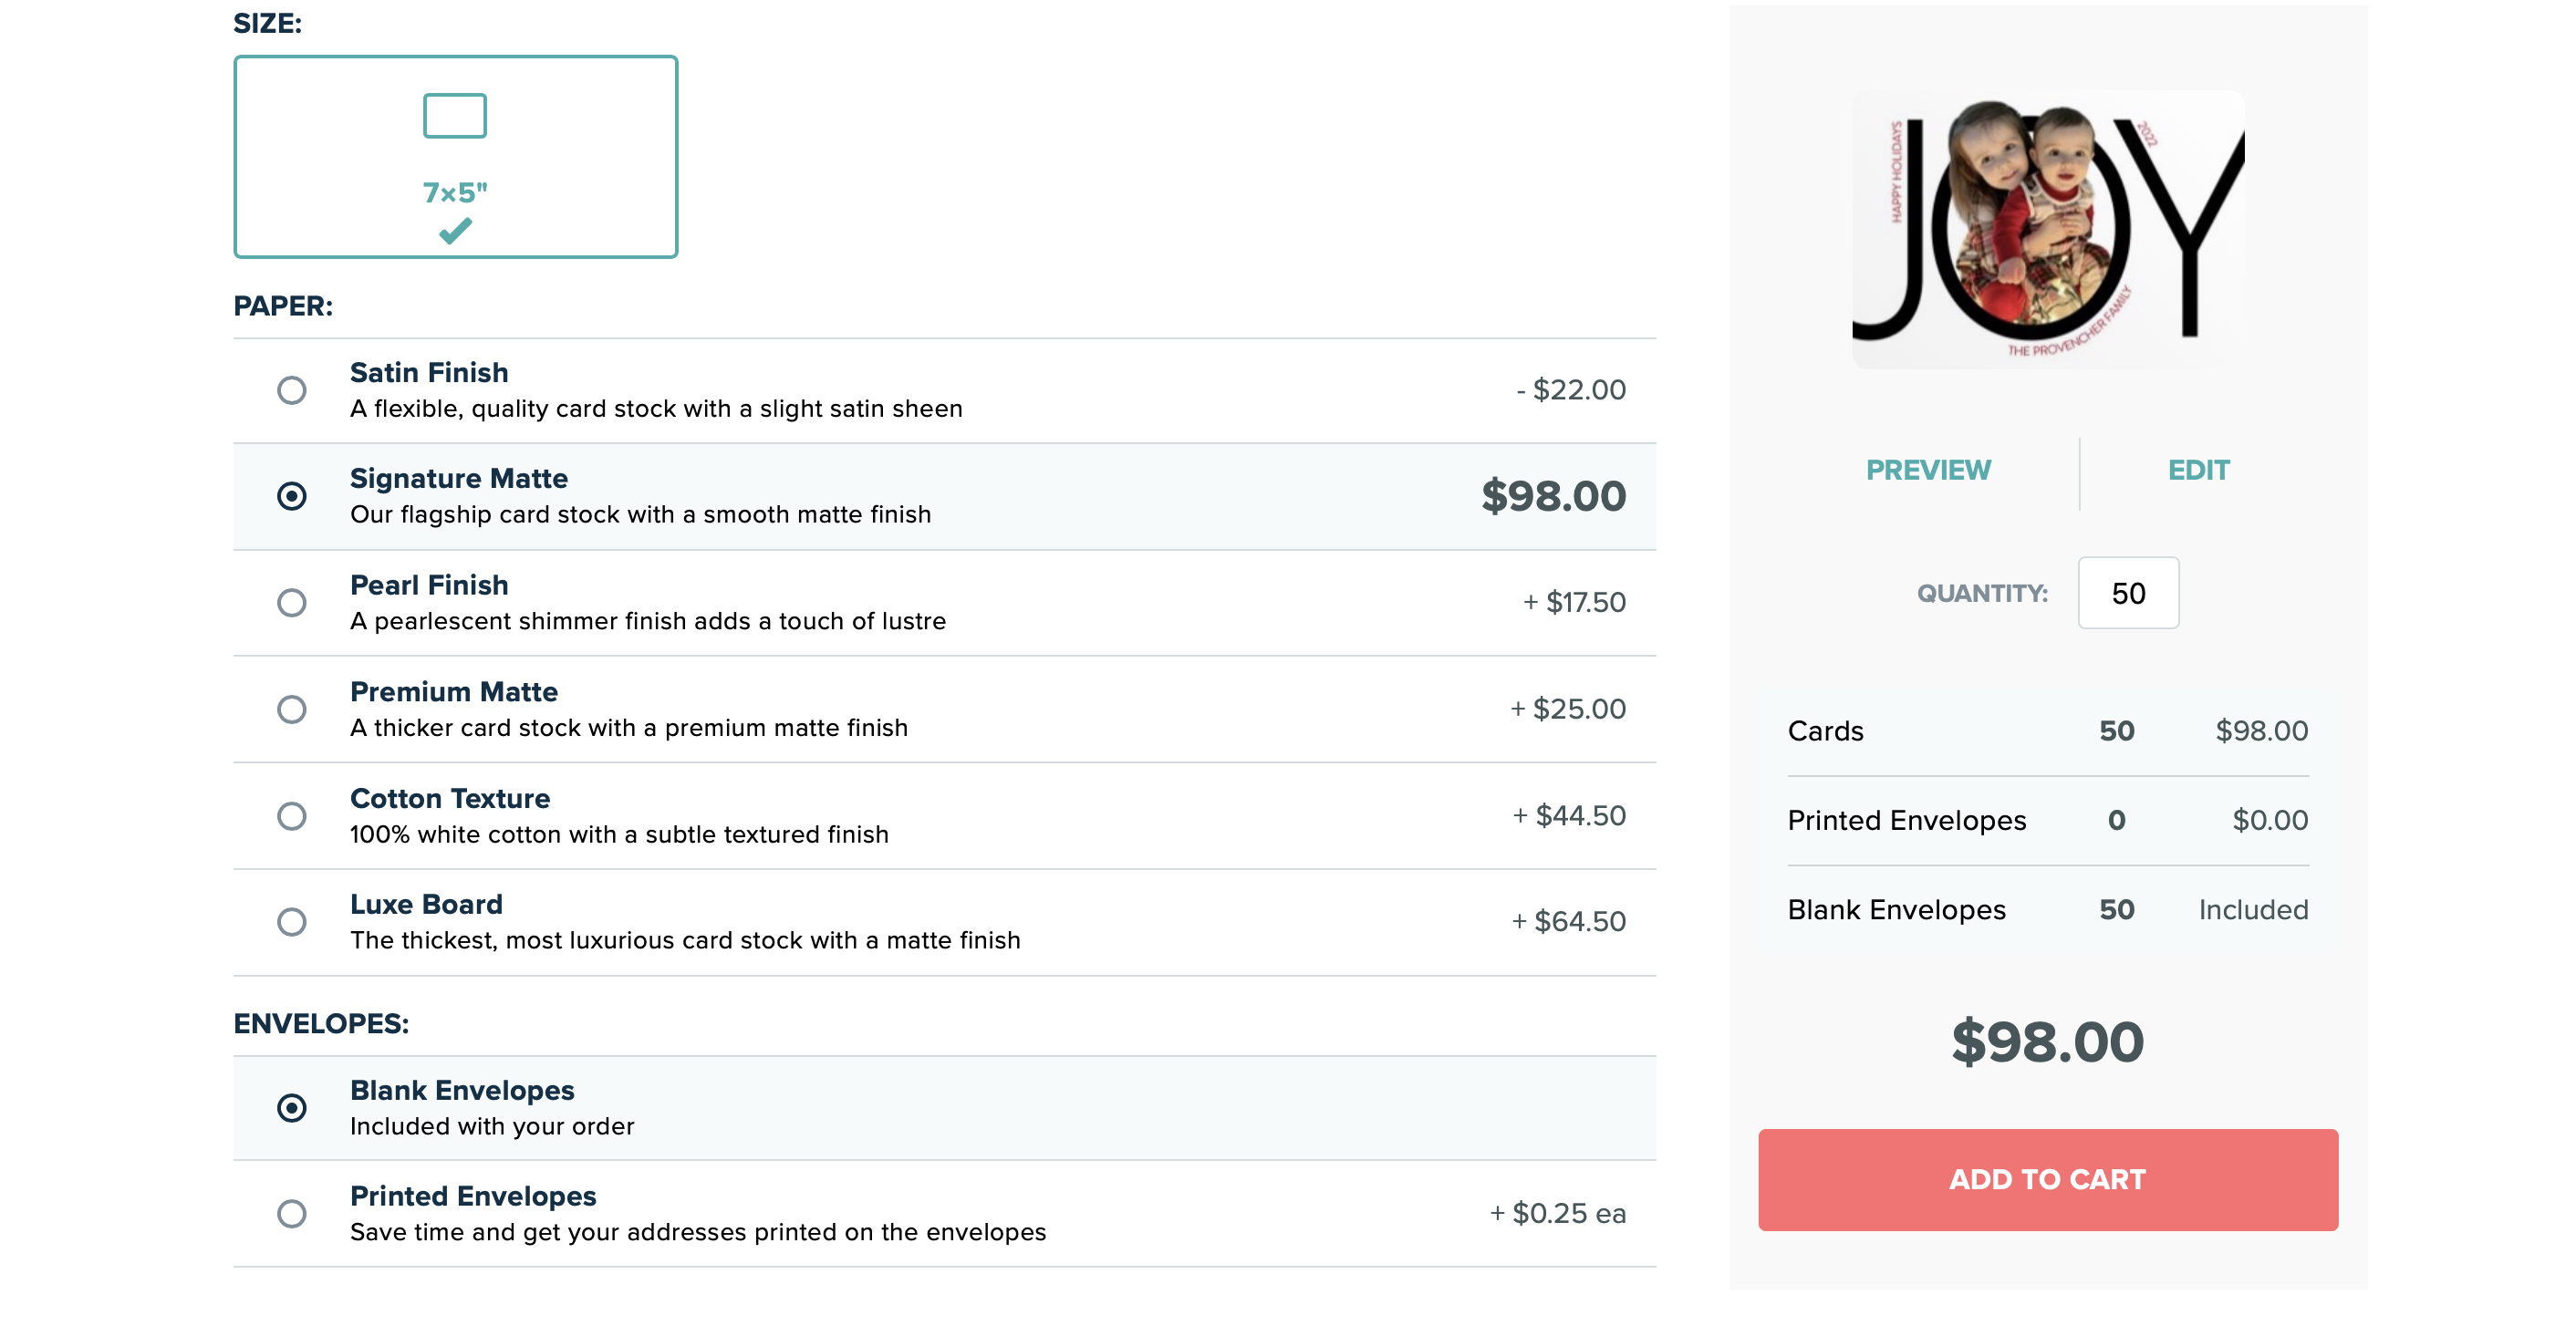
Here you can choose your card stock and envelope options. Click “Add To Cart” and you’re ready to purchase your cards!
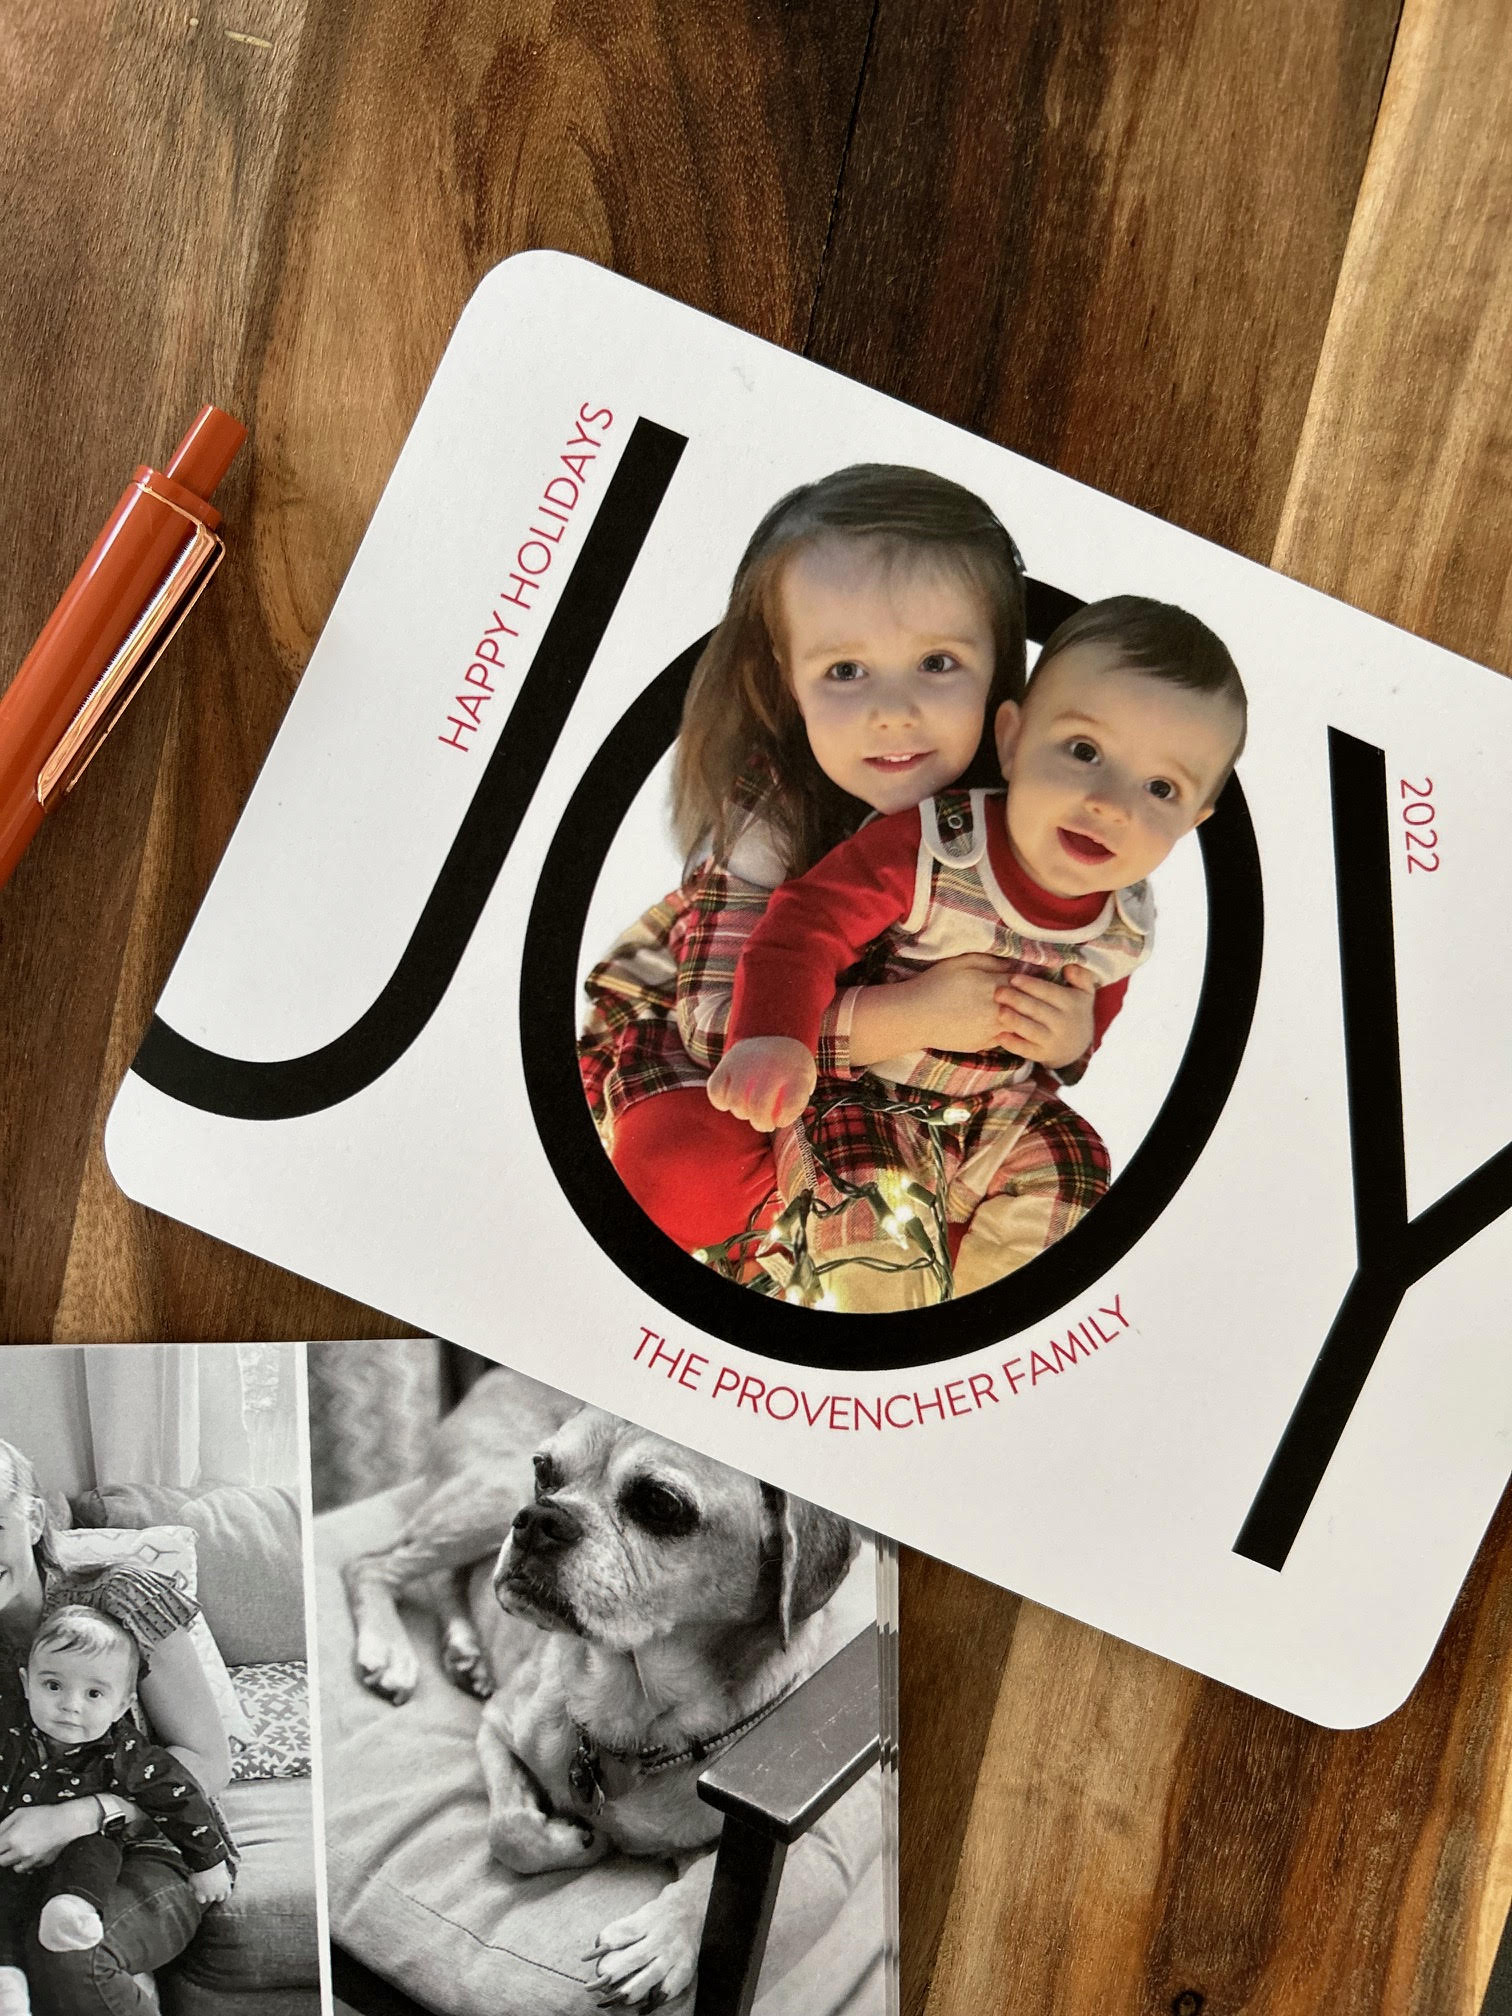
And here’s how they turned out. I had to include a photo of Charlie the dog… he’s turning 14 years old this year! Happy holidays everyone, thanks for reading!
This post was created in partnership with Mixbook.
Thanks for supporting the brands that help keep Design Fixation online!
