
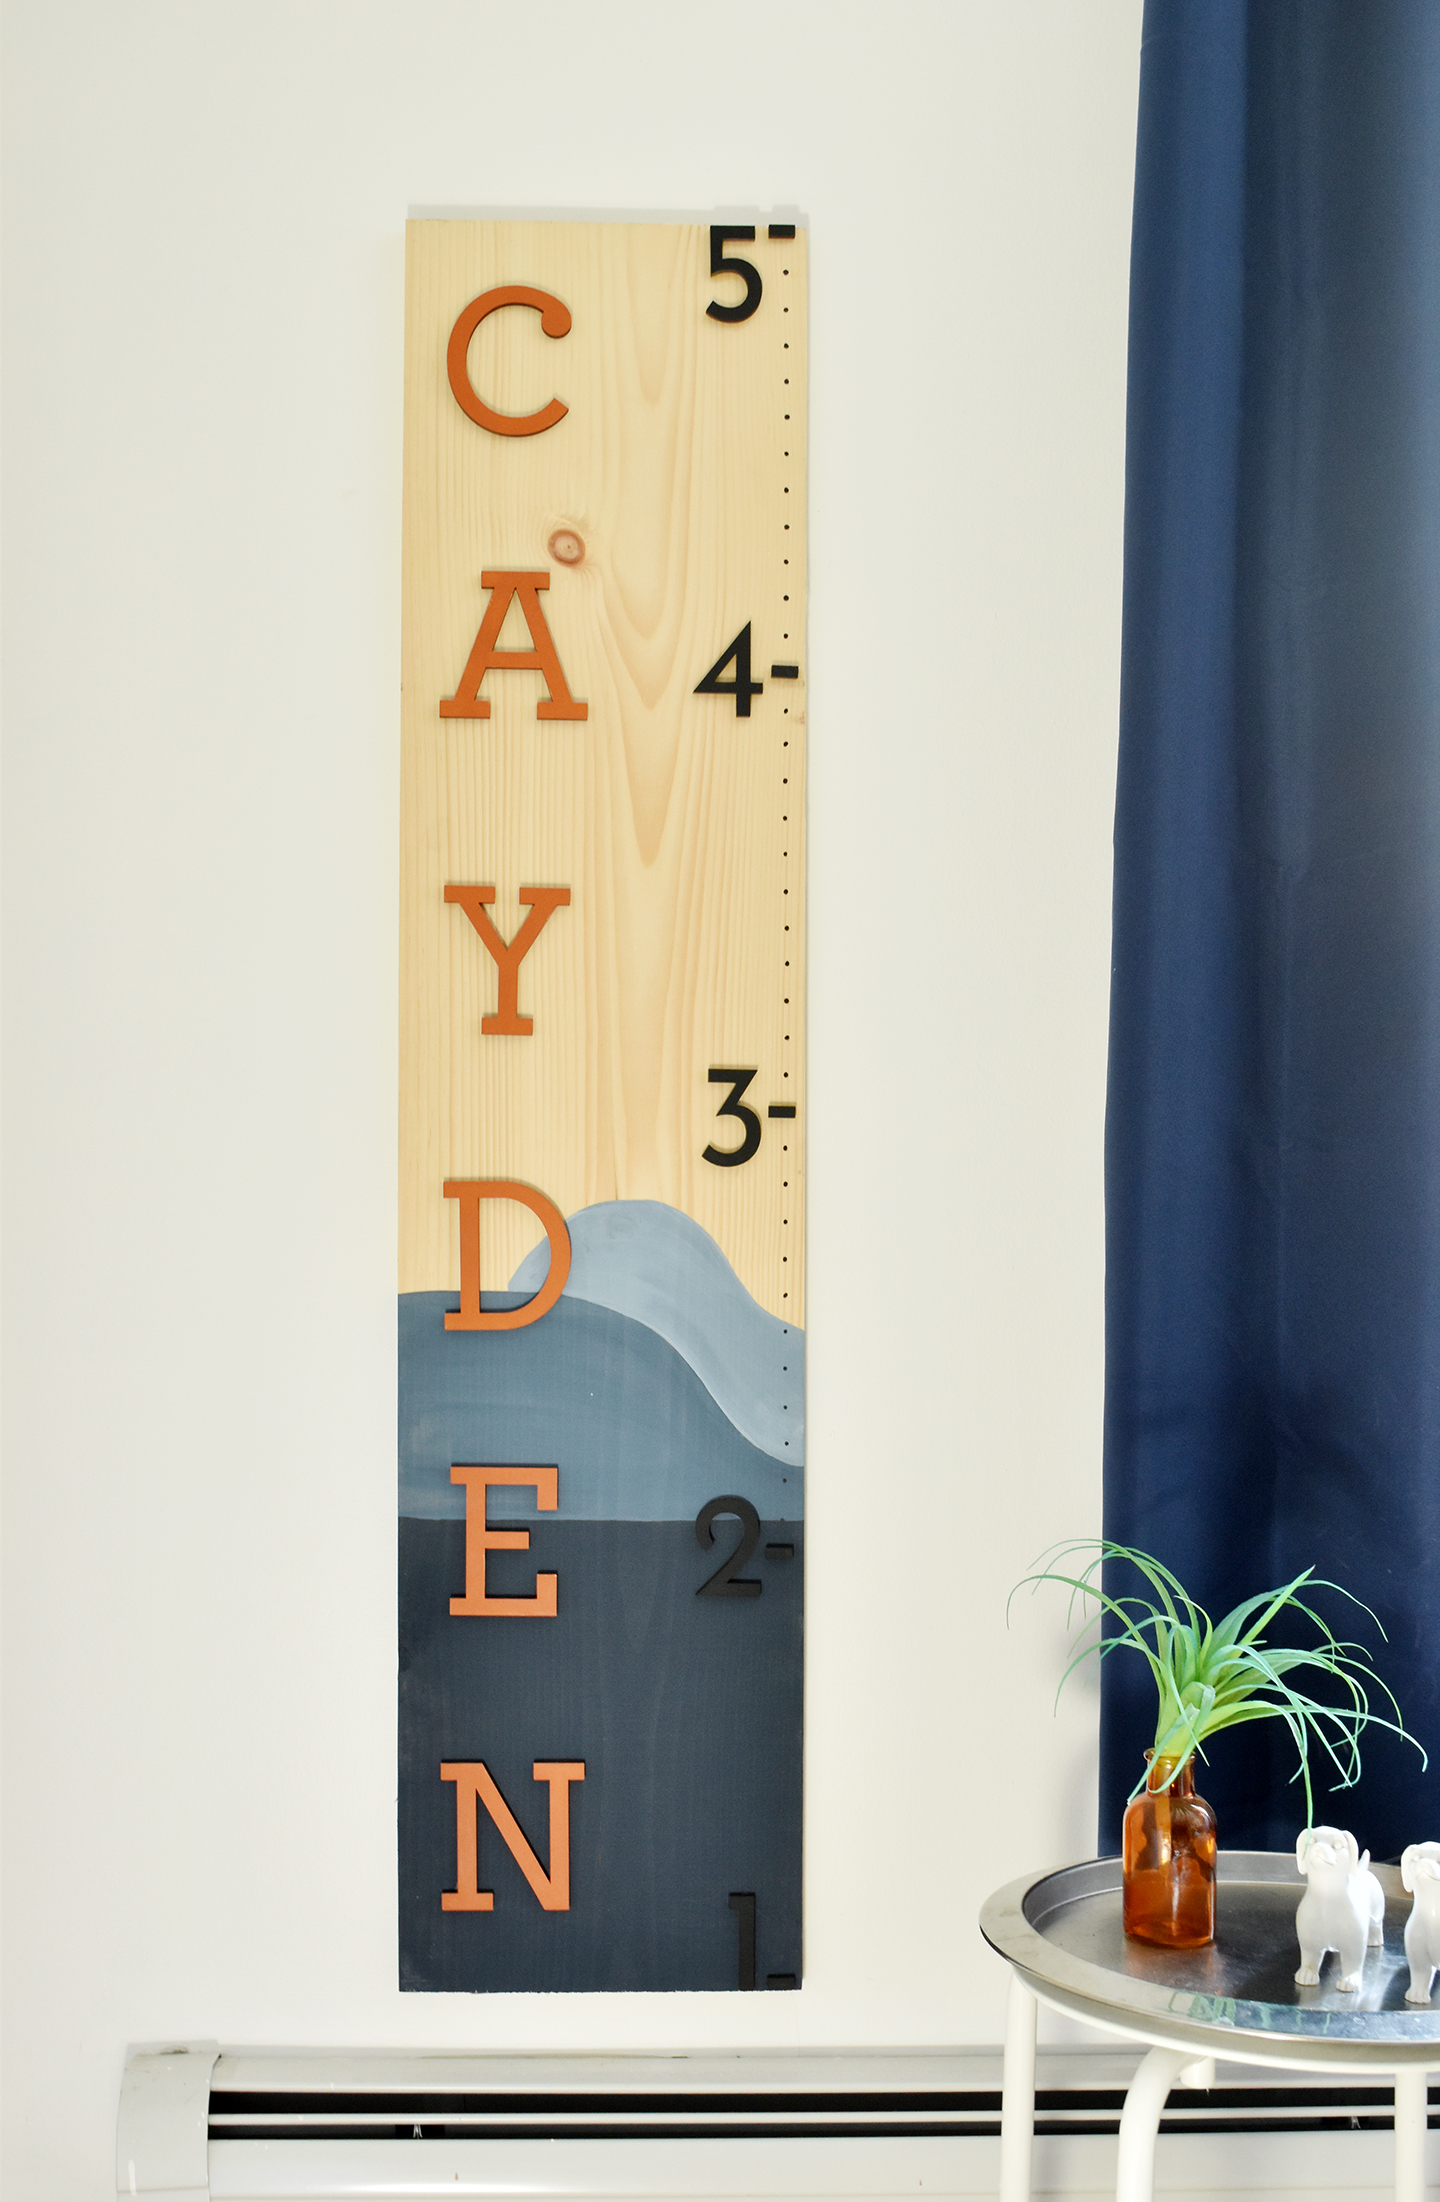
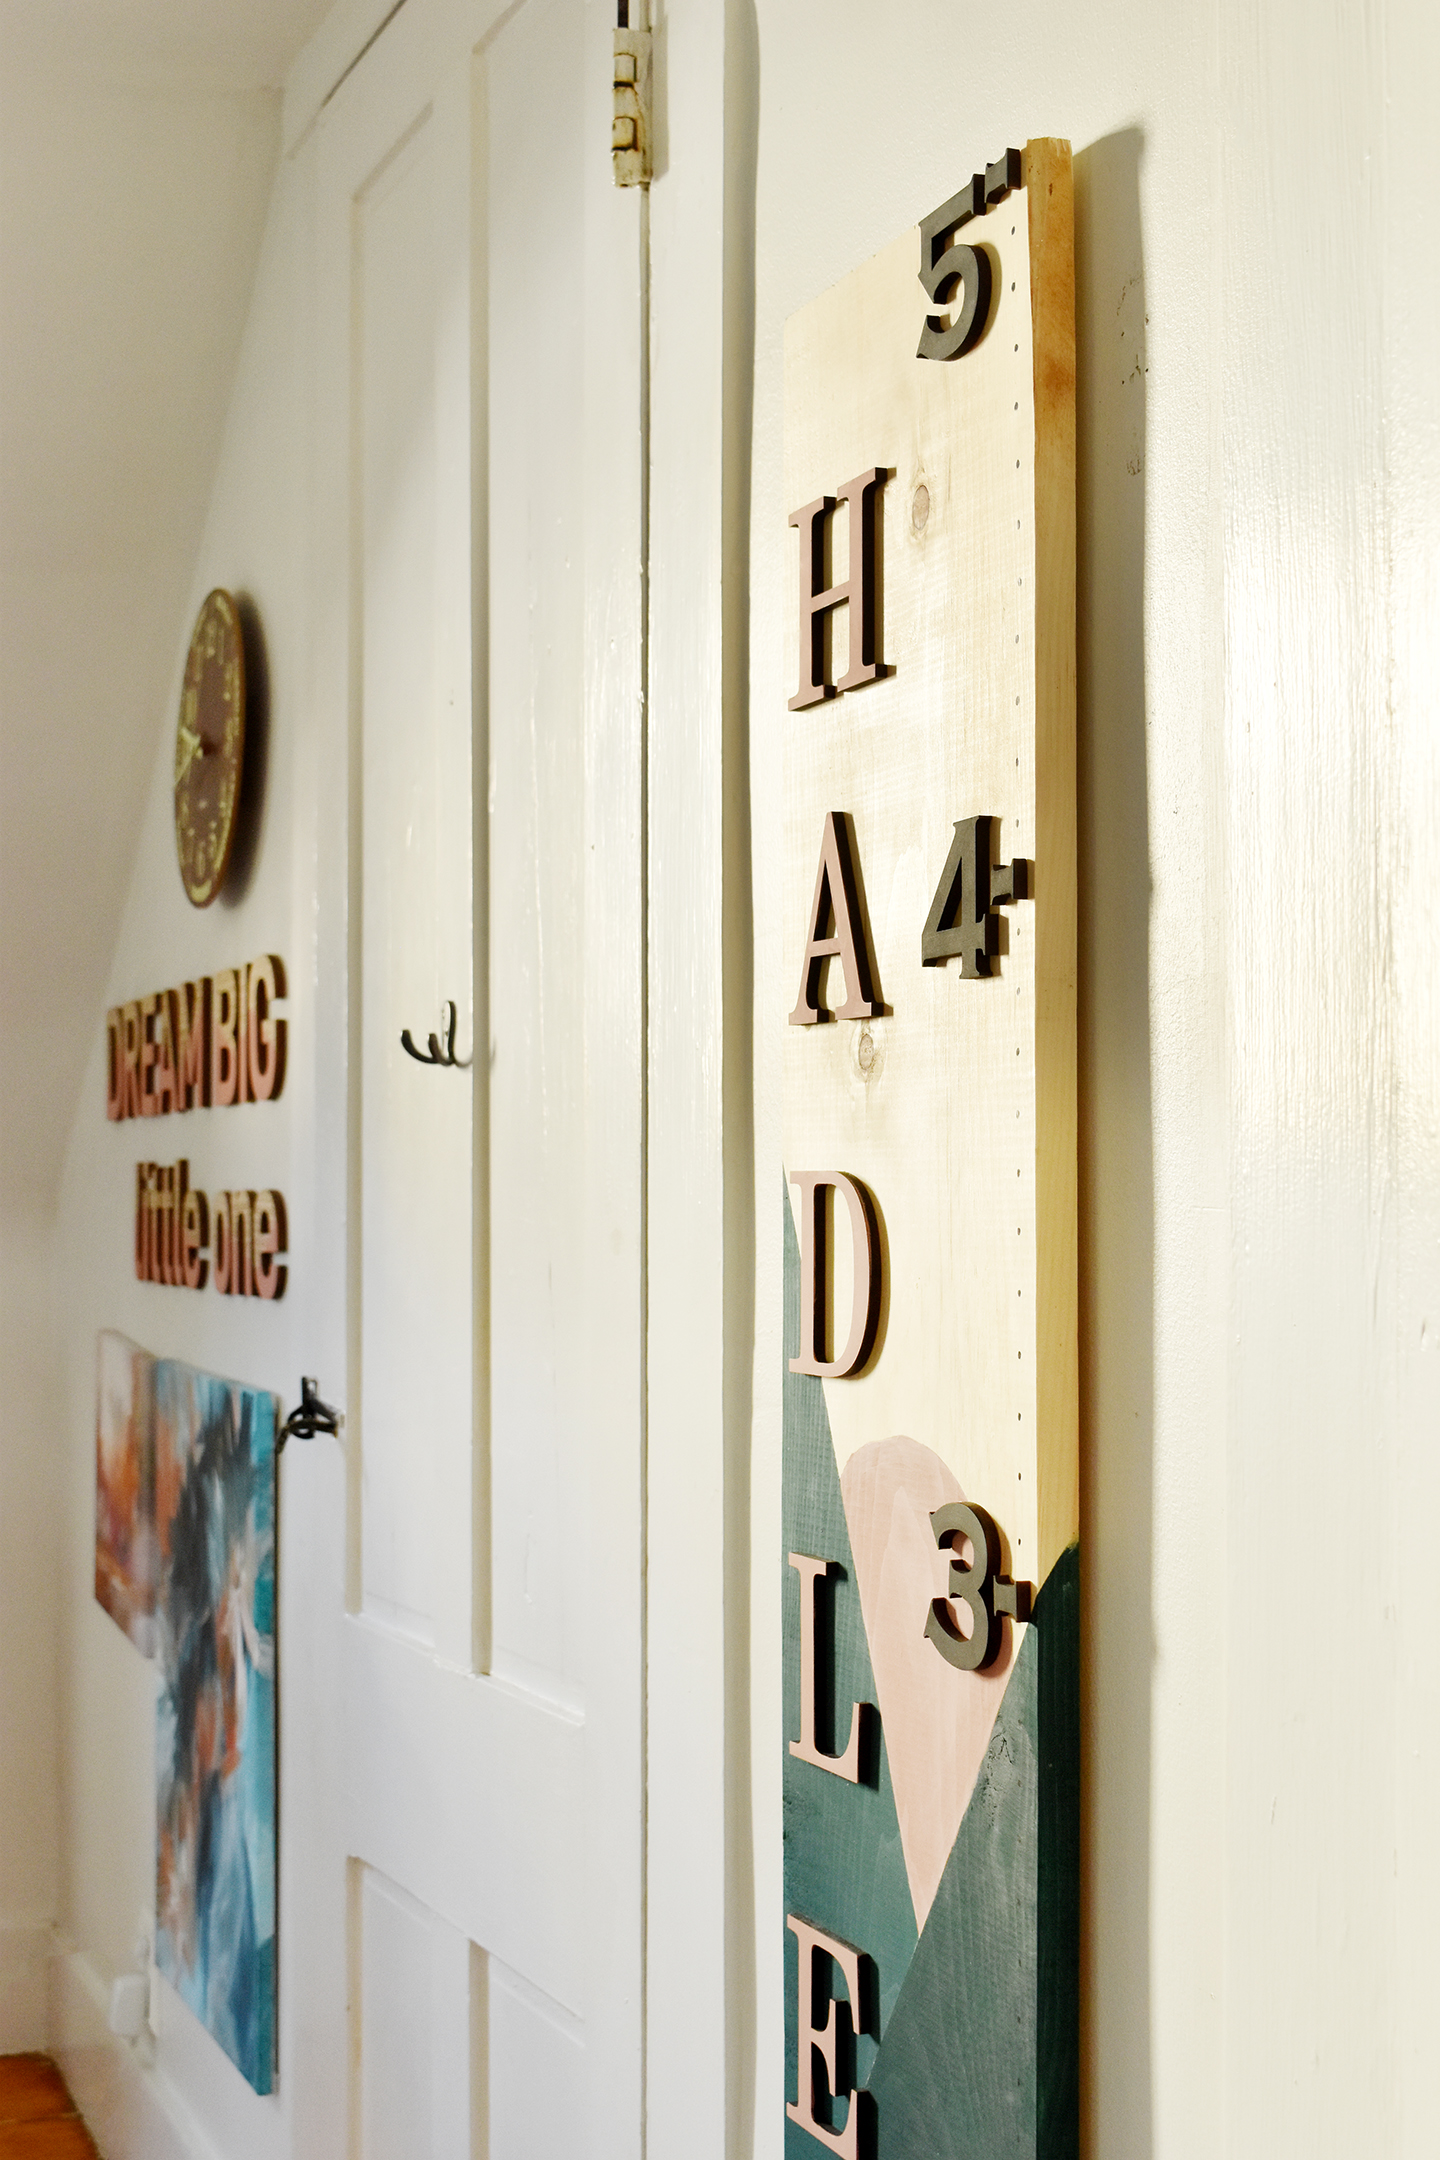
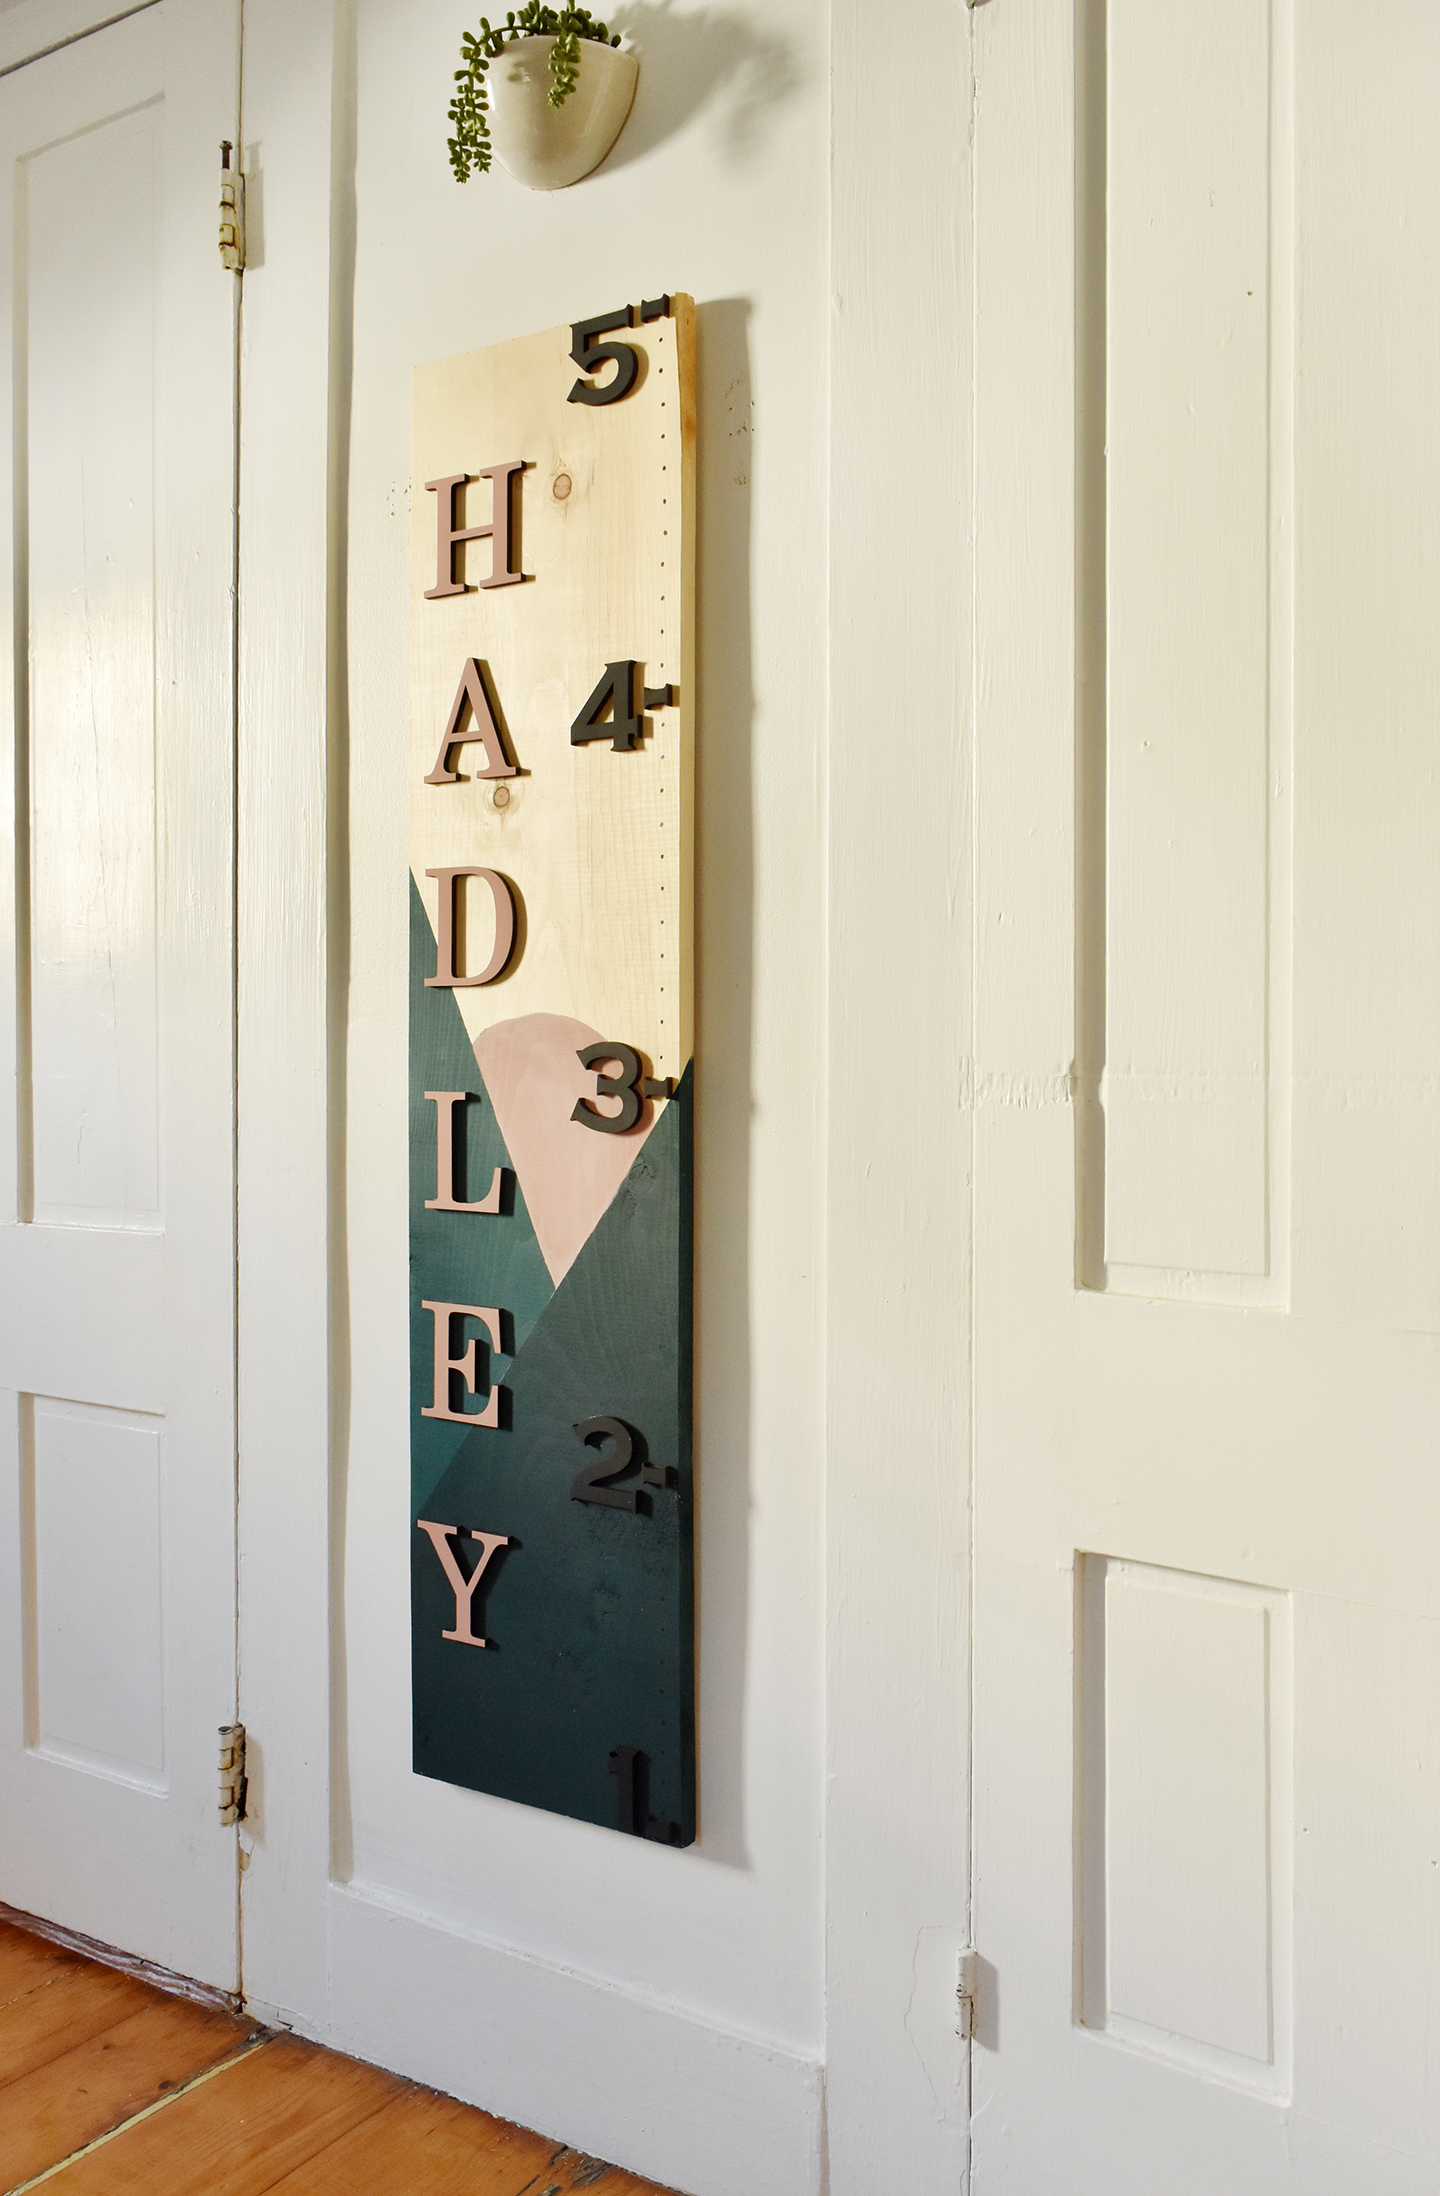
Making heights charts for the kids has been on my to-do list for a long time. I documented my height on the wall of my childhood home, and I always wished I could have chopped that piece of wall out and brought it with me when the house was sold. So having wooden height charts that can be moved in the future was a no-brainer. And of course I had to make them 😉 Keep reading to find out how to make your own height chart using a piece of lumber and some letters and numbers from CraftCuts.
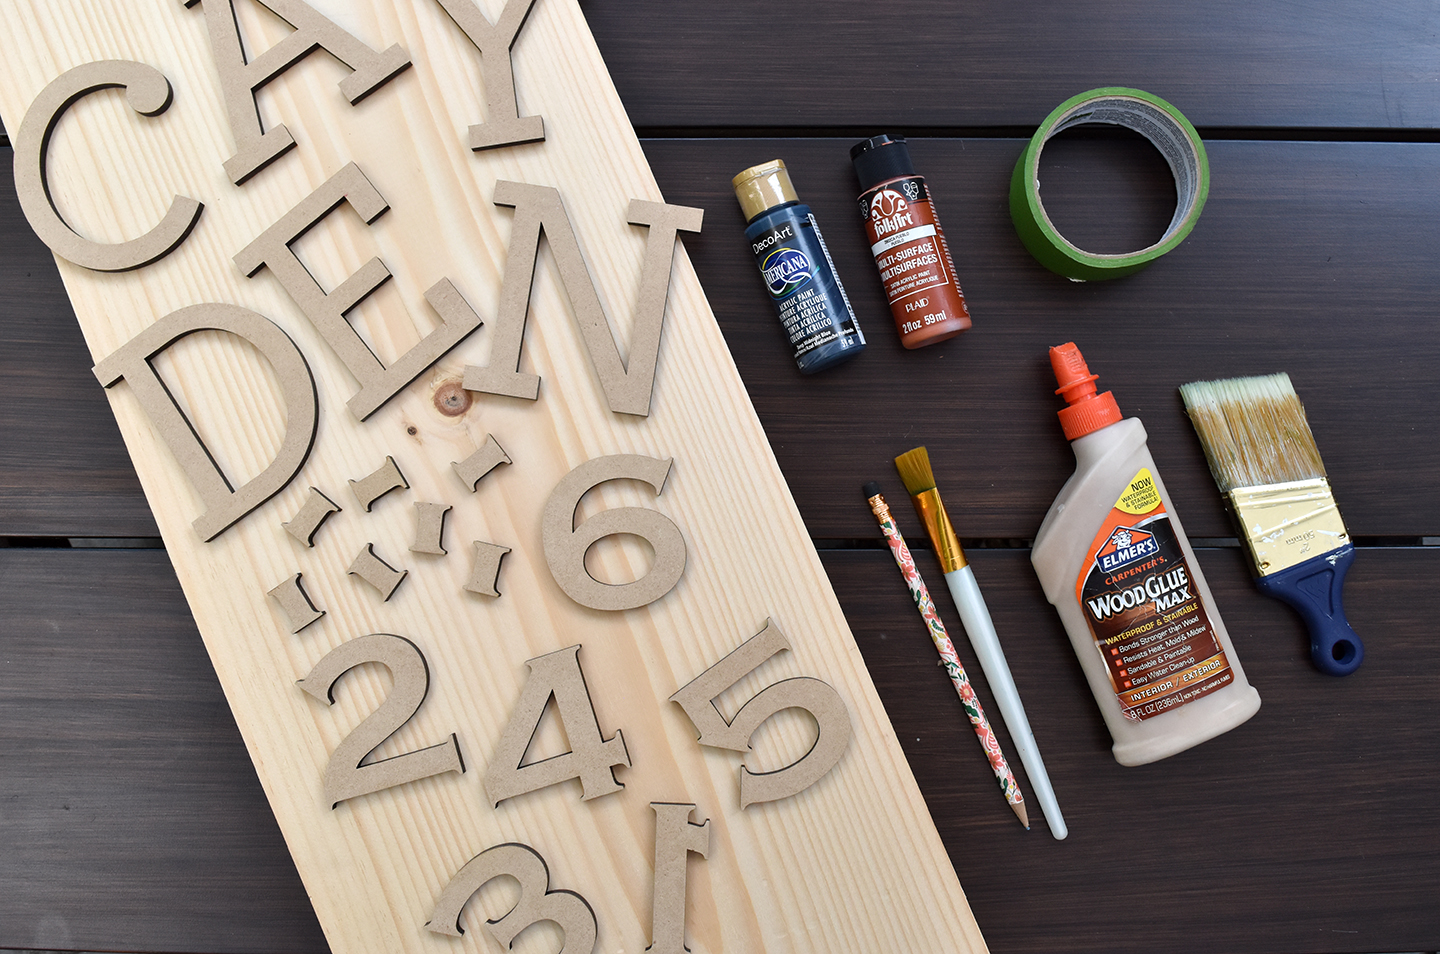
Here are the materials you’ll need for your DIY height chart:
- 1’x4′ piece of wood*
- Growth chart kit from CraftCuts
- Wood glue
- Painter’s tape
- Acrylic paint
- Paintbrushes
- Pencil
- Long ruler (not pictured)
- Permanent marker (not pictured)
*The growth chart kit actually comes with a number 6 also… so if you’d like to use it, buy a 1’x5′ piece of wood.
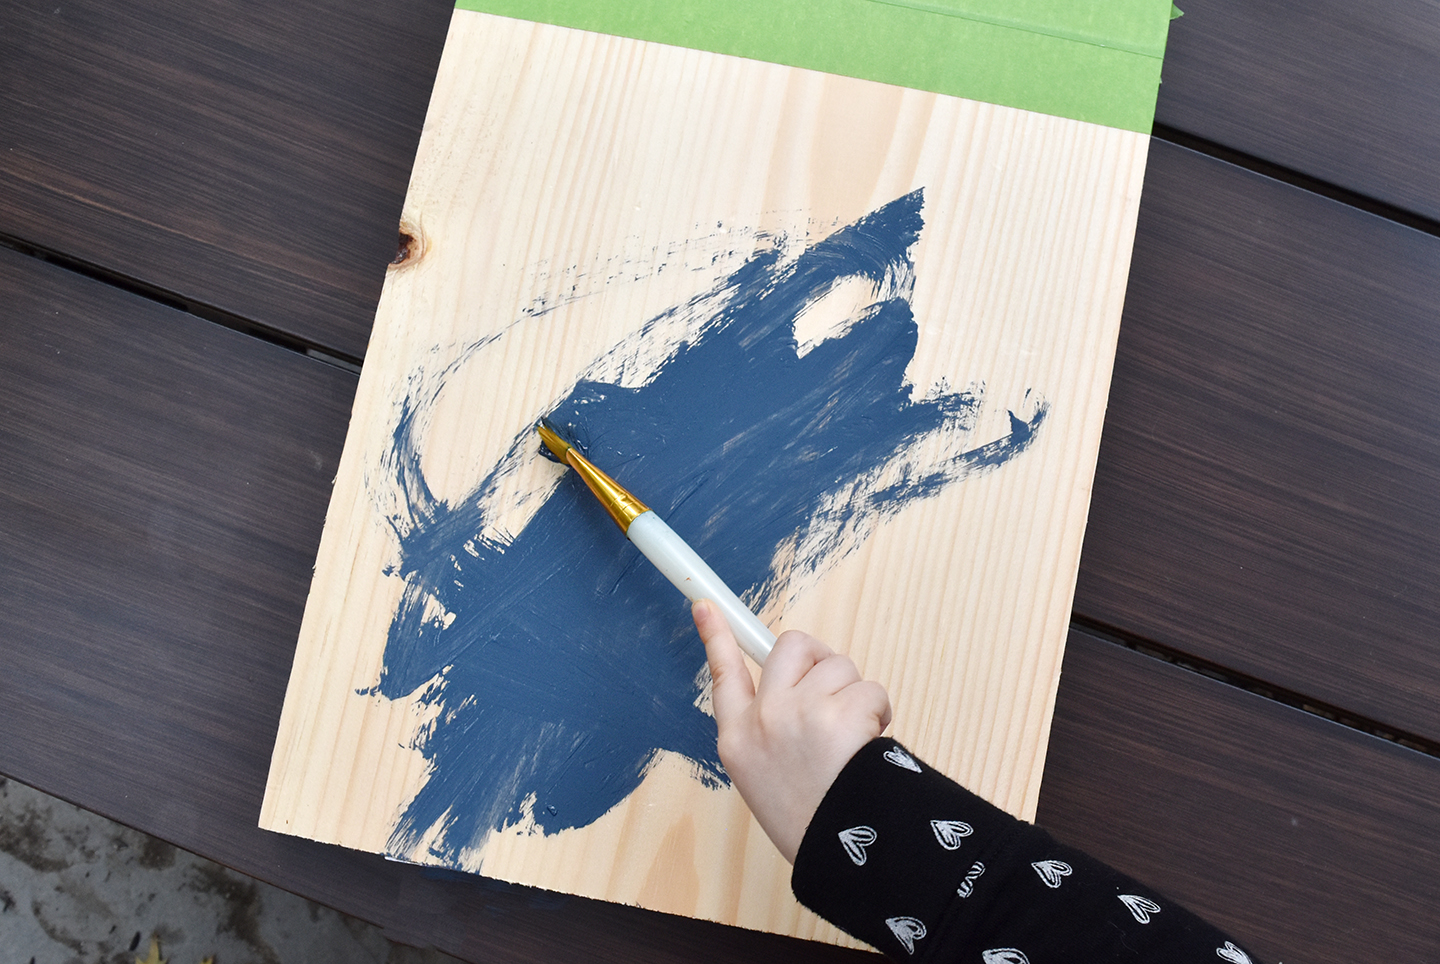
Begin by deciding what sort of design you’d like to paint on your DIY height chart. I wanted to do an abstract mountain and water scene, so I taped off the bottom section and painted it dark blue (actually my daughter painted it… that’s her little hand in the photo above).

Then I painted some curvy mountains above, using lighter versions of the first color.
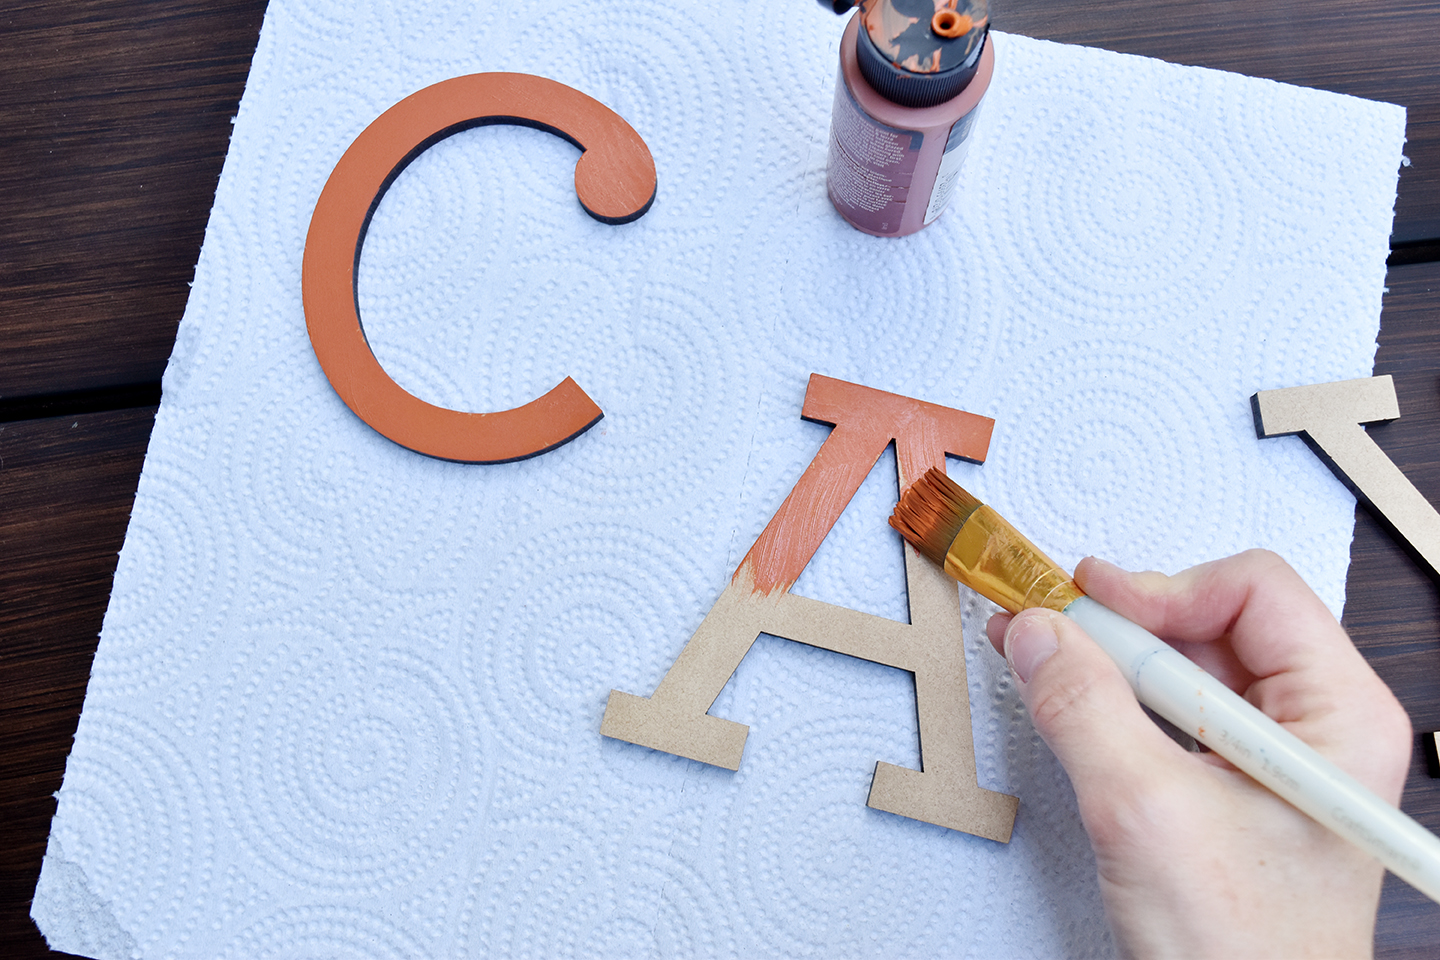
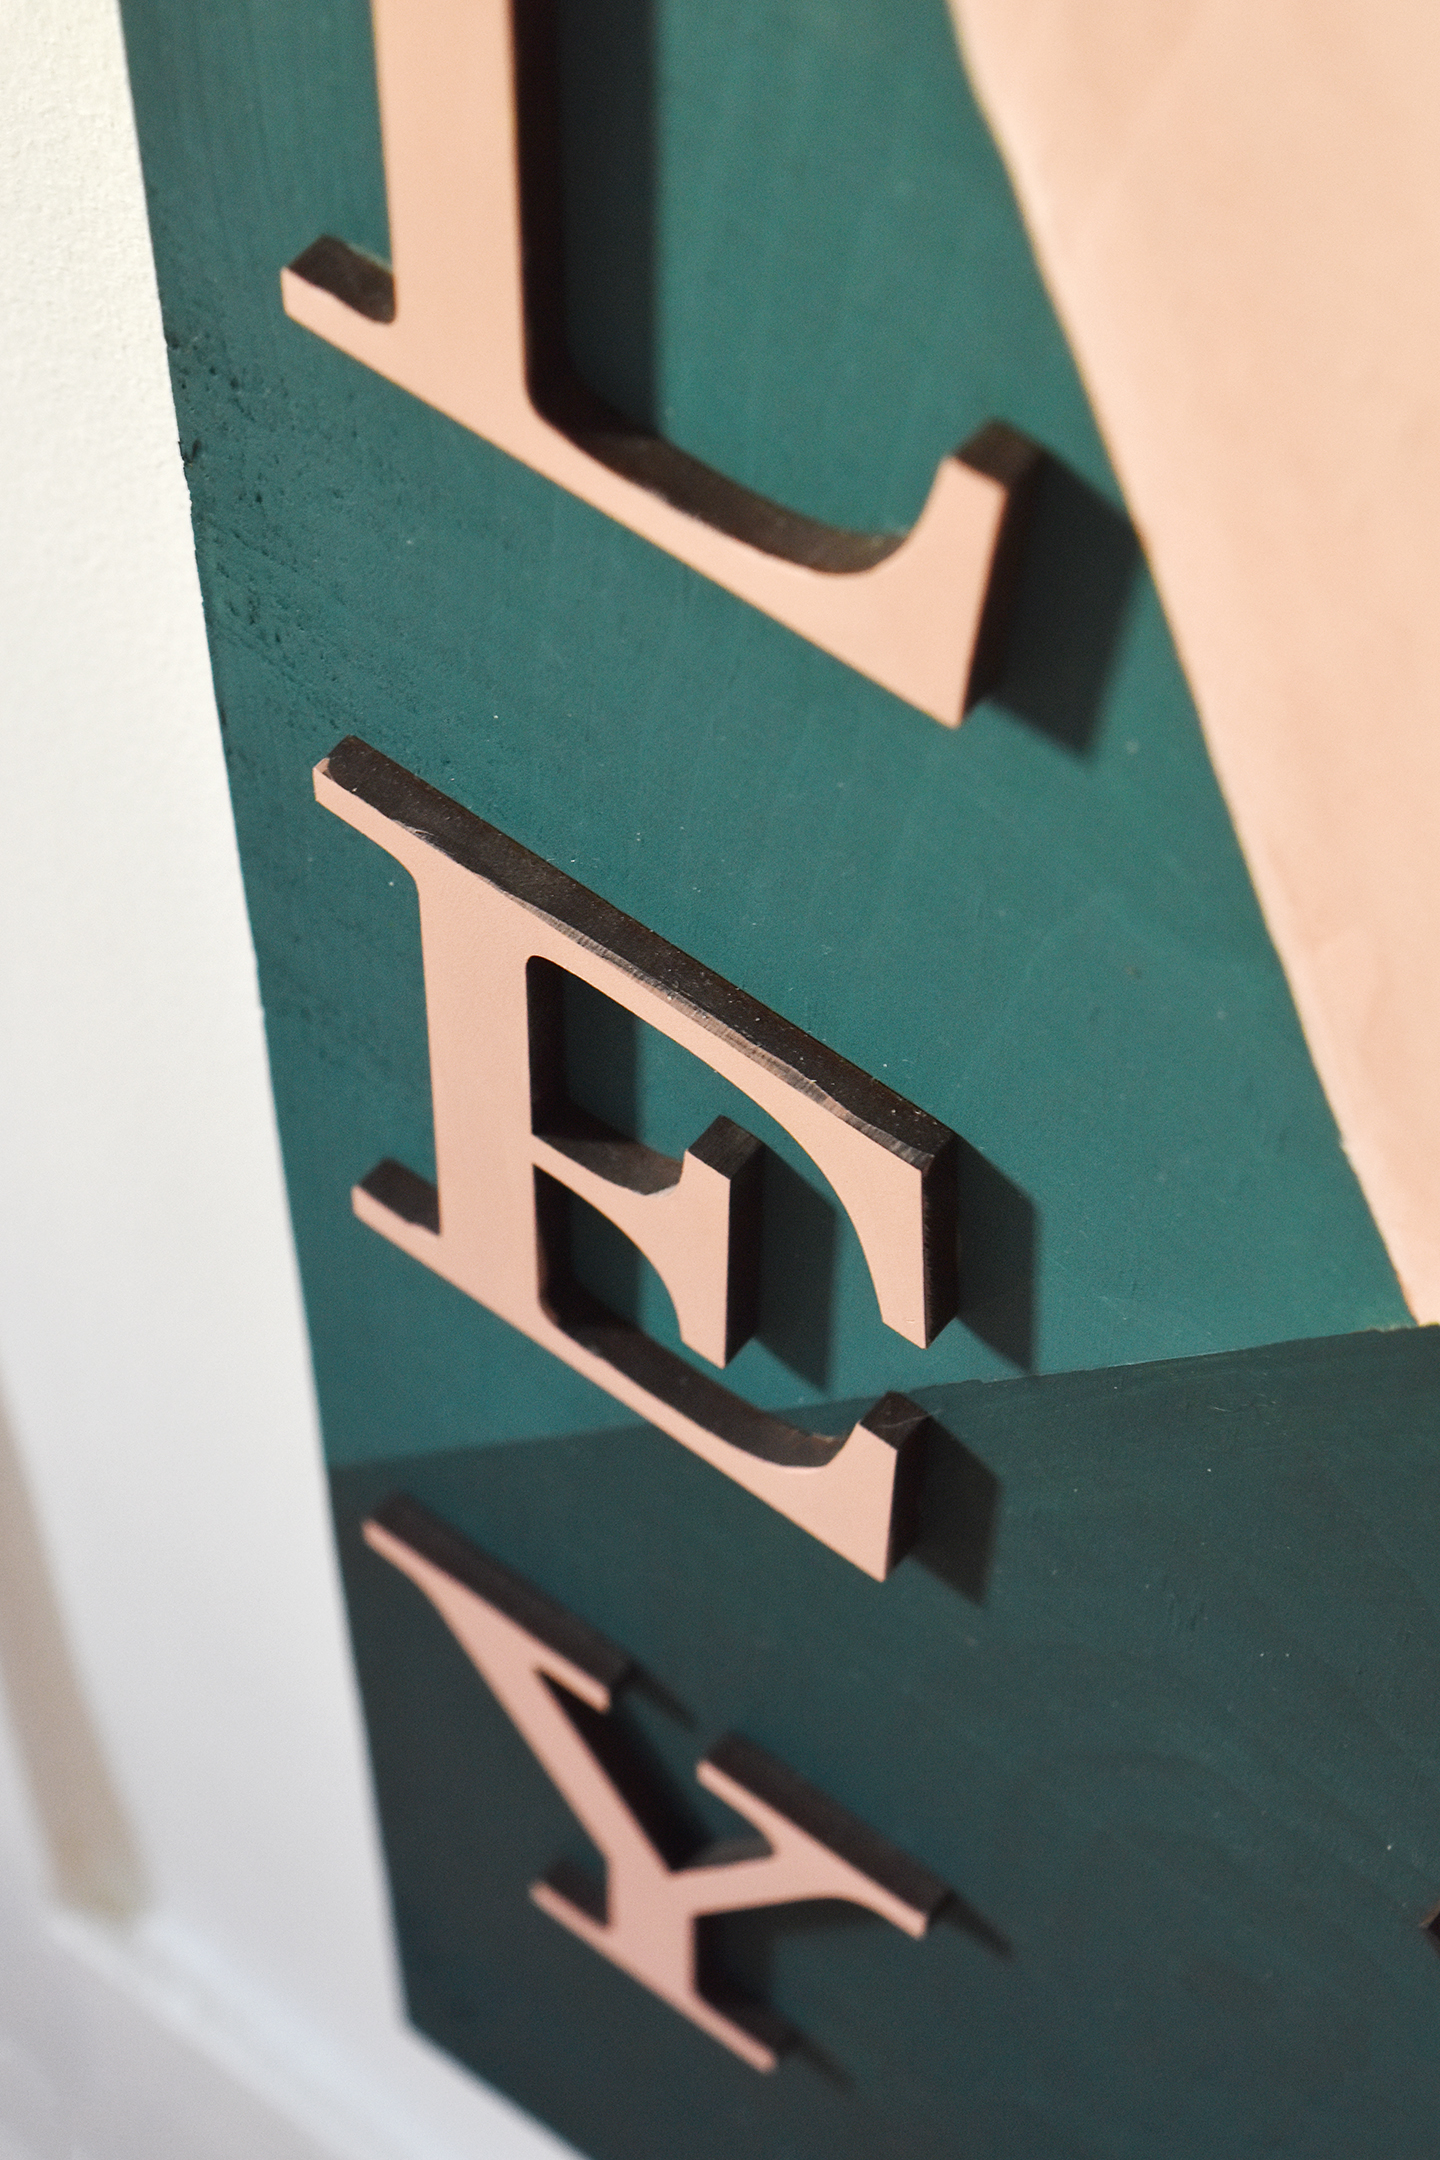
While those are drying, paint the letters a bright contrasting color. For this I chose the Craft Slab font at 4 inches tall.
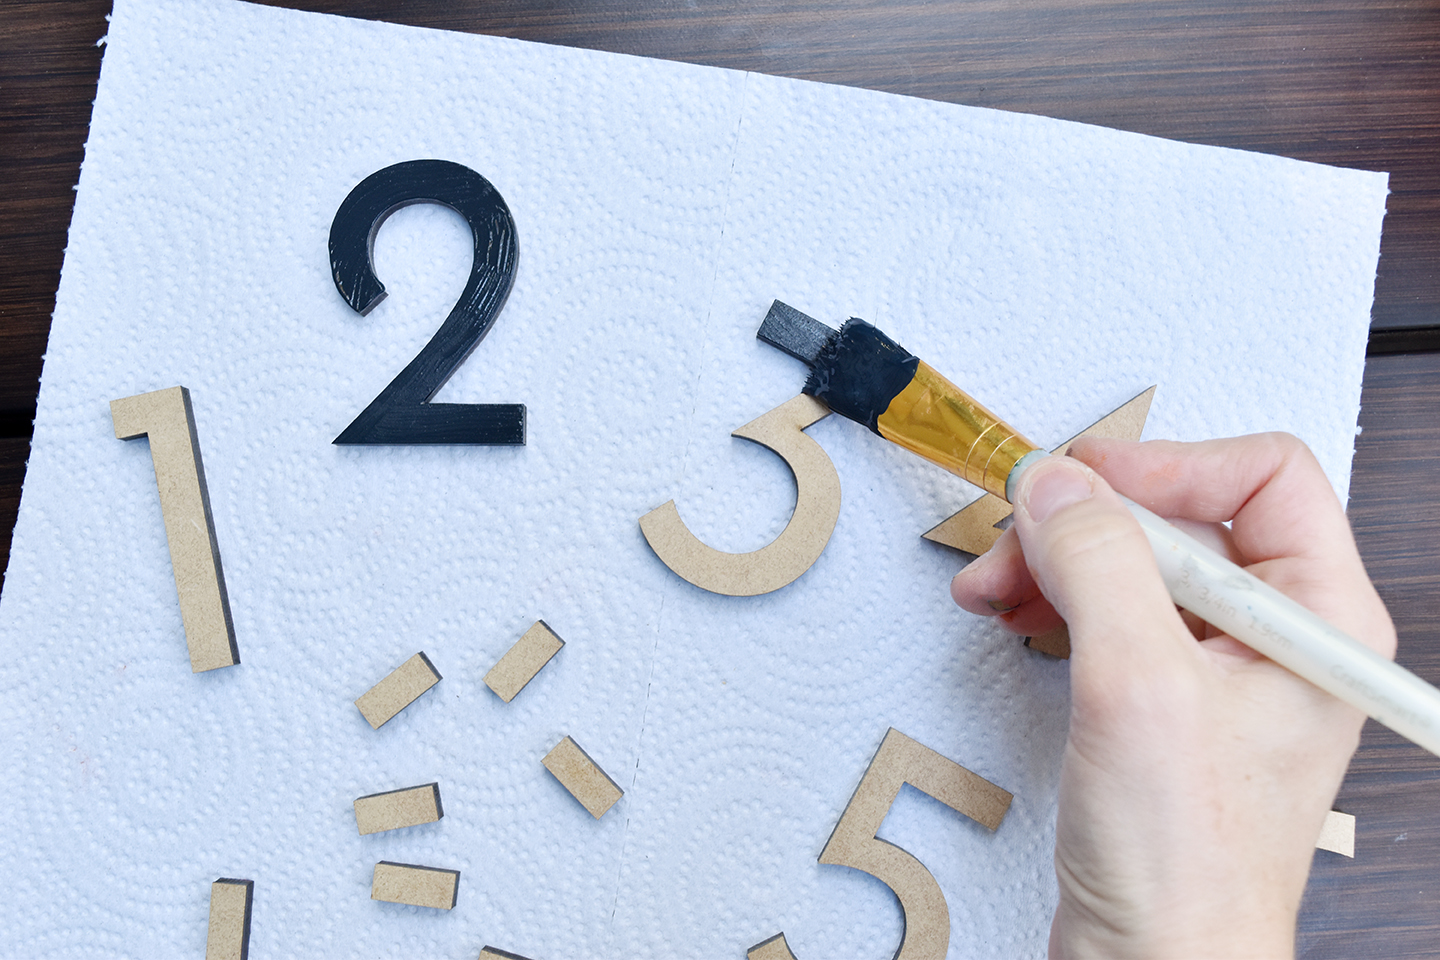
Paint the numbers and little hashmarks a darker version of the first color.
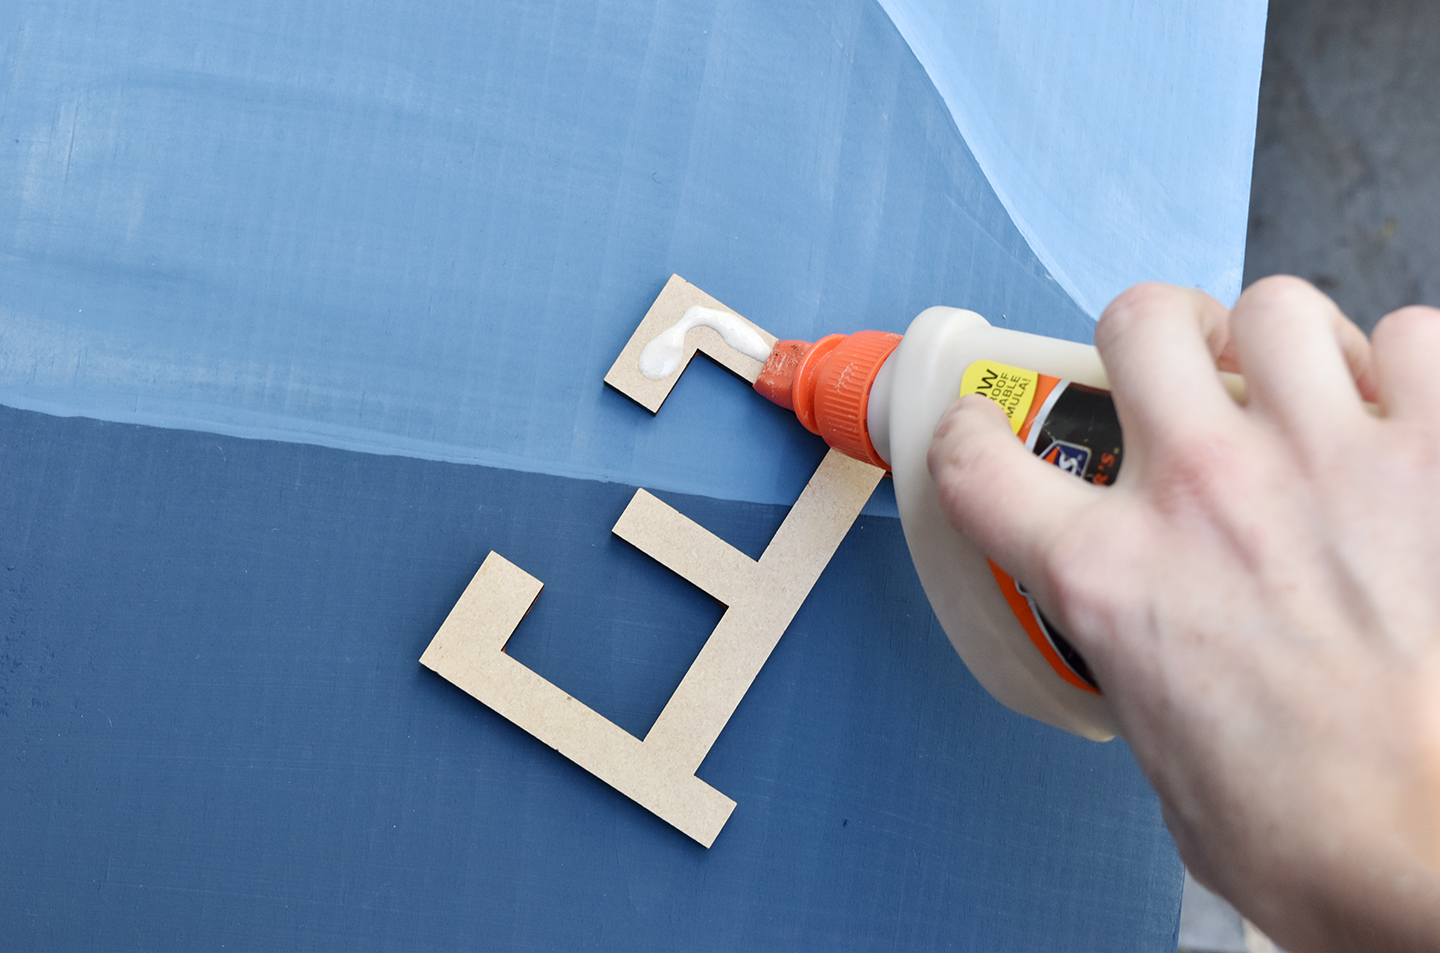
Once everything is dry, glue the letters down the left side of the wood.
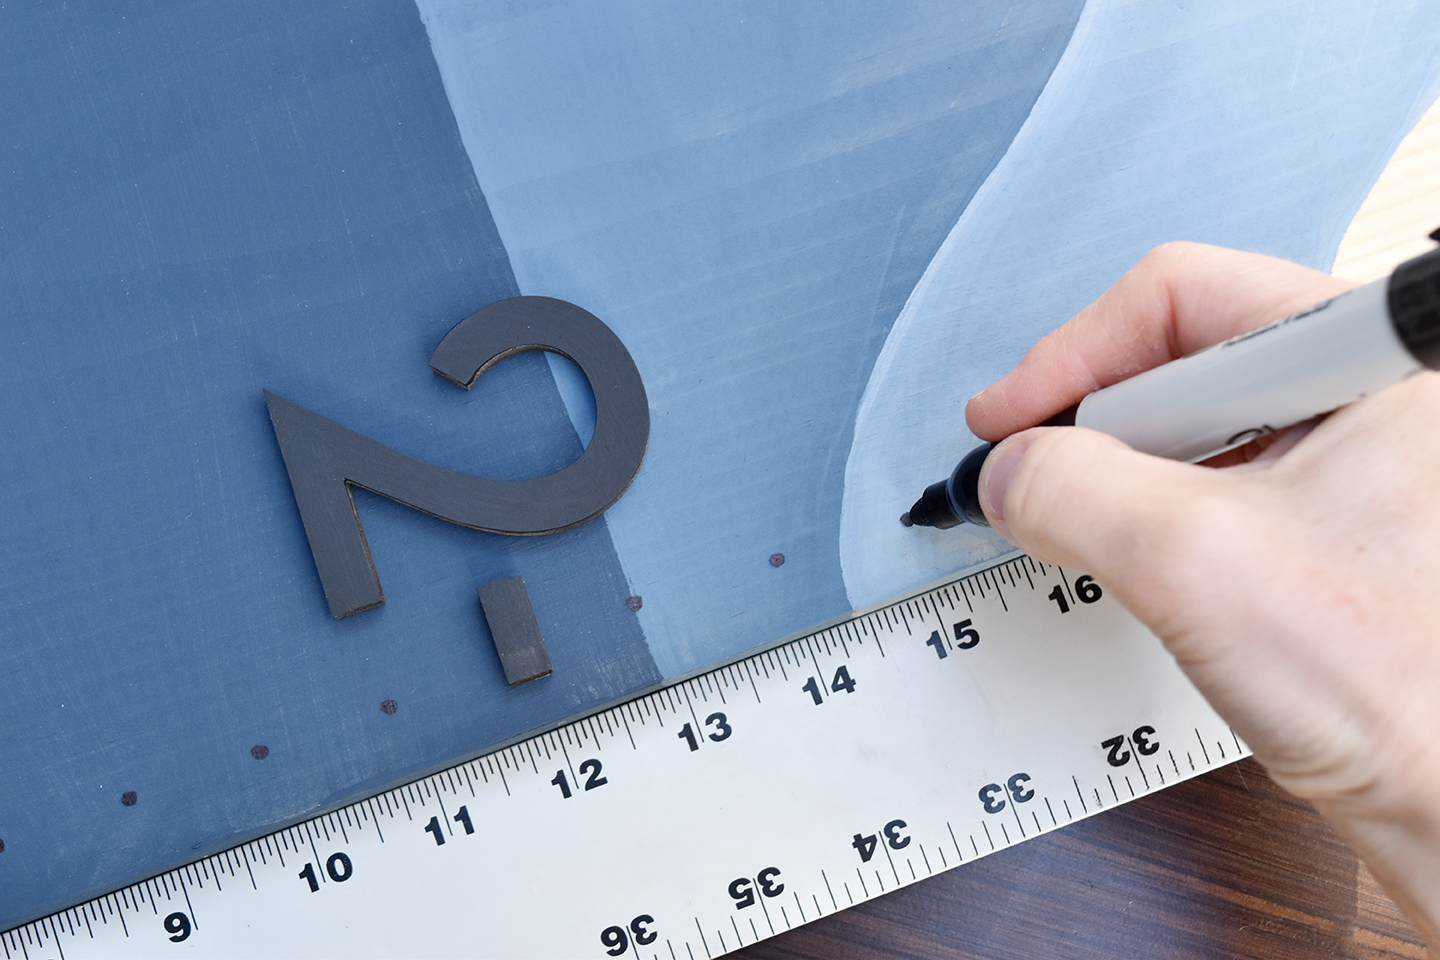
Lay the long ruler next to the edge of the wood and glue down the numbers and hashmarks along the right side and also put little dots at every inch using a permanent marker.
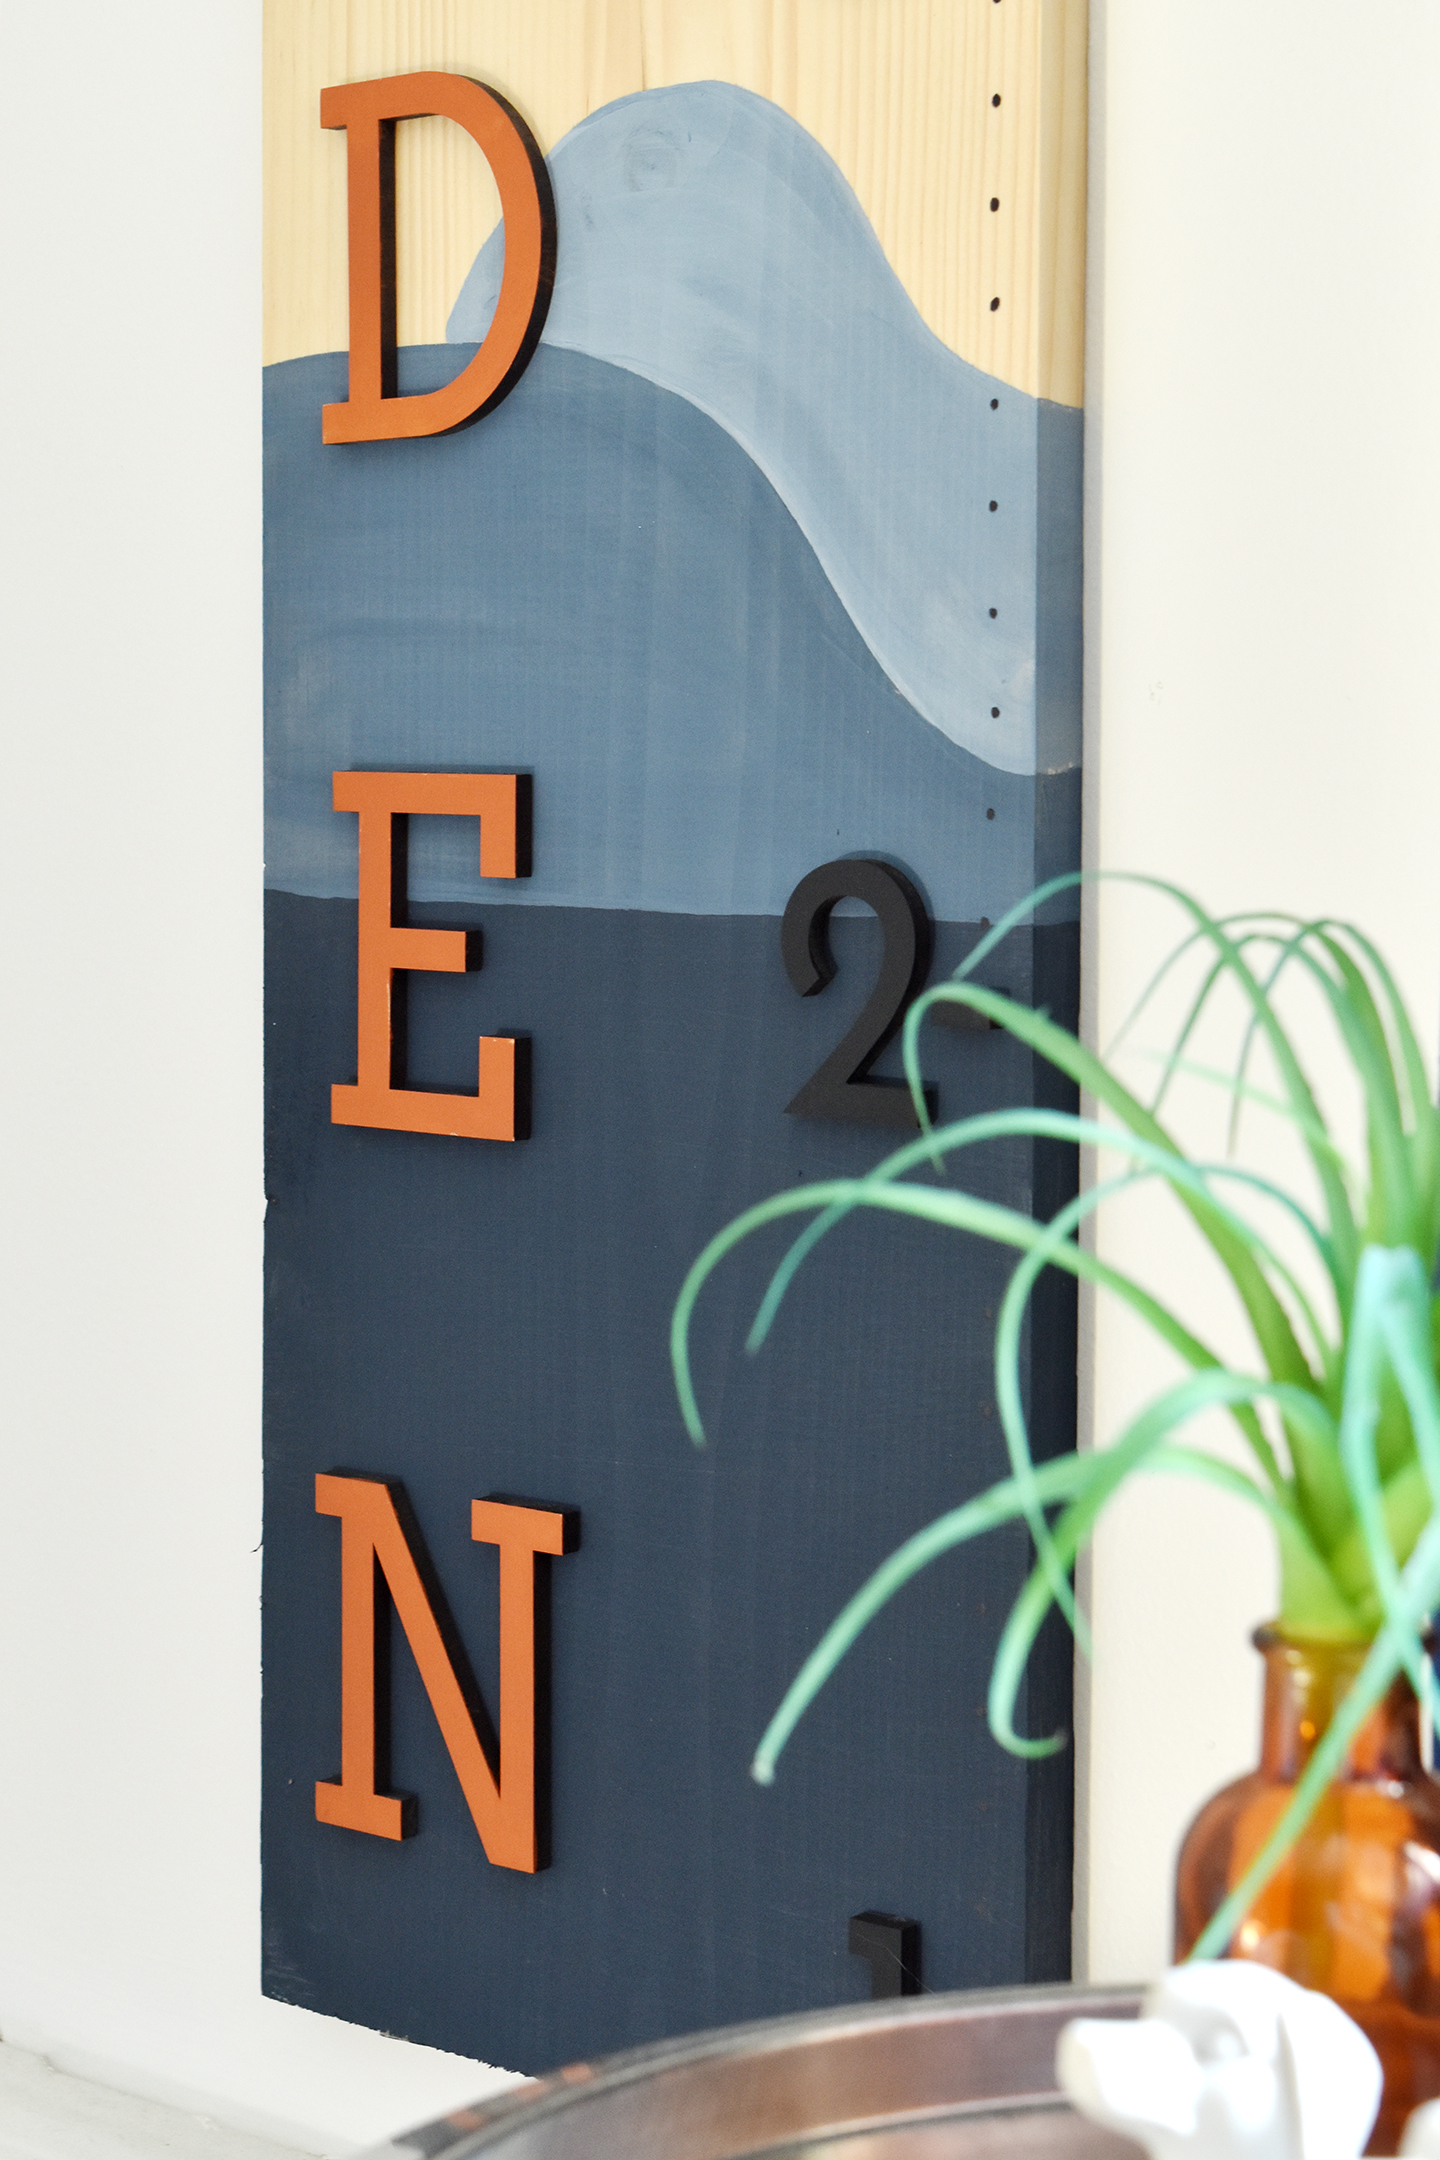
And ta da! You’re finished. I attached mine to the wall by simply drilling pilot holes in the top and bottom and then screwing them into the wall. You can paint the screws so you can barely see them.
And here’s my daughter’s height chart… a different color scheme and font combination, and more of an abstract shape sort of design. For hers I chose the Schola font at 4 inches tall.
Now I just have to remember to document their height regularly! That will probably be the hardest part of this whole project 🙂
This post was created in partnership with CraftCuts.
Thanks for supporting the brands that keep Design Fixation online!