Keeping kids entertained can be a daunting task, especially in the summer, and even more during a global quarantine! We feel your pain, so we’ve taken it into our own hands to plan the perfect summer activity, a DIY recycled wind chime craft accompanied by a scavenger hunt around the house to find materials! Parent/adult assistance is recommended for this craft, so why not make this an opportunity to have some family fun during these crazy times! This is also a great opportunity to teach your kids the importance of recycling and working together as they practice counting, measuring, and color identification. Start now by downloading the FREE scavenger hunt printable and let the crafting begin!
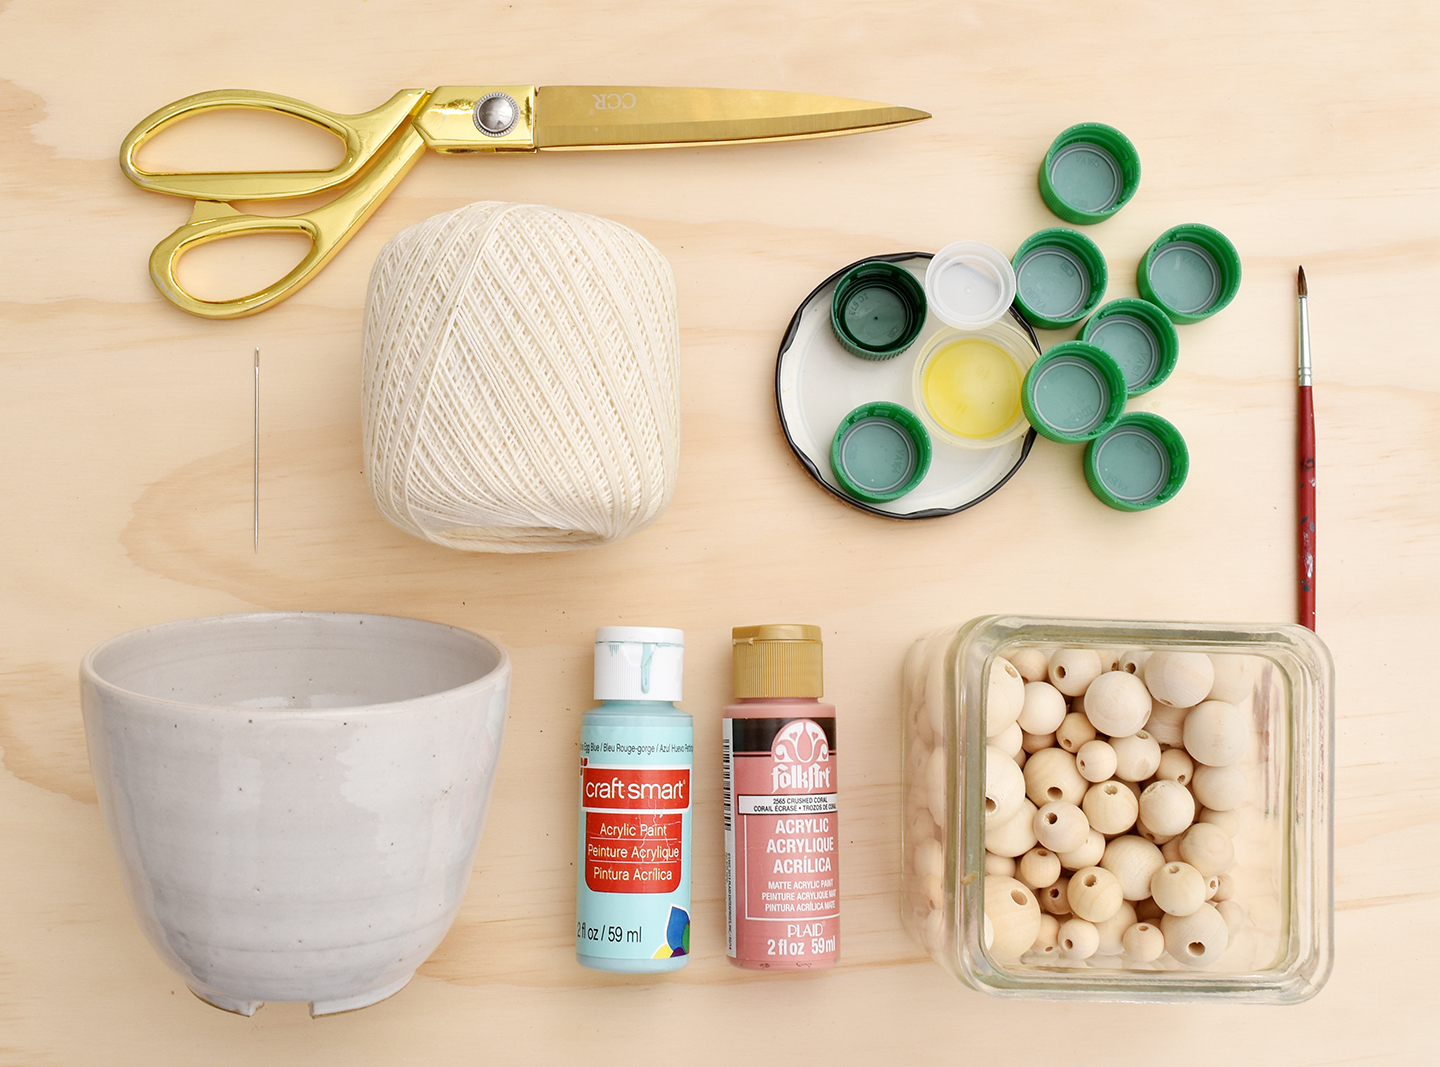
DIY Recycled Windchime Materials:
- Pot with drainage holes
- Assorted beads
- Recycled bottle caps/lids
- String (jute, twine, thread etc.)
- Thick needle
- Scissors
- Acrylic paint
- You may need a hammer and nail (not pictured)
- FREE scavenger hunt printable
TIP: Recycle all necessary plastic bottle caps before beginning the craft. Also, feel free to add any other materials to list that you may have lying around and could be put to good use.
After you’re done hunting and collecting materials around the house, follow the step-by-step instructions below to make your very own DIY recycled wind chime!
Step 1
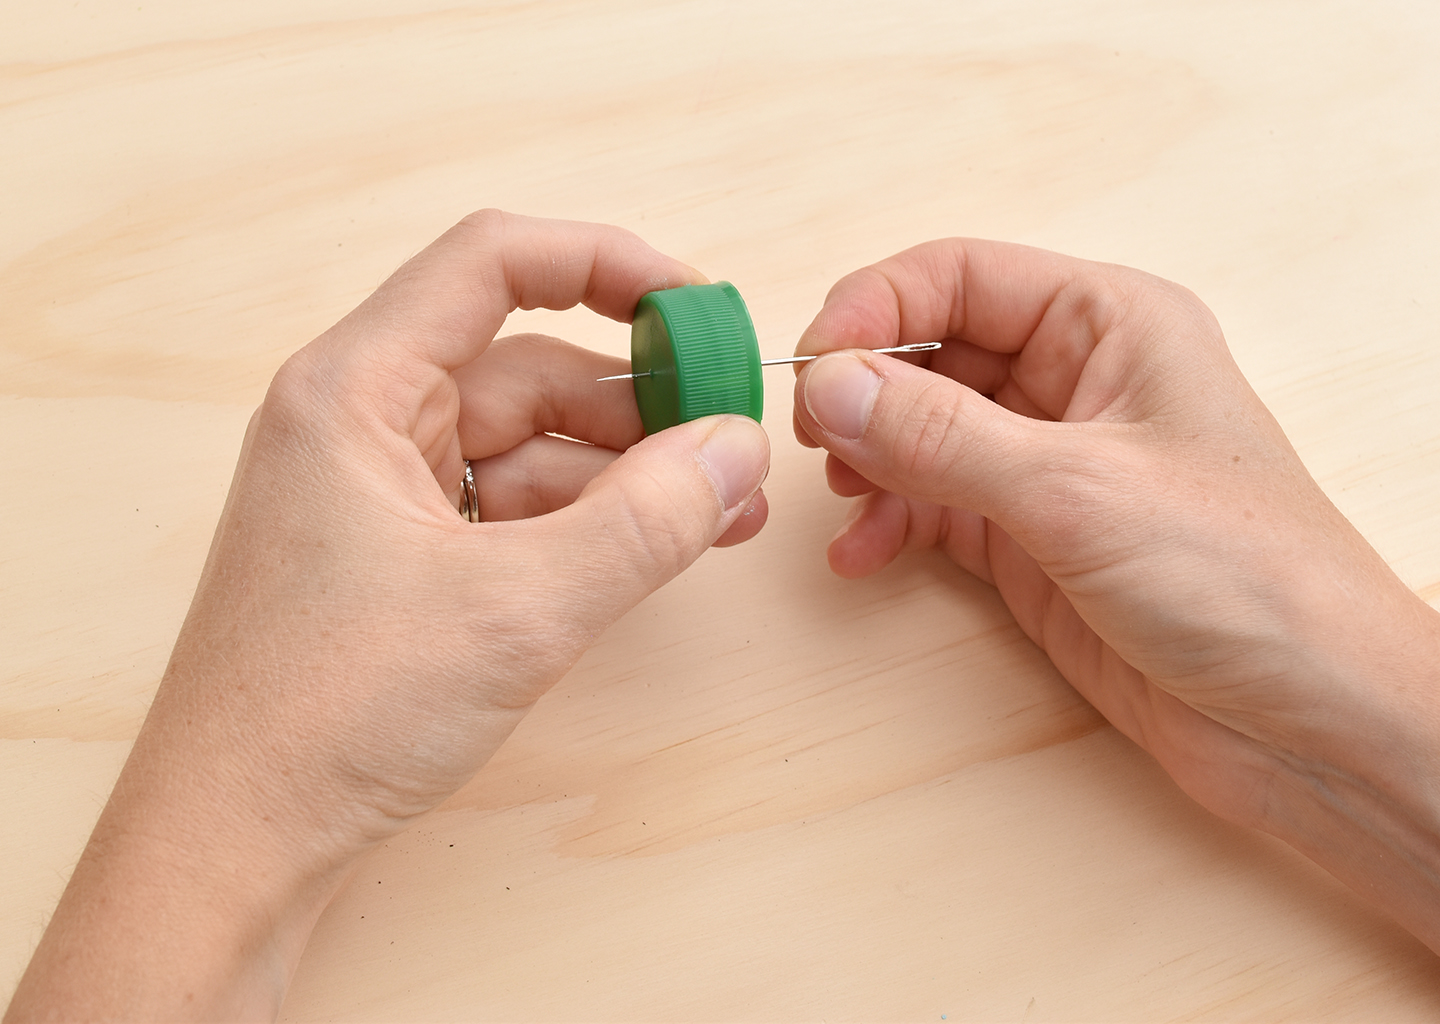
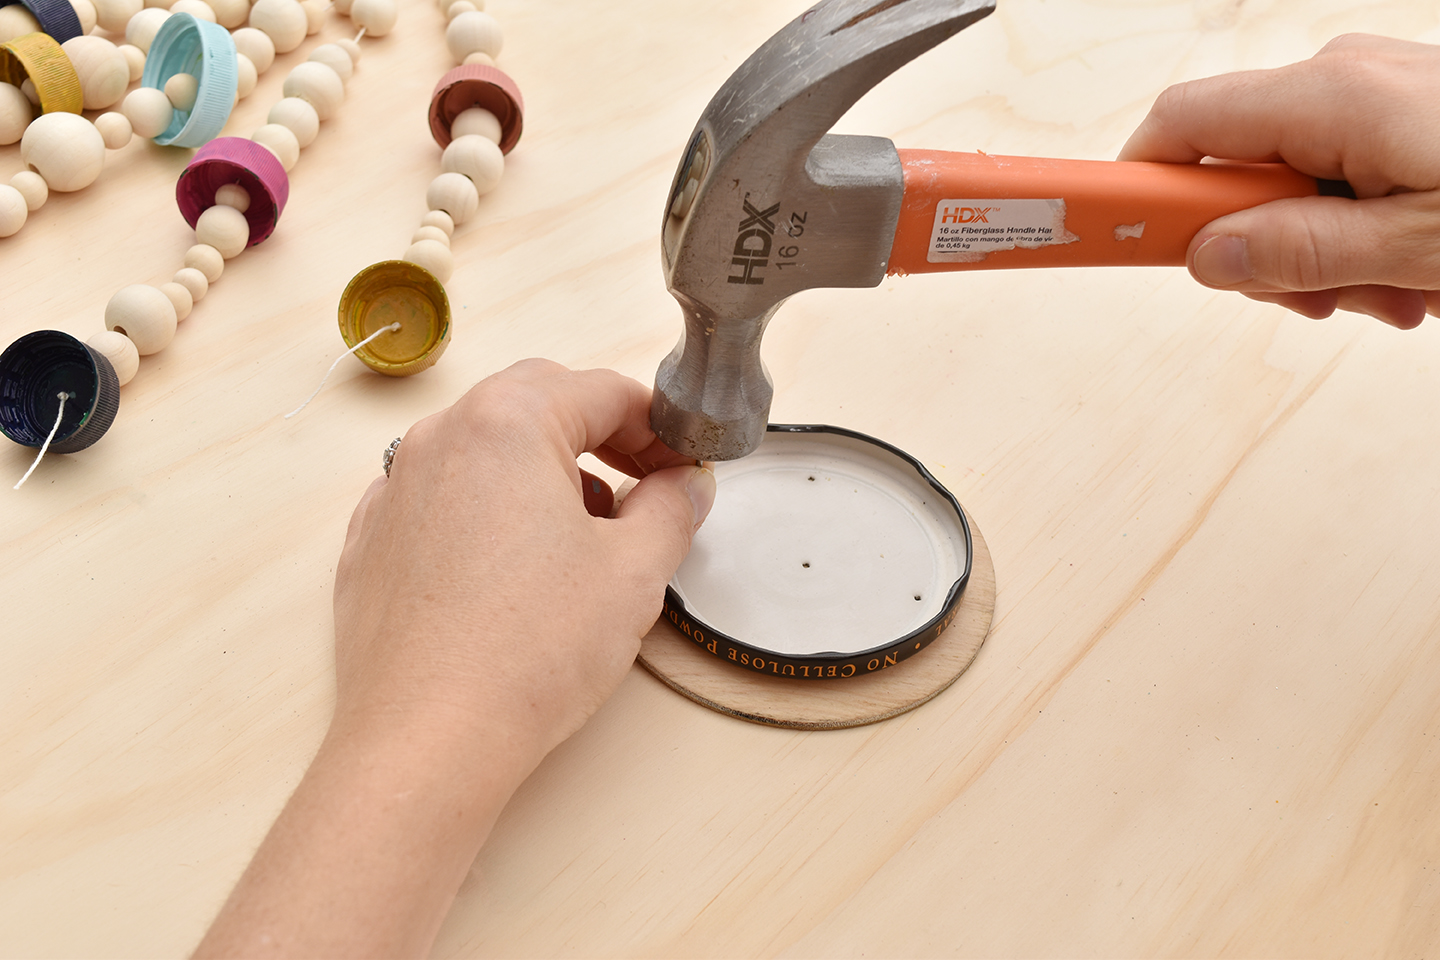
I found it is helpful to do some small prep before crafting. With a needle in hand and the bottle caps you recycled, create a small whole in the center of each bottle cap by gently pushing the needle through the cap. In one of the larger caps, poke four extra holes in a square shape with one in the middle. My lid was metal so I used a hammer and nail to make the holes. Later, this will become the base where all the chimes are assembled together.
Some caps may be made of a thicker plastic, in this case, use a hammer or an object with a hard surface to “nail” the needle through. I recommend this part be done by an adult.
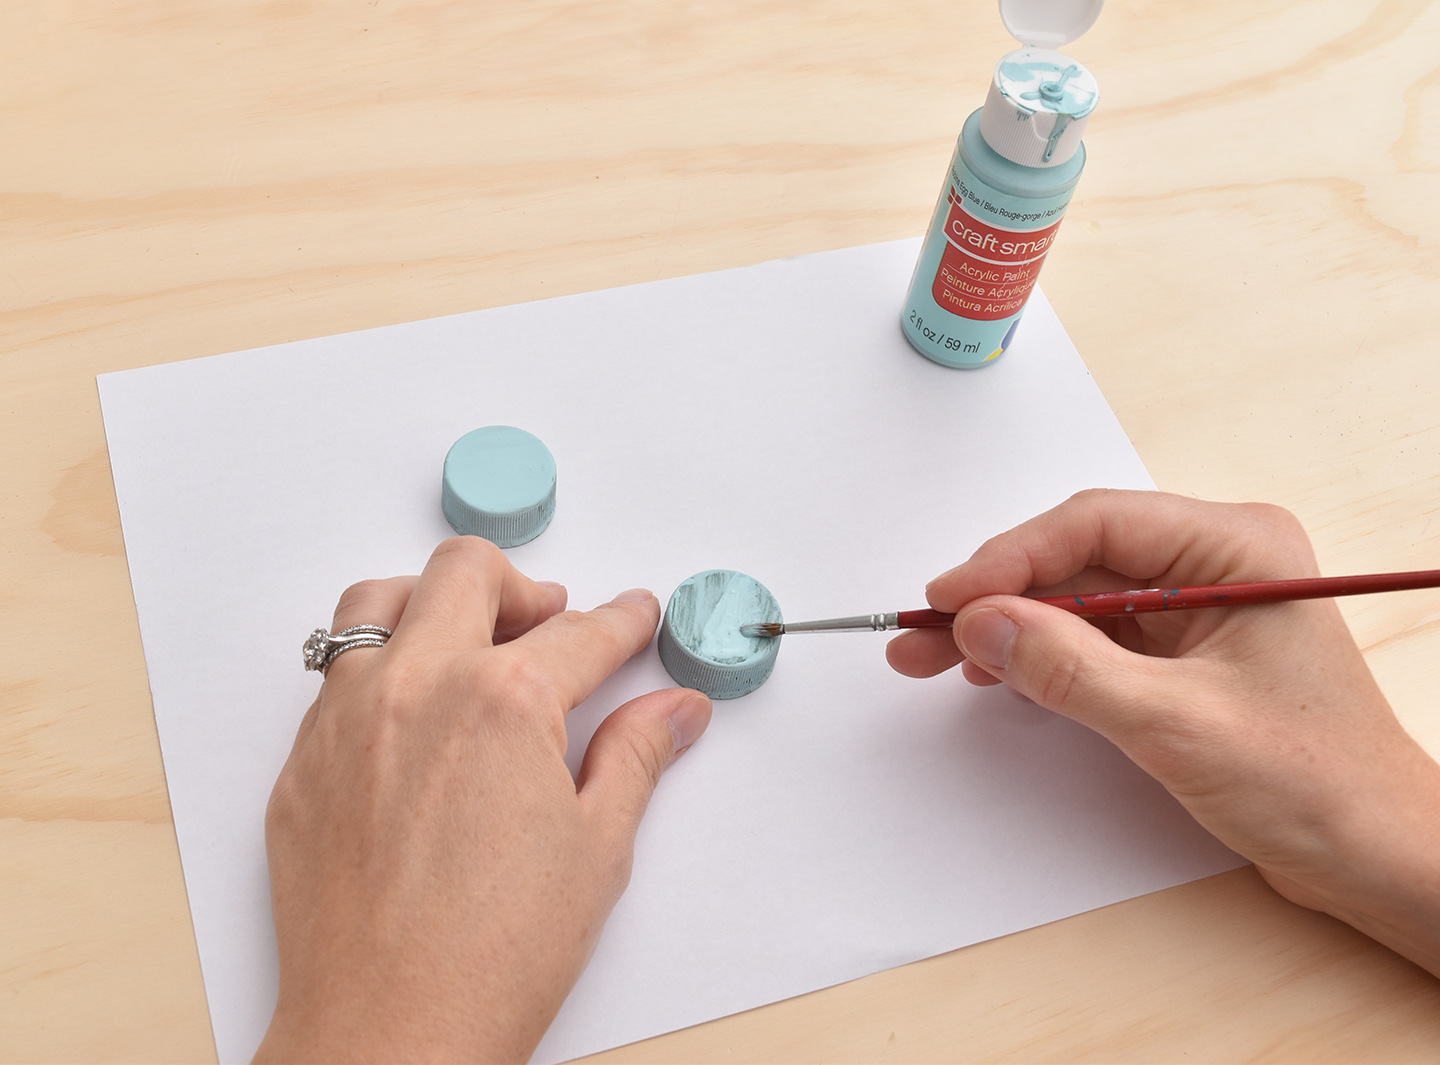
Step 2
Part 2 of prep is an optional step… Like many of you, I have tons of acrylic paint leftover from other craft projects so I decided to spruce the bottle caps up by painting them. I find this gives a more personal touch to the craft and playing around with paint is always fun (especially for the kids). If you’d like to do the same, use a small paintbrush to evenly paint each bottle cap with 2-3 coats of acrylic paint or until the original bottle cap color is no longer visible. Take this time to also paint the terra cotta pot if you’d like. Once you’re done painting, set all the objects aside to dry. We will be getting back to them soon.
Step 3
Now, cut 5 pieces of string to your desired length. Length may vary depending on how long you want your chimes to be. I cut my string pieces to be 18 inches long. Once all of your string pieces are cut, thread a needle through the first piece and tie a sturdy knot at the end (2-3 knots should do).
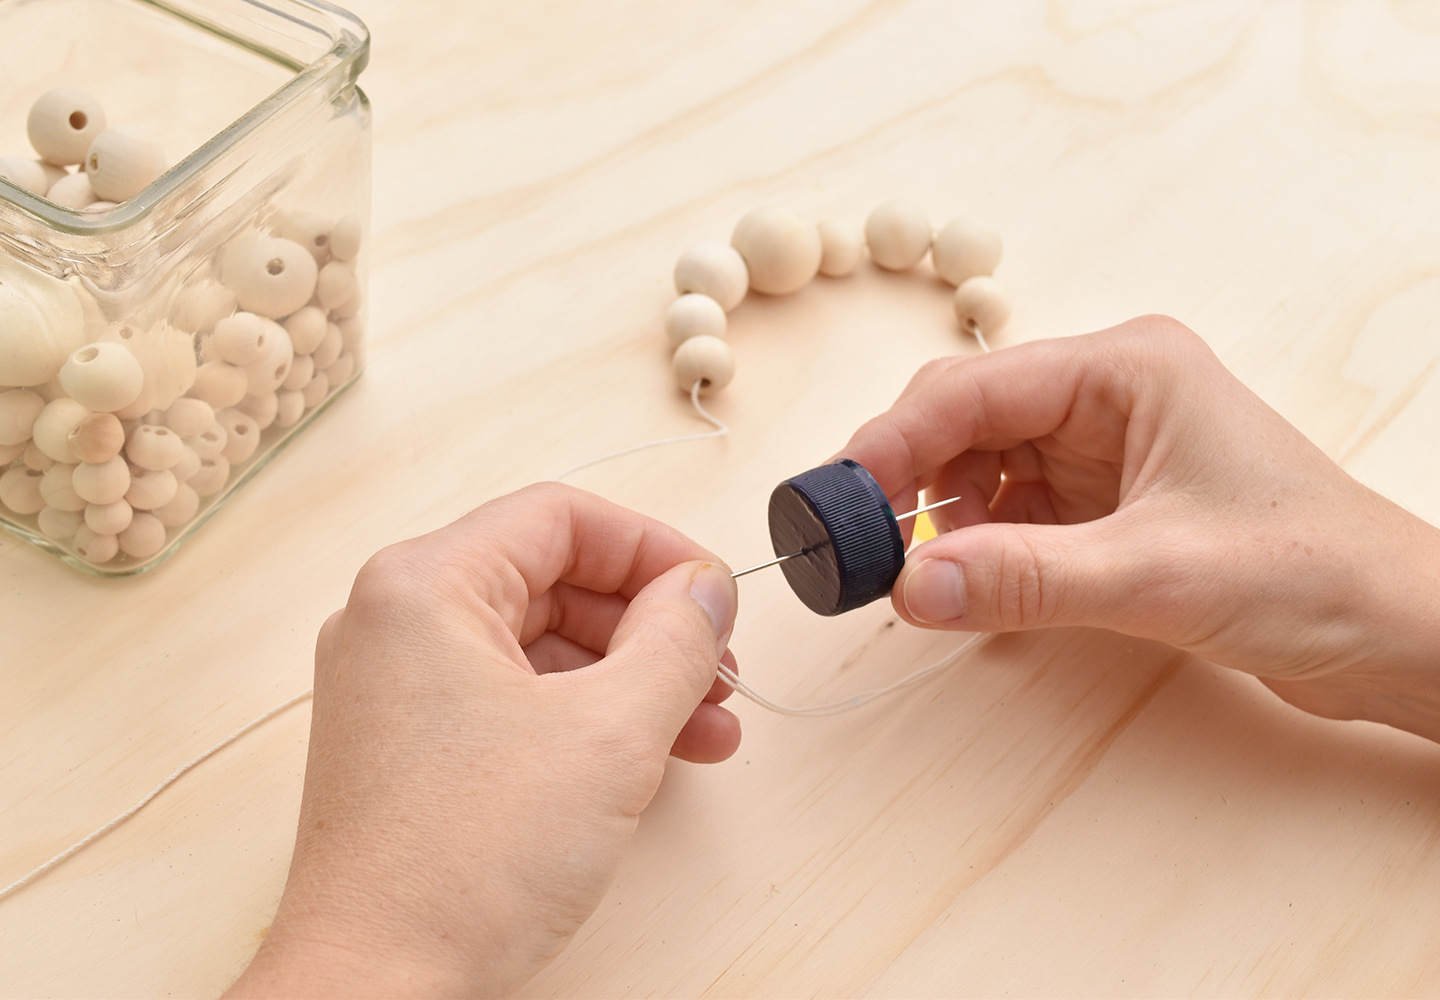
Step 4
Thread your first bead onto the string. This will become the base of your chime. Continue to form the chime by threading on more beads and adding those plastic bottle caps we worked so hard to prep. I like to do __ beads then a plastic bottle cap, but do as you please. Some other materials you could add on are bells, sea glass, silverware, shells etc.
Repeat step 4 for the remaining chimes making sure to tie a knot at the end of each string so your beads don’t fall off. Here’s your chance to get creative and explore your options… Come up with your own color palette, patterns/design, length etc. (or if you like my way that’s fine too)!

Step 5
It is now time to assemble the wind chime. Take one of the chime strings and thread it through the center of the cap or lid with 5 holes. Do the same to the rest of the strings, one in each of the remaining holes.
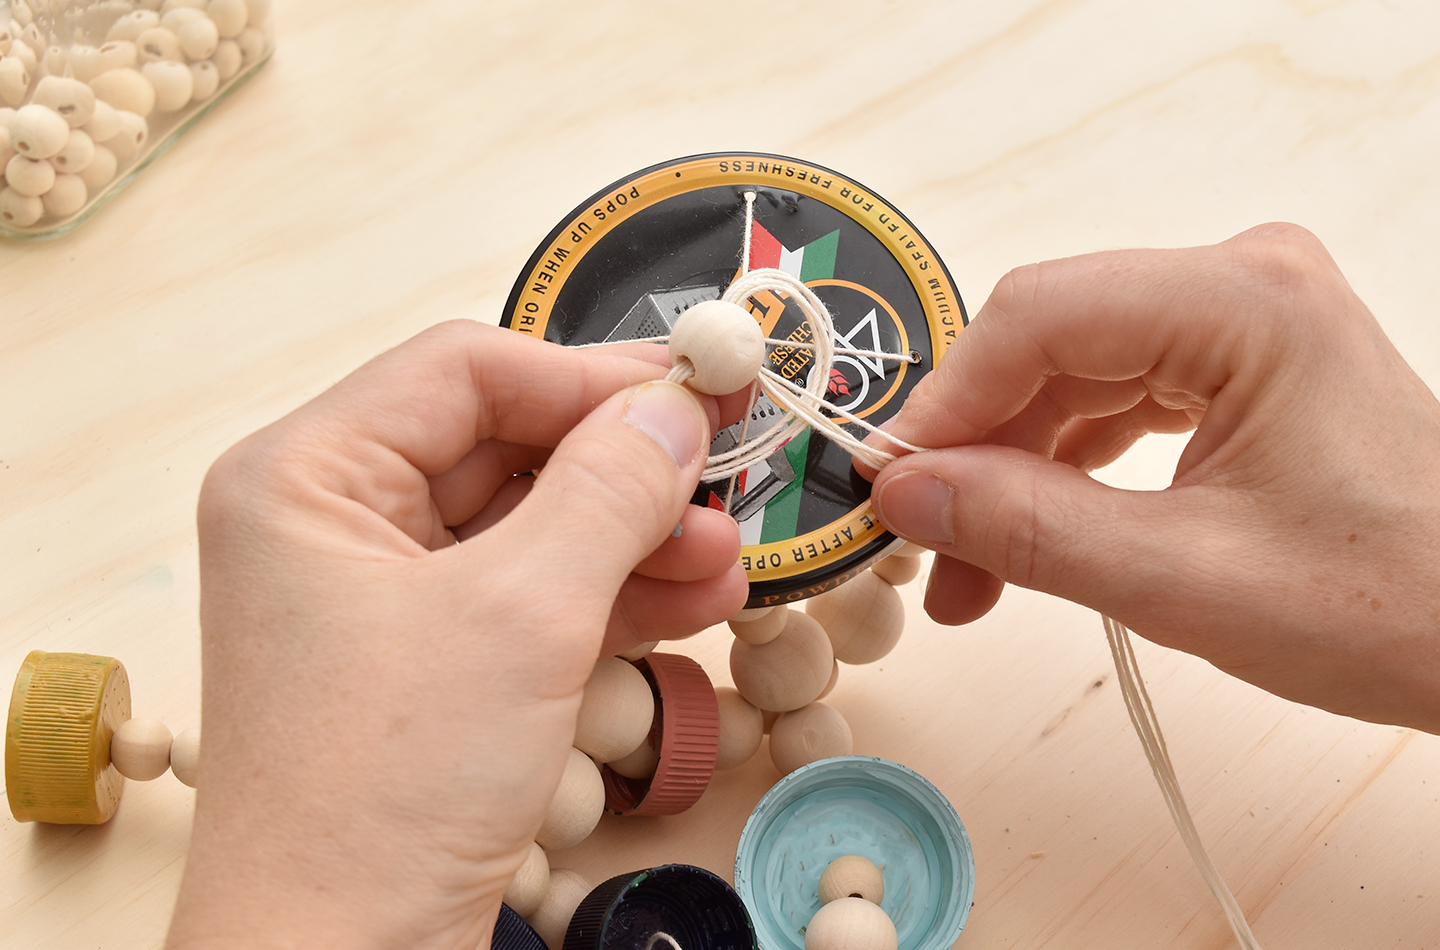
Collect all the strings together, slide a bead through them to act as a stopper and then tie a loop knot.
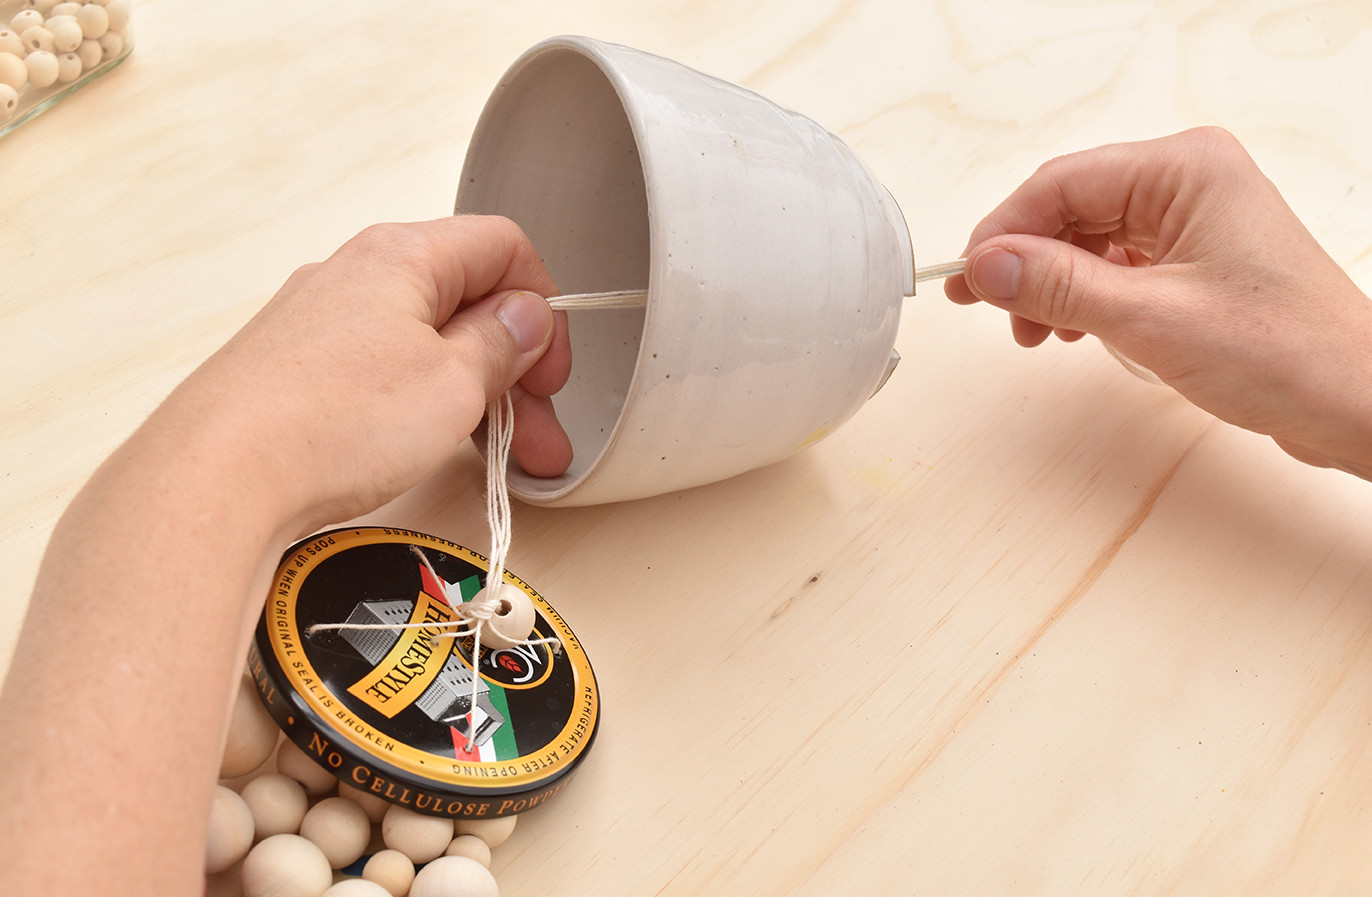
Thread the collected strings through the drainage hole of your pot and tie a loop knot once more.
Step 6
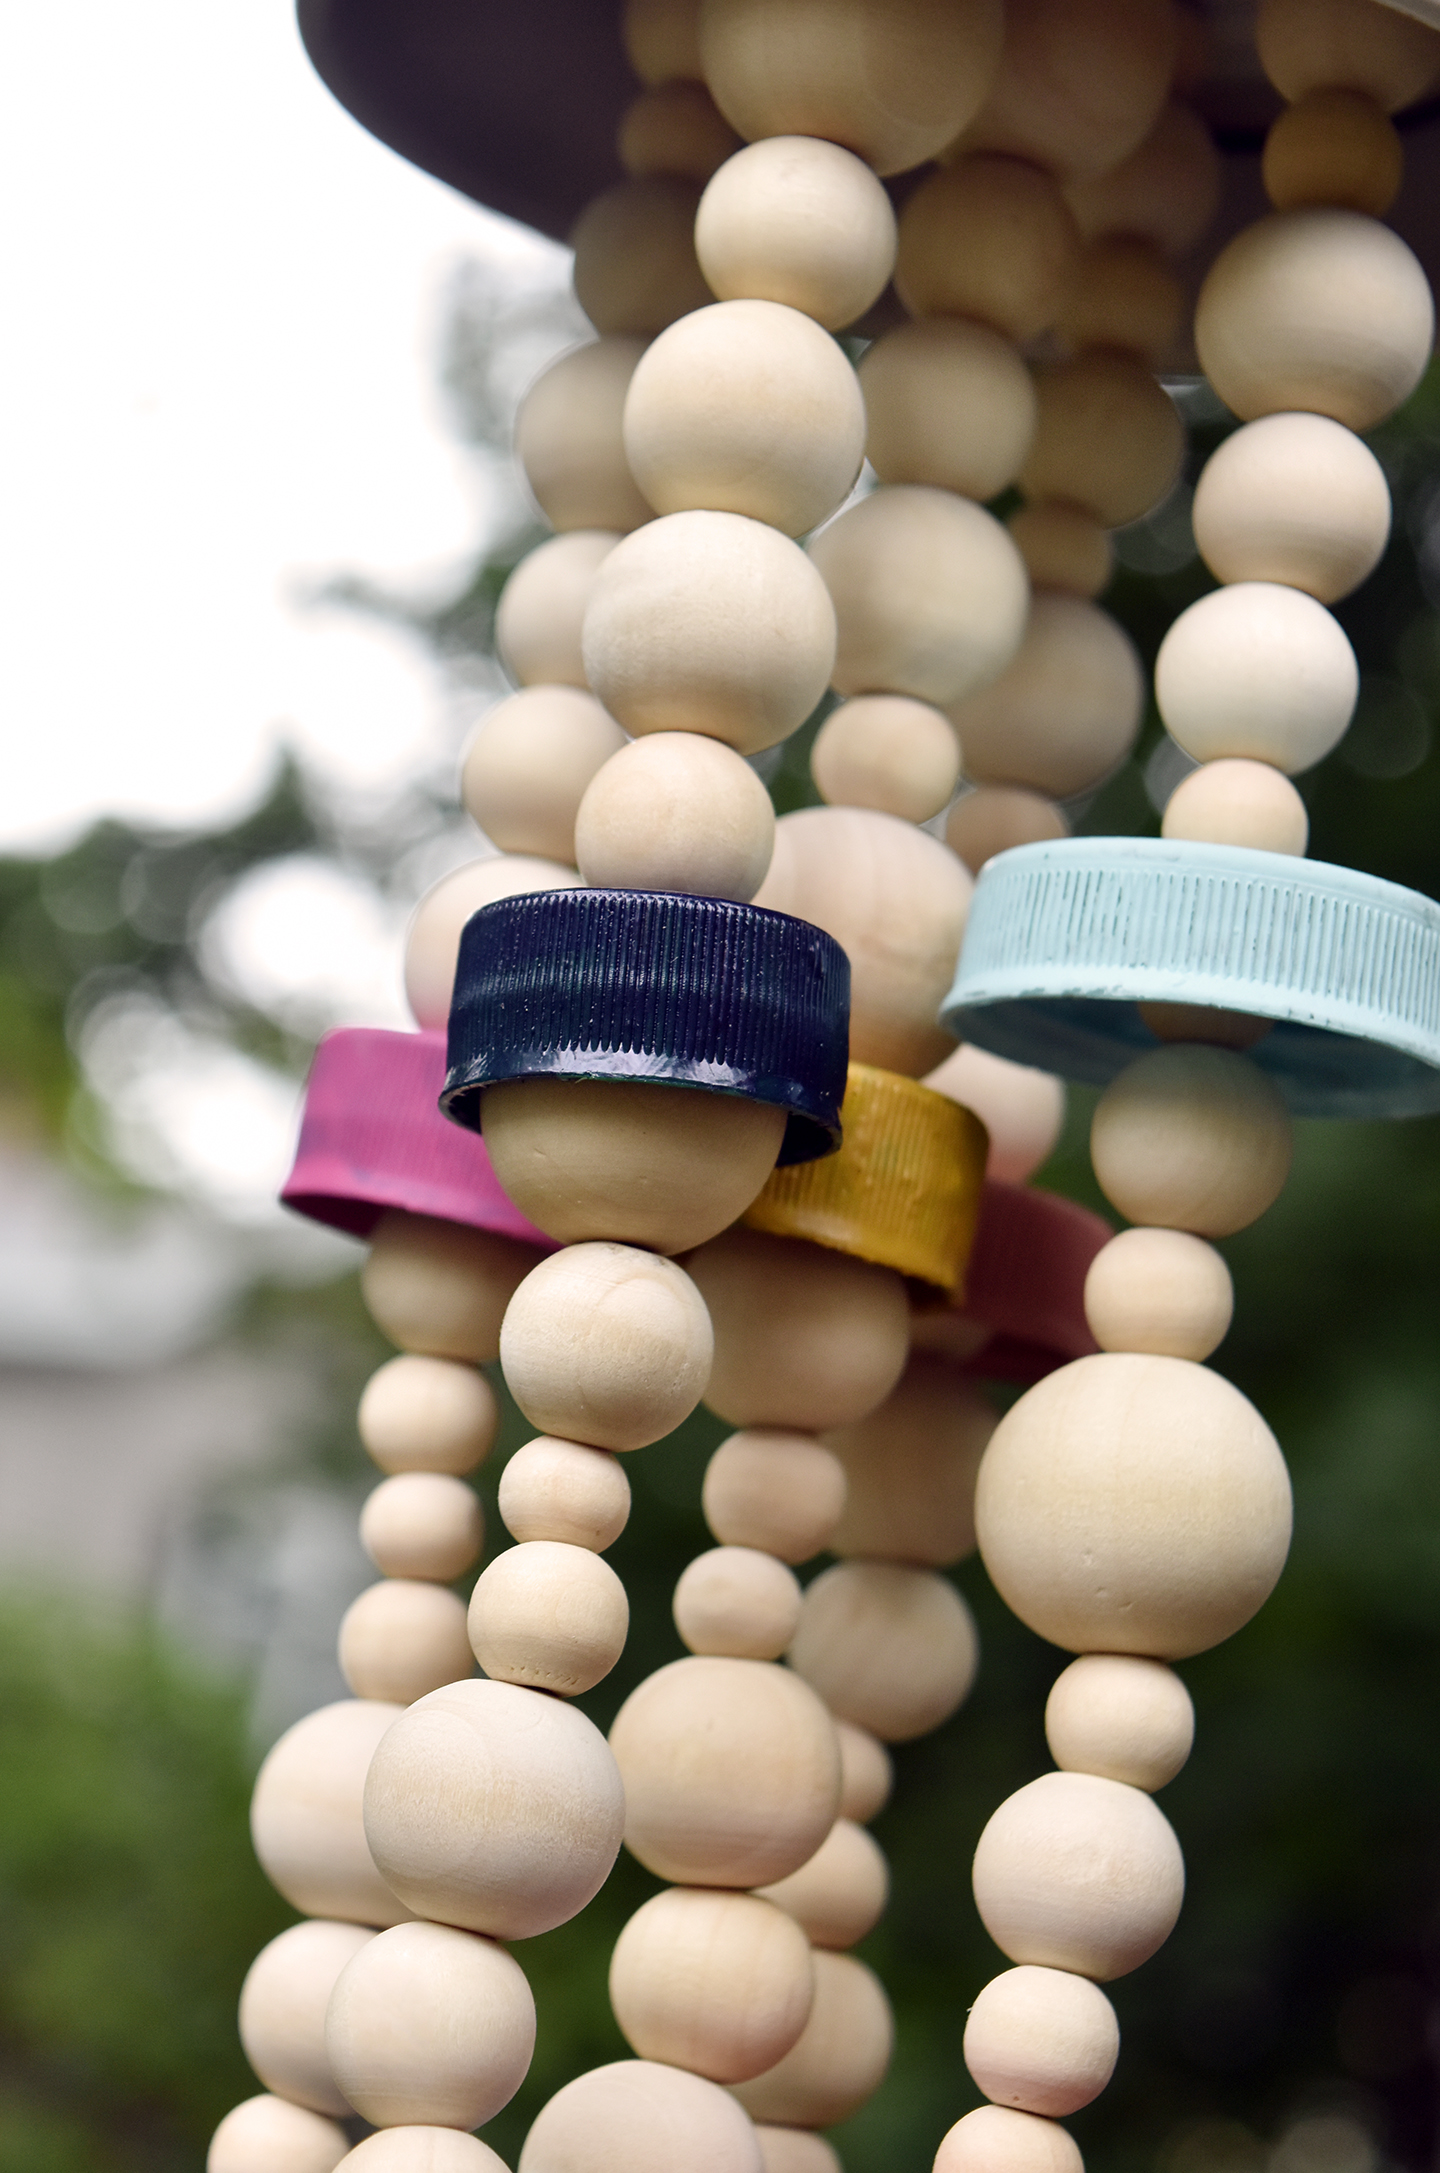
Last of all, hang your DIY recycled windchime wherever it looks best and don’t forget to share your creation with me on Instagram! Tag @designfixation so I can take a look. Can’t wait to see your results!