This post may contain affiliate links. This means that if you buy the cool stuff I recommend, I earn a small commission (but you still pay the same price). Thanks for helping me make a living doing my dream job!

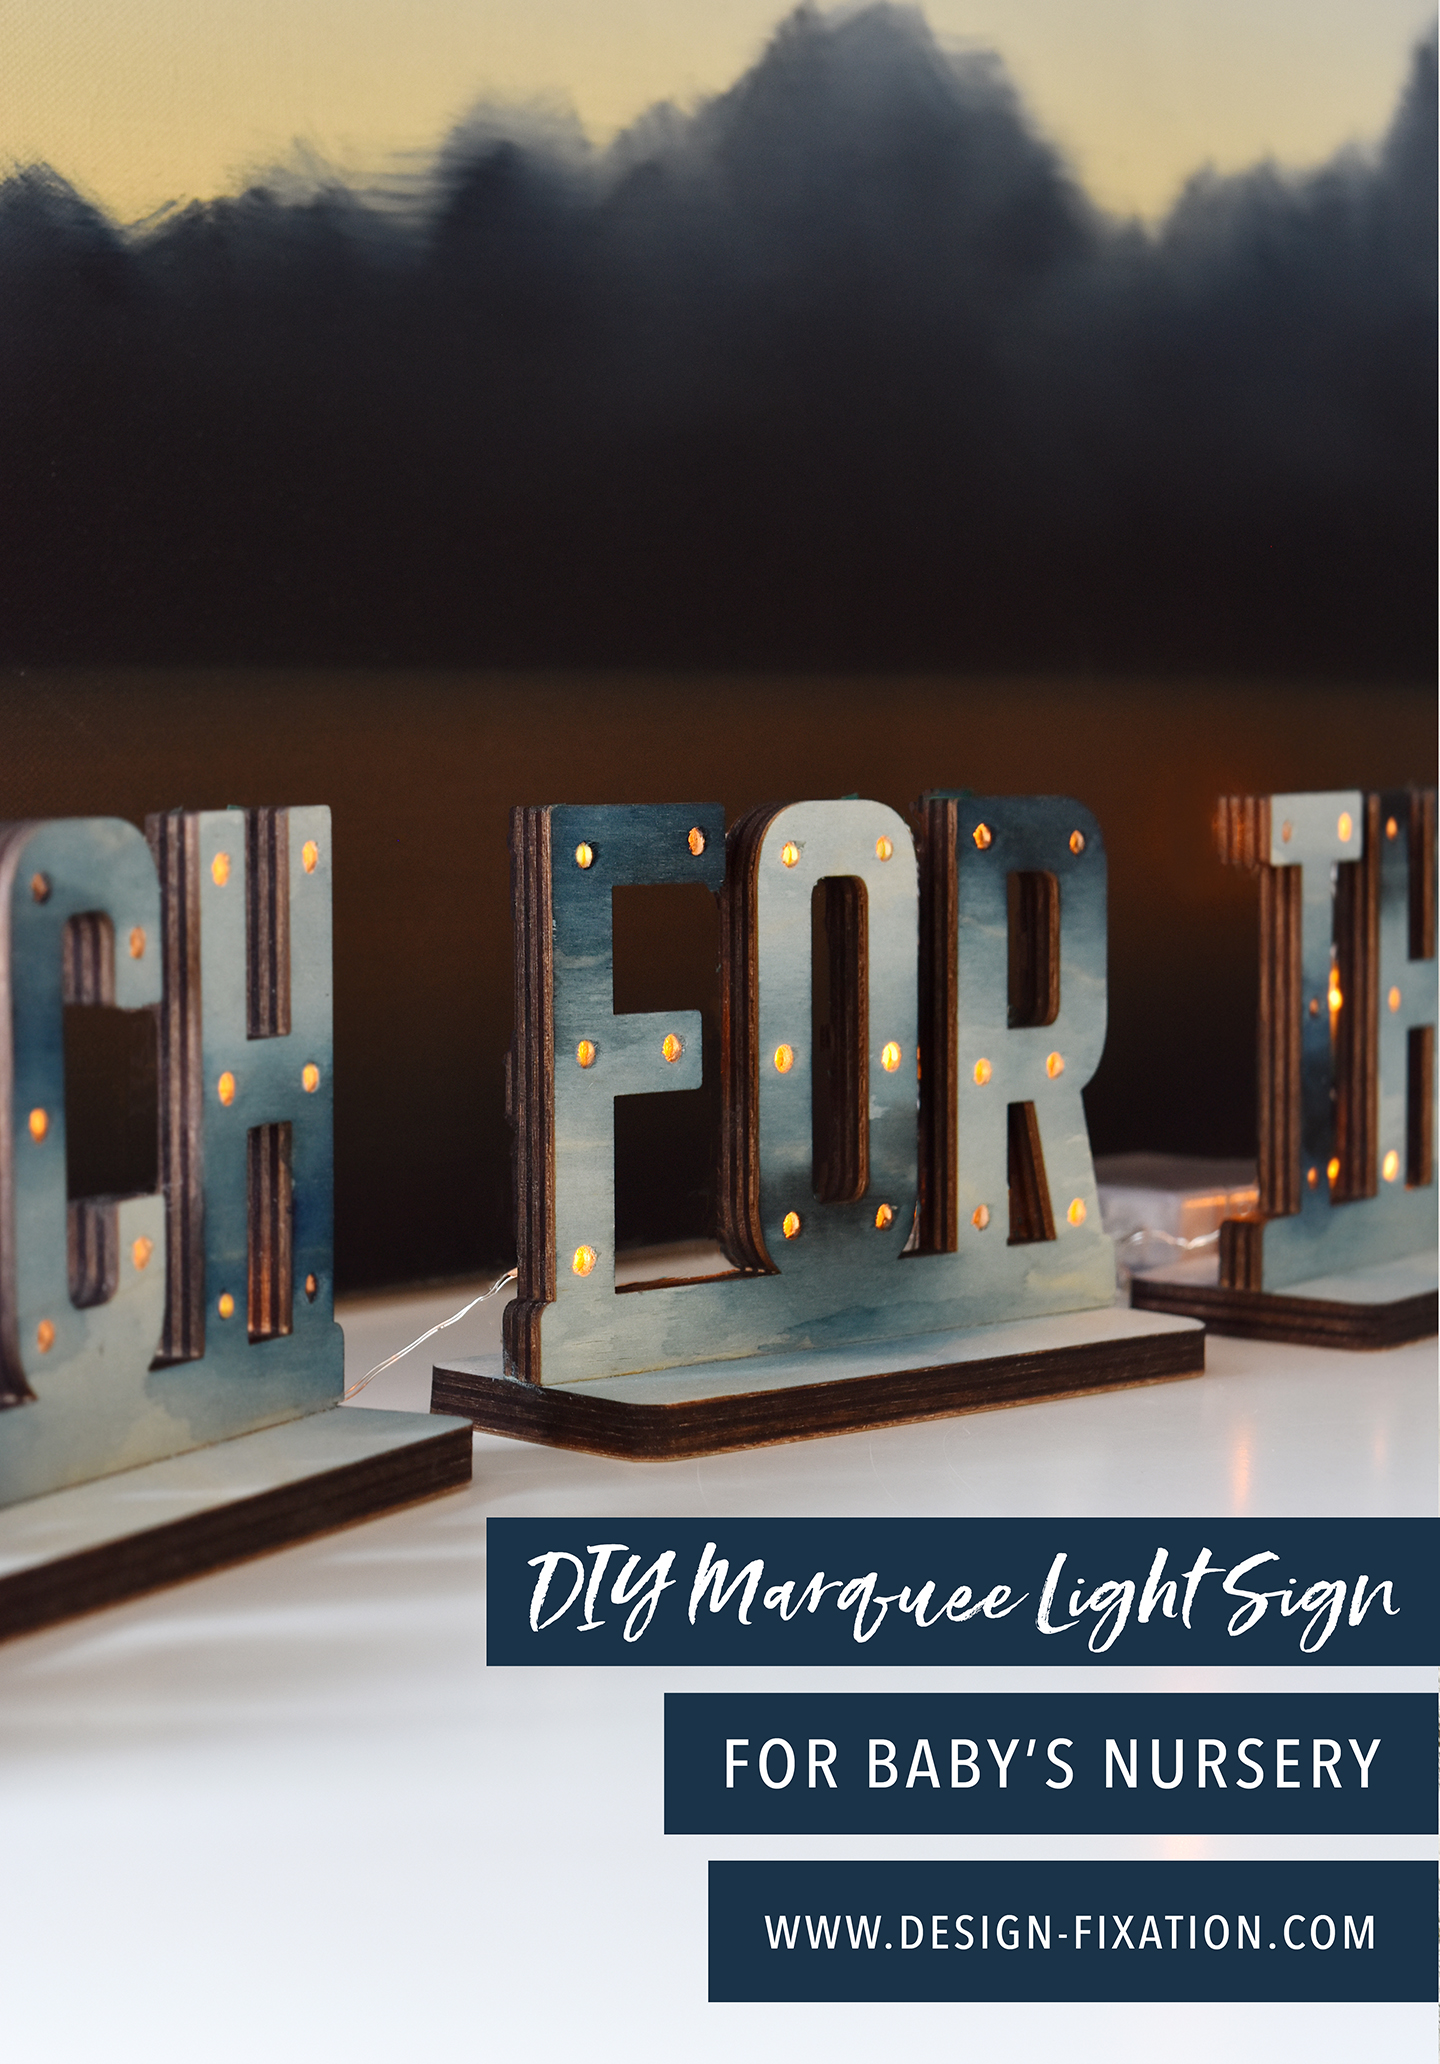
I’ve always loved the look of marquee lights… they have a touch of glamour and also shed a bit of warm light on the space in which they’re displayed. And as you guys know, I’m a huge fan of all of CraftCuts’ wood products – so I thought that their stand-up letters would lend themselves perfectly to a set of mini marquee lights. I made this mini marquee sign with the quote “reach for the stars” and today I’m sharing the process with you! Keep reading to check out the full tutorial.
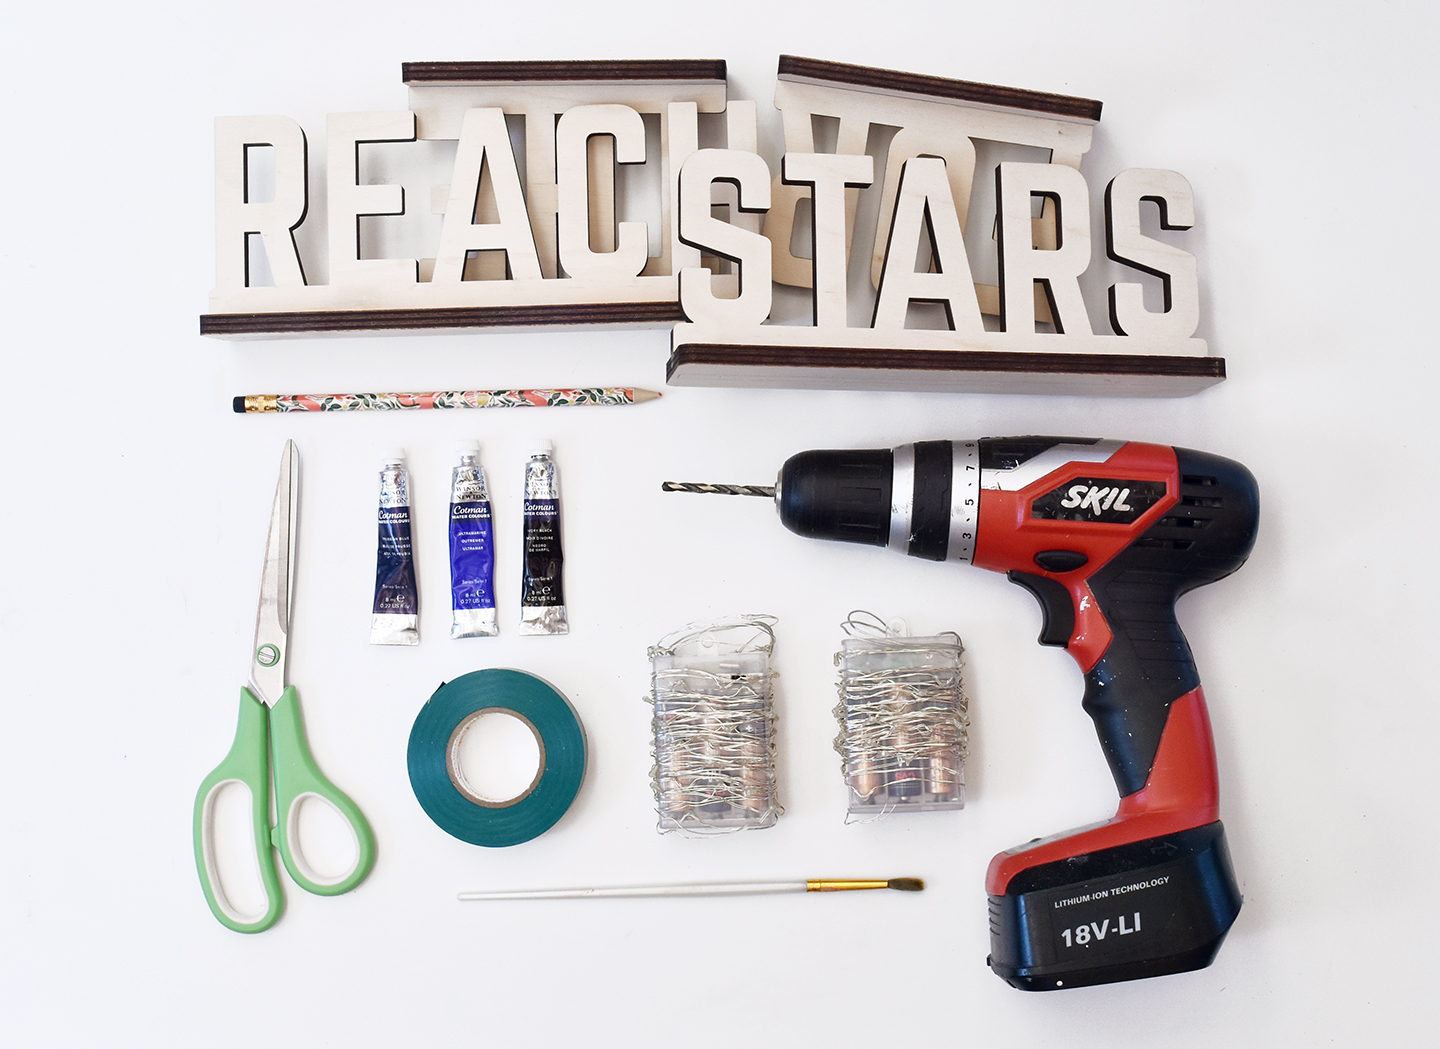
Here’s what you’ll need for your DIY marquee light quote sign:
- Stand-up lettering in the quote of your choice
- Battery operated fairy lights
- Watercolor paint
- Paintbrush
- Electrical tape
- Scissors
- Pencil
- Electric drill with 3/16″ bit
- Sandpaper (not pictured)
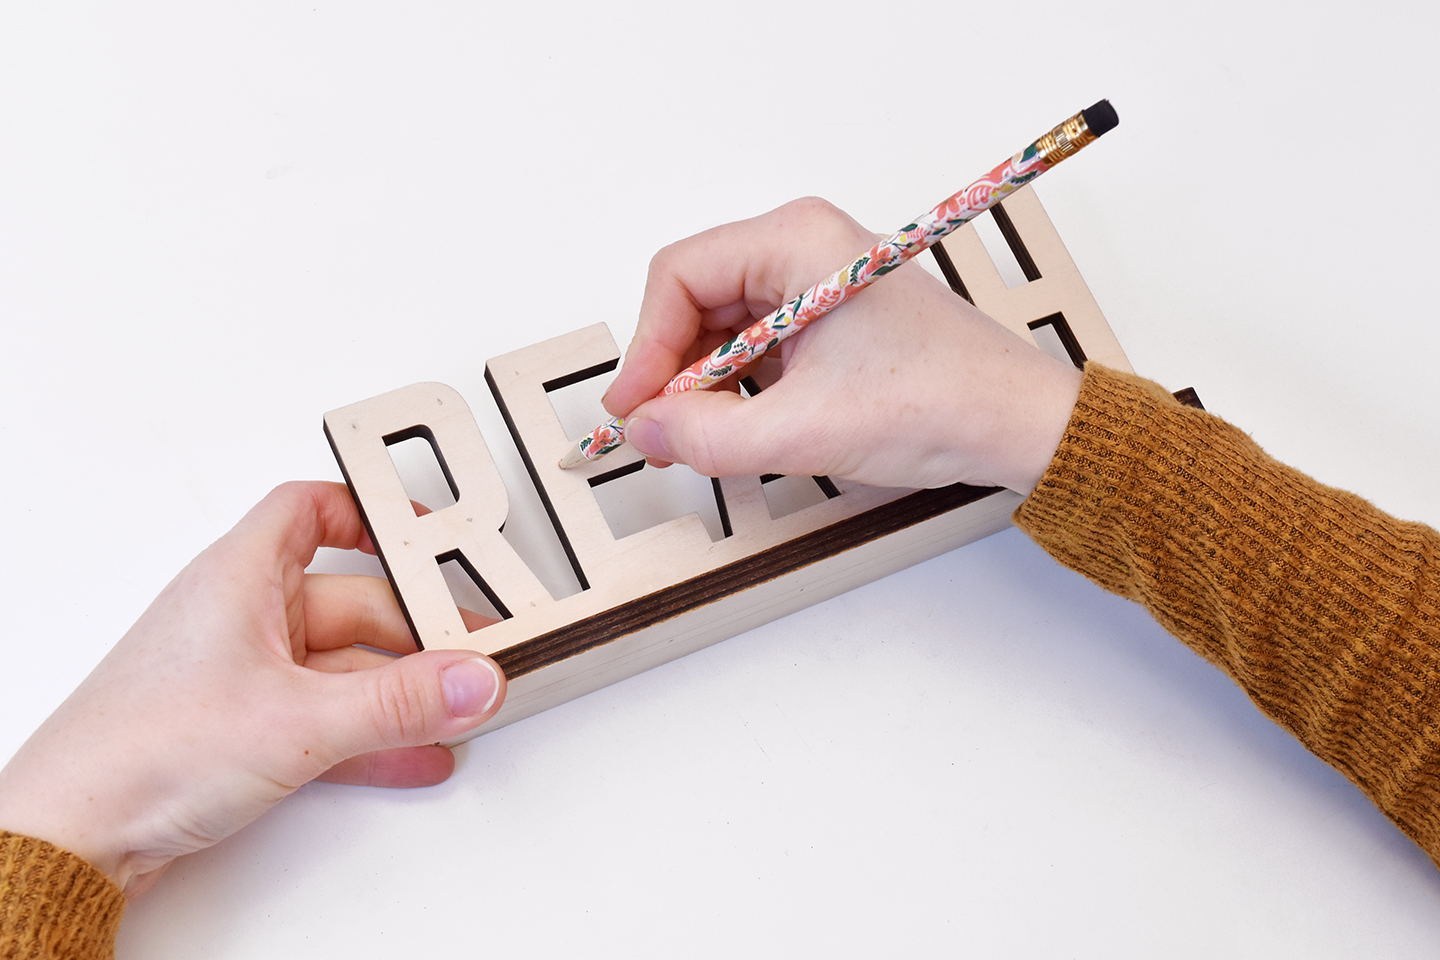
Begin by determining where each light will be placed. I decided to put them in the corners of the letters and also halfway down as shown above.
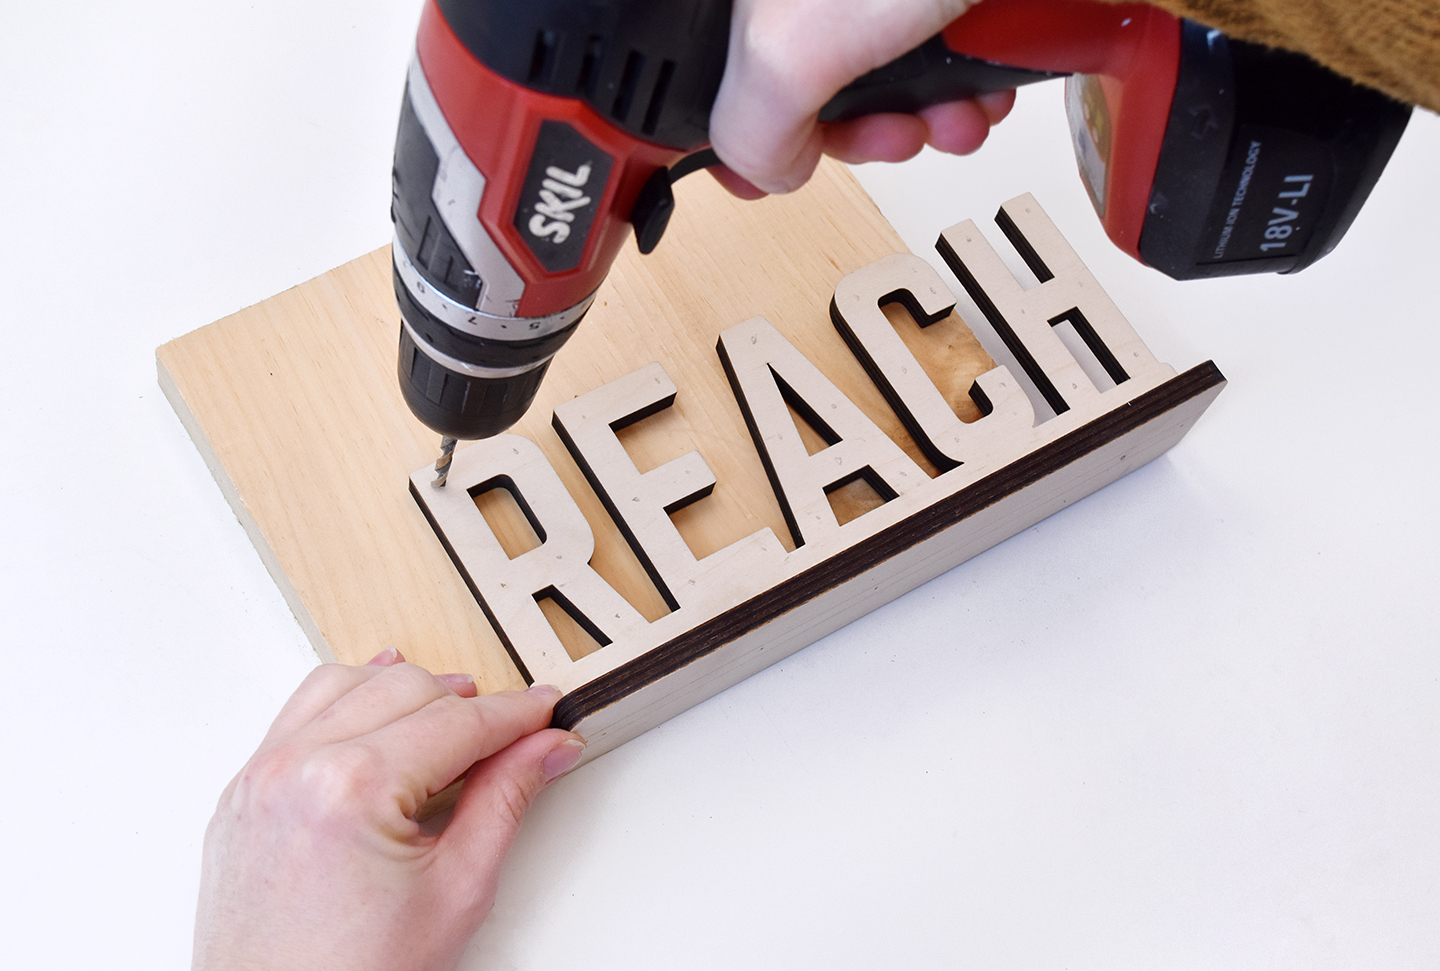
Put a piece of scrap wood underneath the letters and drill straight down with a 3/16″ drill bit.

Use a piece of sand paper to clean up any rough edges as you go along. Do the back side too. You may also want to roll up a little cone-shaped piece of sandpaper to swivel back and forth inside each hole if necessary.
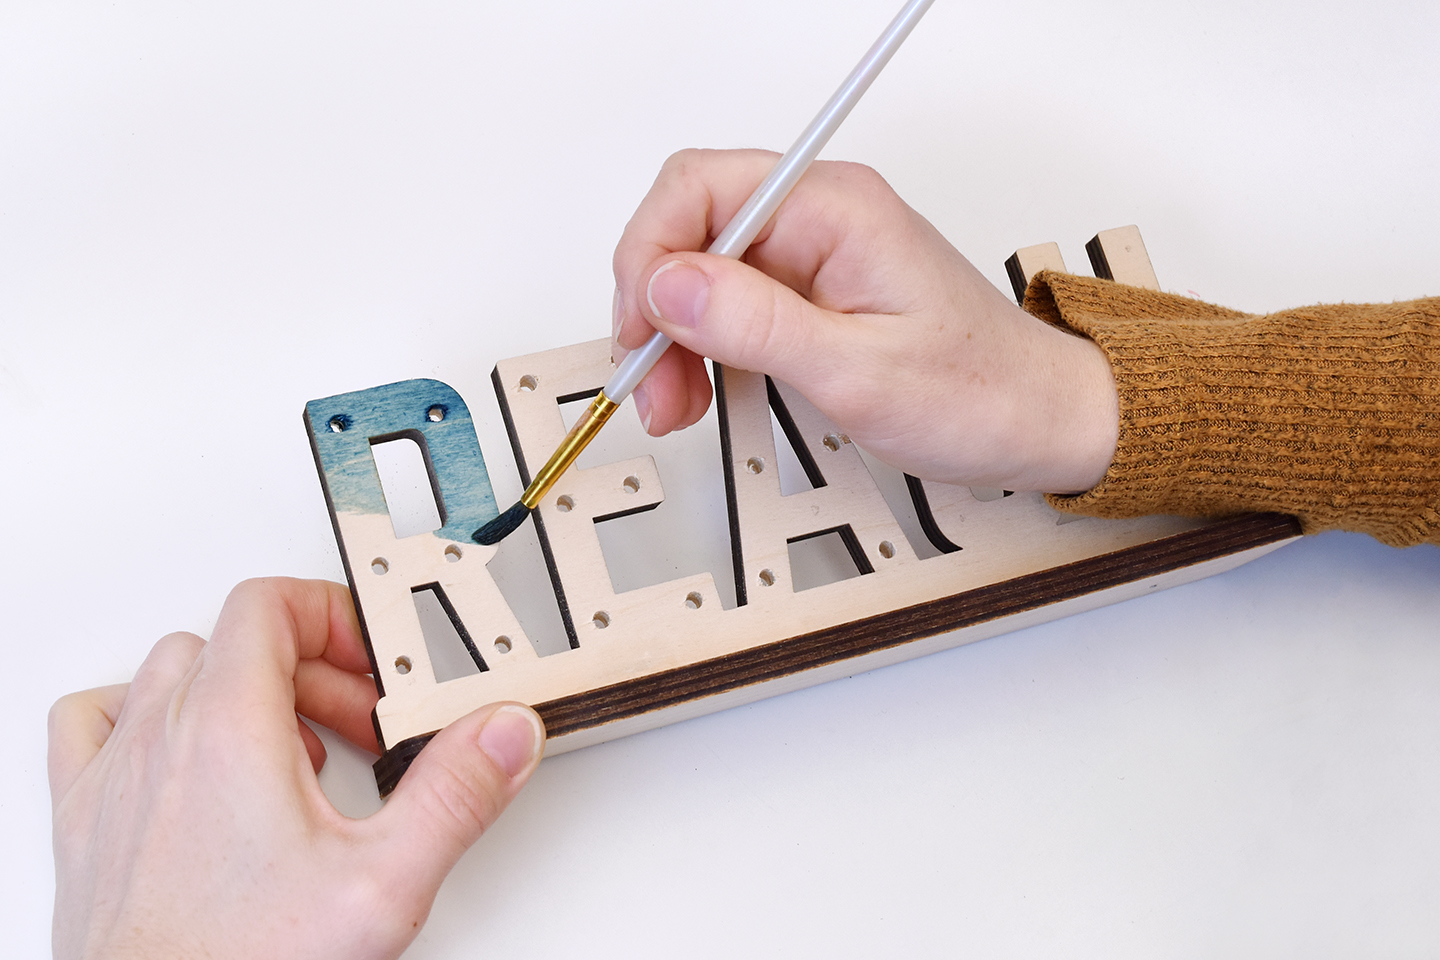
Next, paint the letters using watercolor. I varied the saturation of the paint with water to make it look like the night sky.
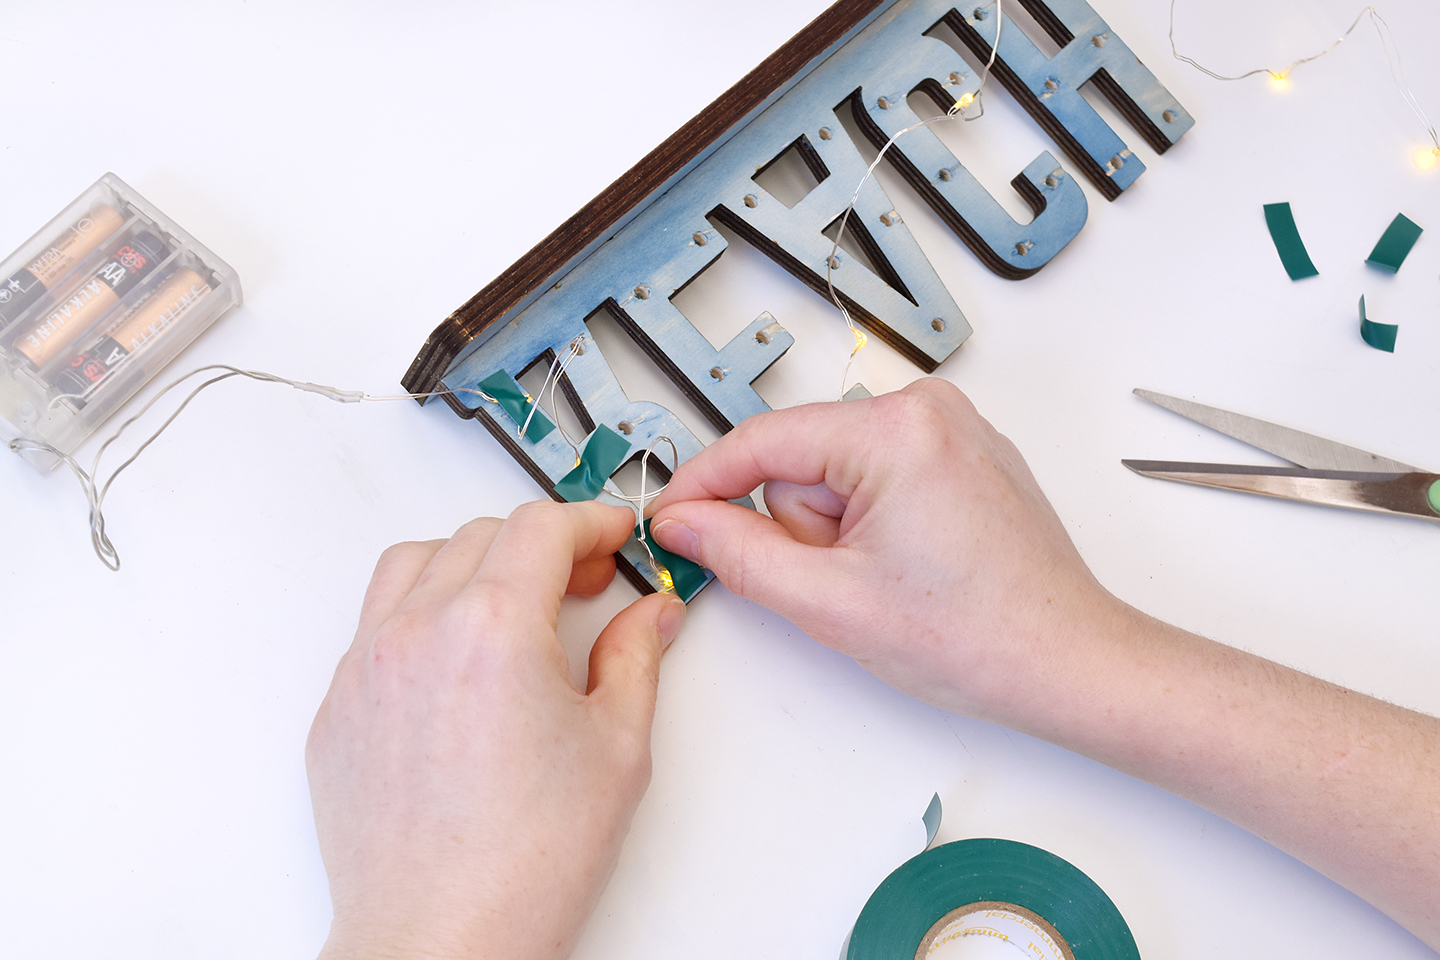
Once the paint has dried thoroughly, flip the letters over and begin taping the string lights to the back. Starting at the battery pack end, position one light over each hole. Use one inch pieces of electrical tape to attach each light. For now, leave the wire where it is.
I used one string of lights per two words (so two strings total). But this will vary depending on the length of the words you choose. I looped the excess lights/wire and taped them out of the way behind the letters.
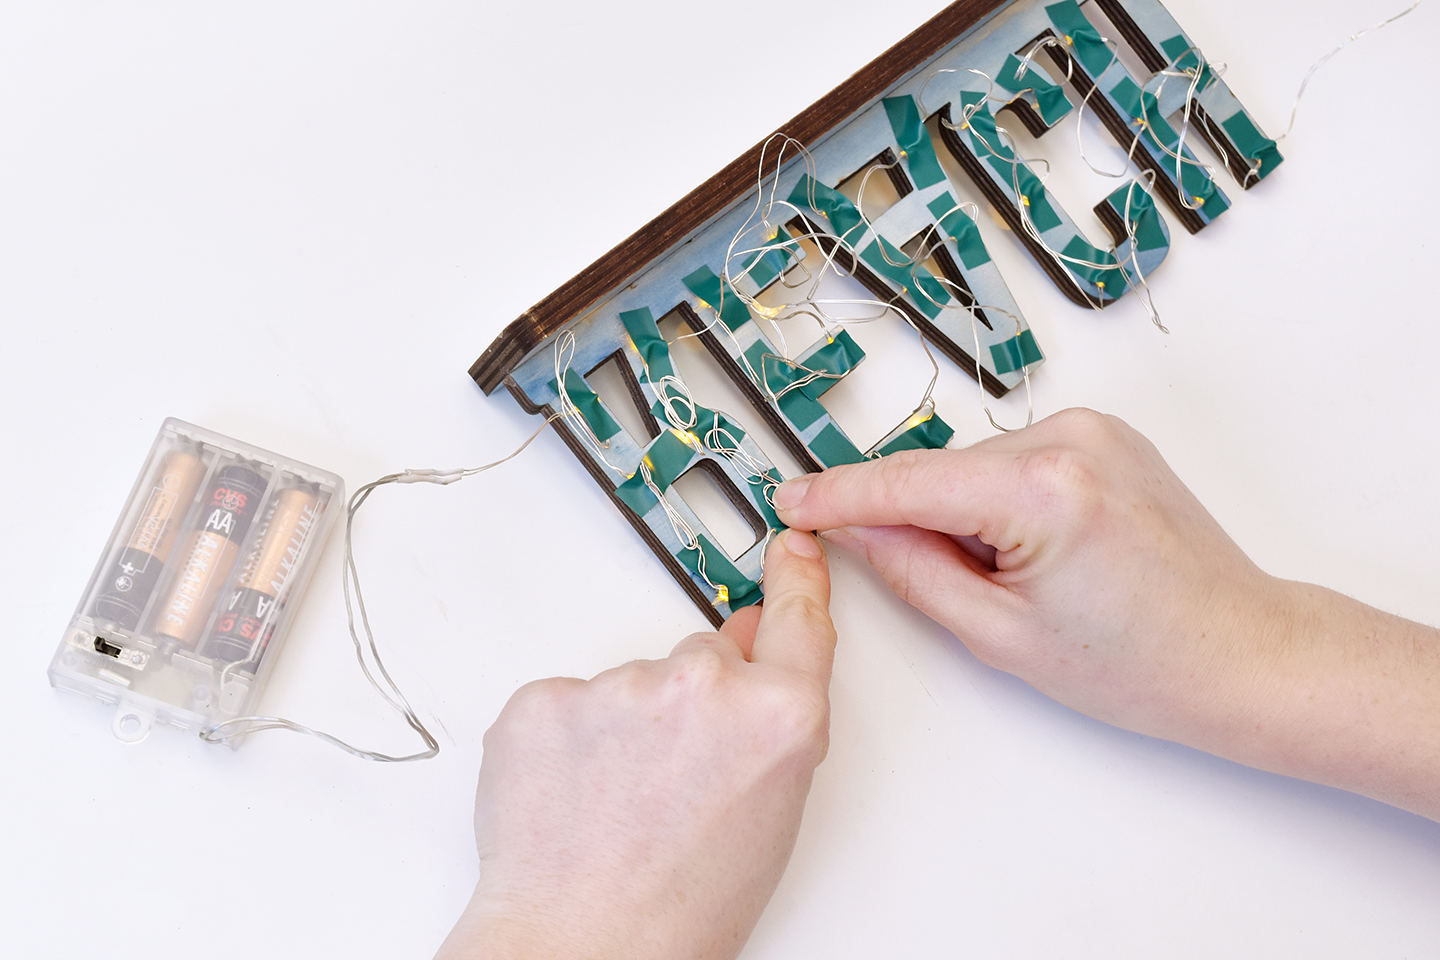
The last step is to flatten the wire down and tuck it behind the letters so you can’t see it from the front.

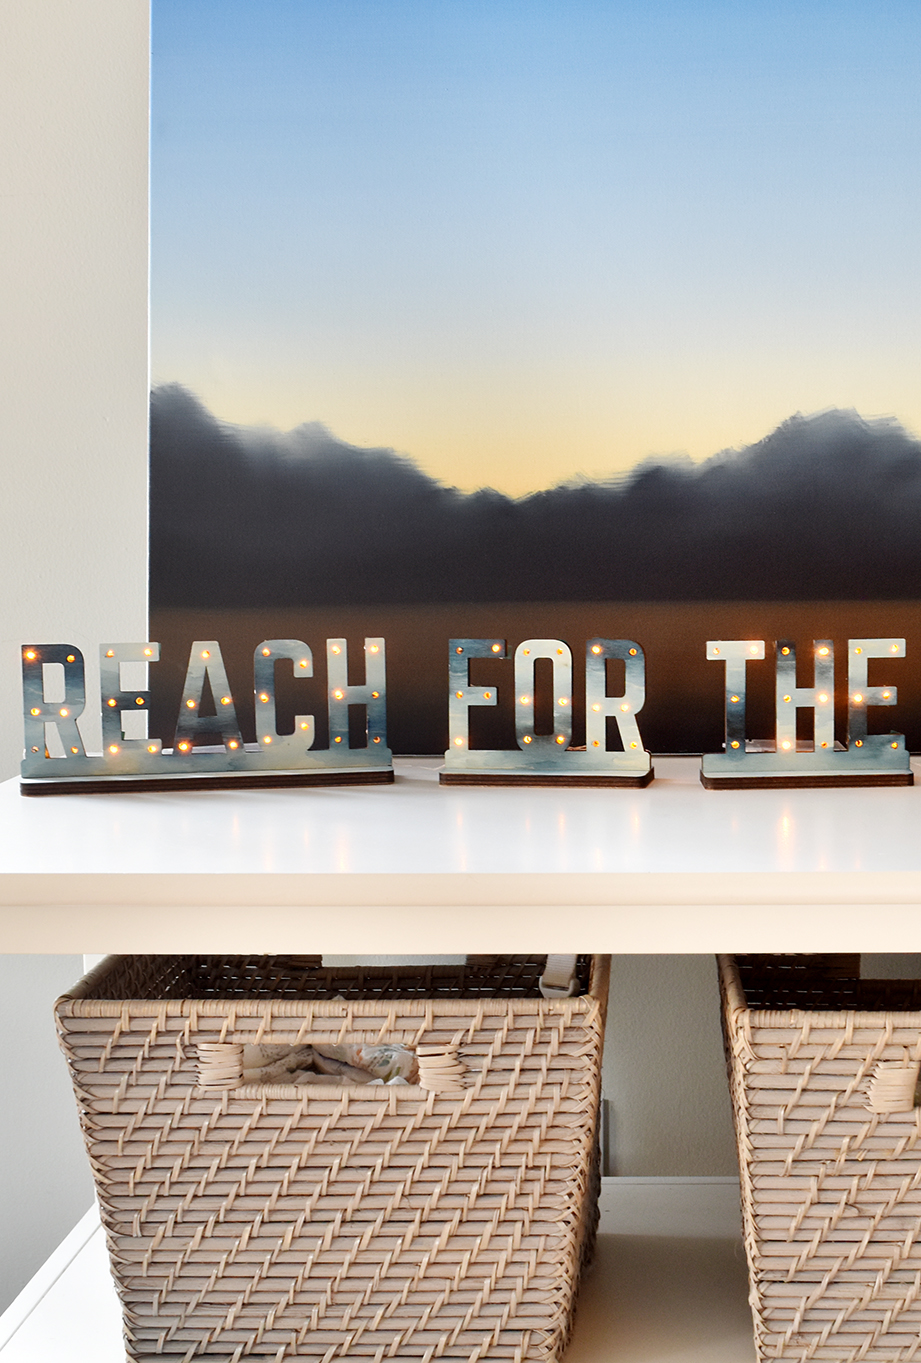
And that’s all… your DIY marquee light quote sign is complete! I’ve always loved the quote “reach for the stars,” so I felt like it would be perfect for this project. And I’m really happy with the way the watercolor gave the wood that night sky vibe.

I’m planning to put it in the nursery for our new little one, but as you can see, it looks great on any tabletop or other flat surface.
What quote would you choose? Head over to CraftCuts to order your letters! And be sure to check out these other wood DIYs too.