
It’s hard to believe, but fall is right around the corner. (Don’t mind me while I go cry for a minute. Because I love summer). But fall is gorgeous here in the northeast so I’m pretty excited for the colors and cooler temps. And of course, now I have an excuse to make some new seasonal decor!
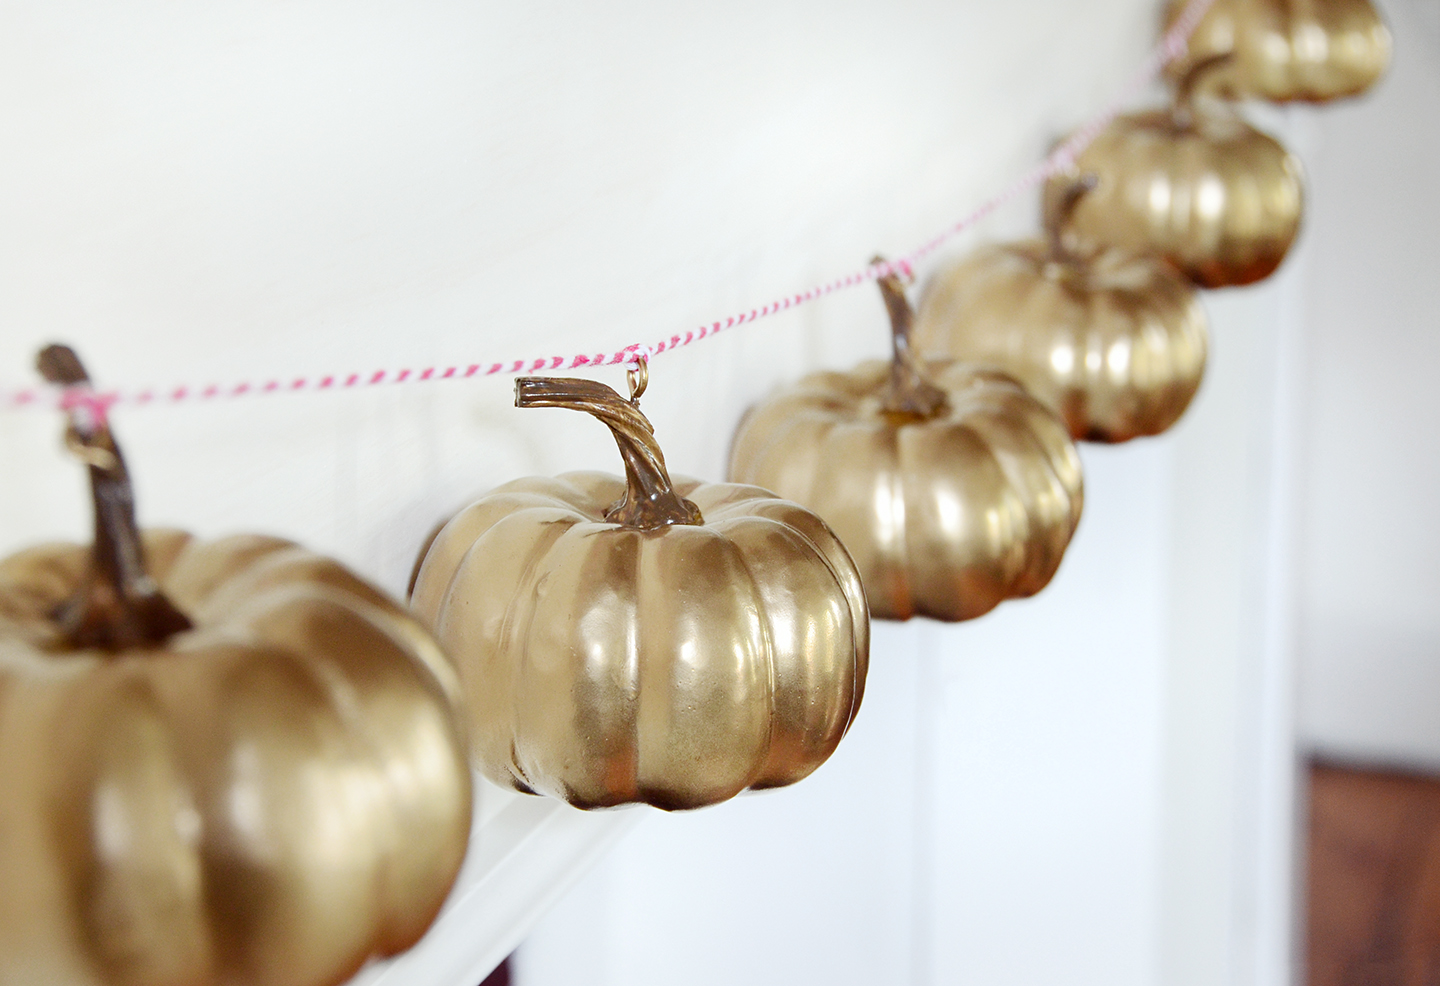
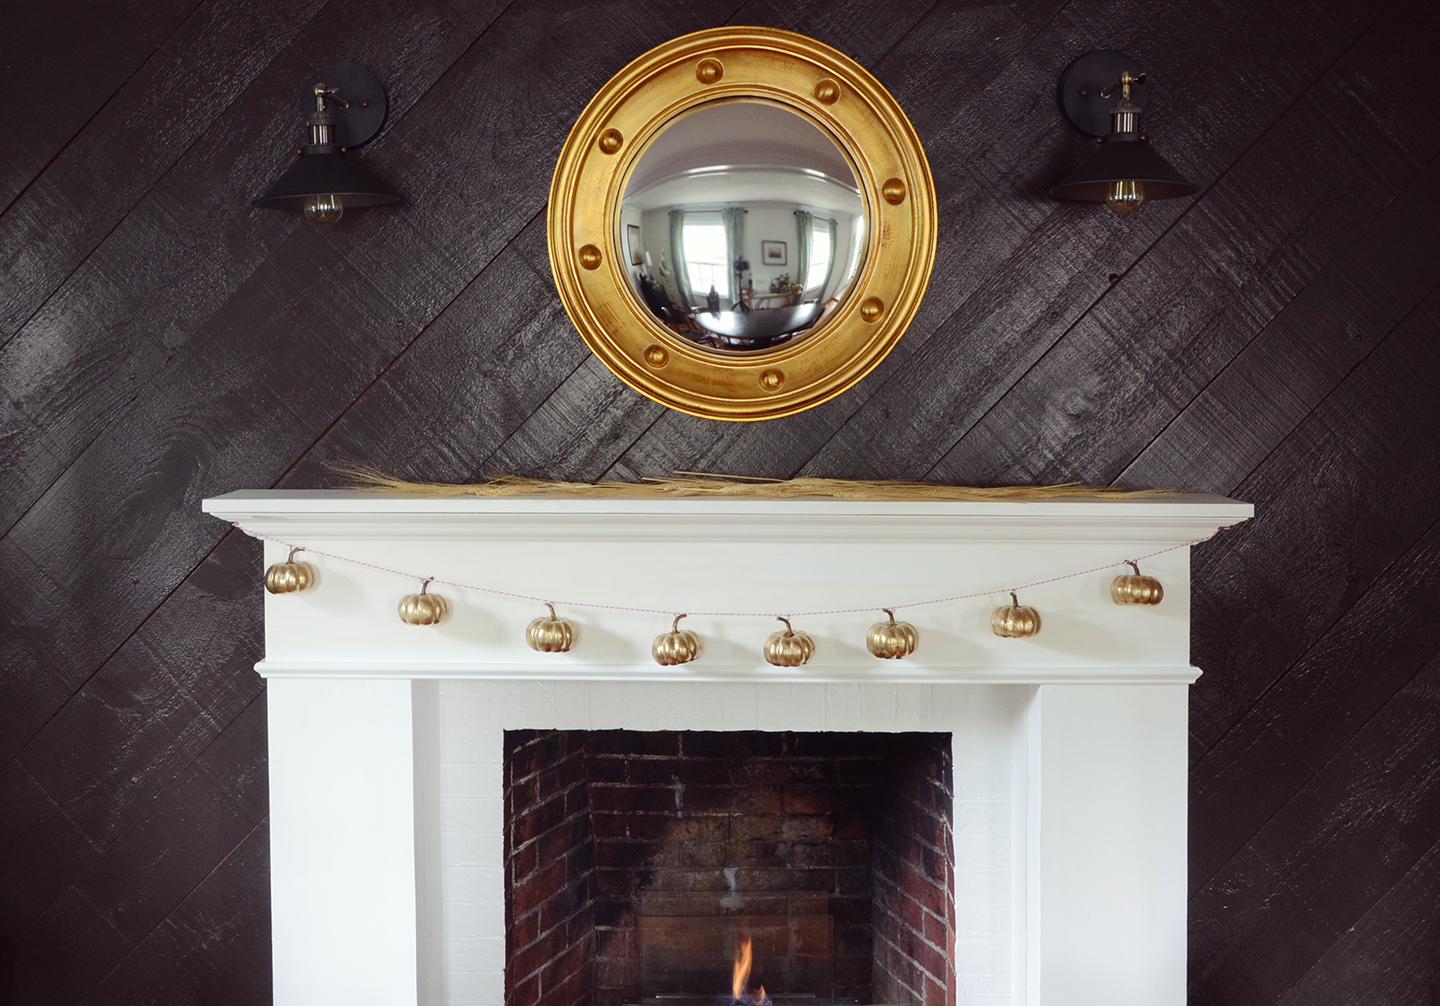
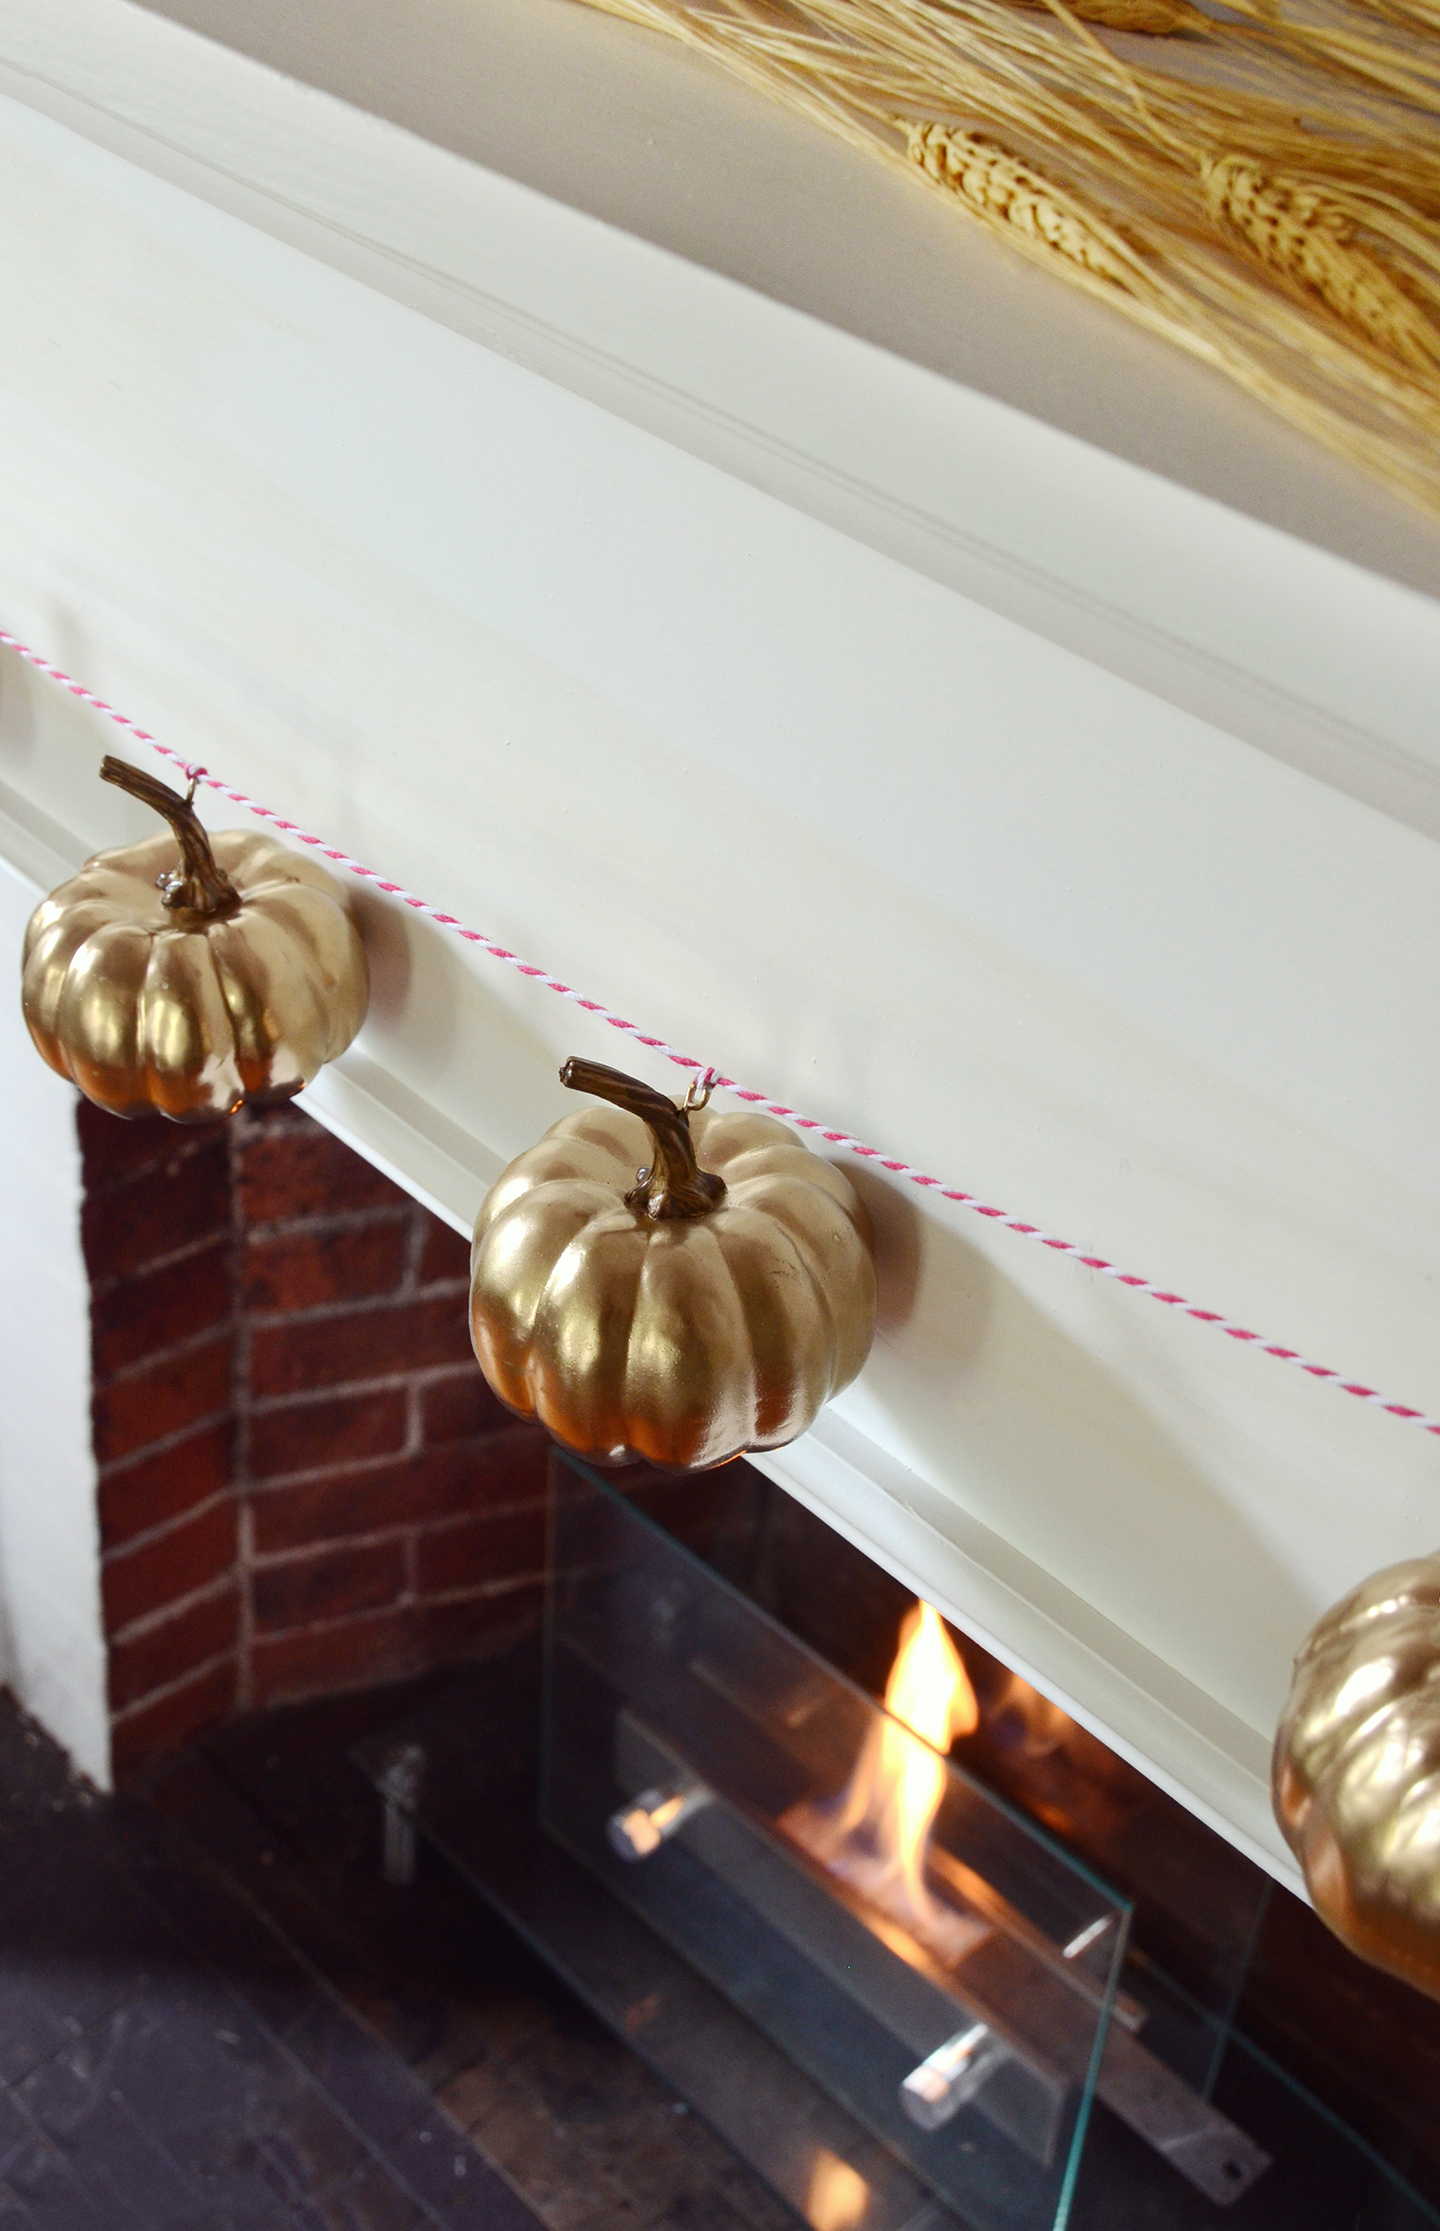
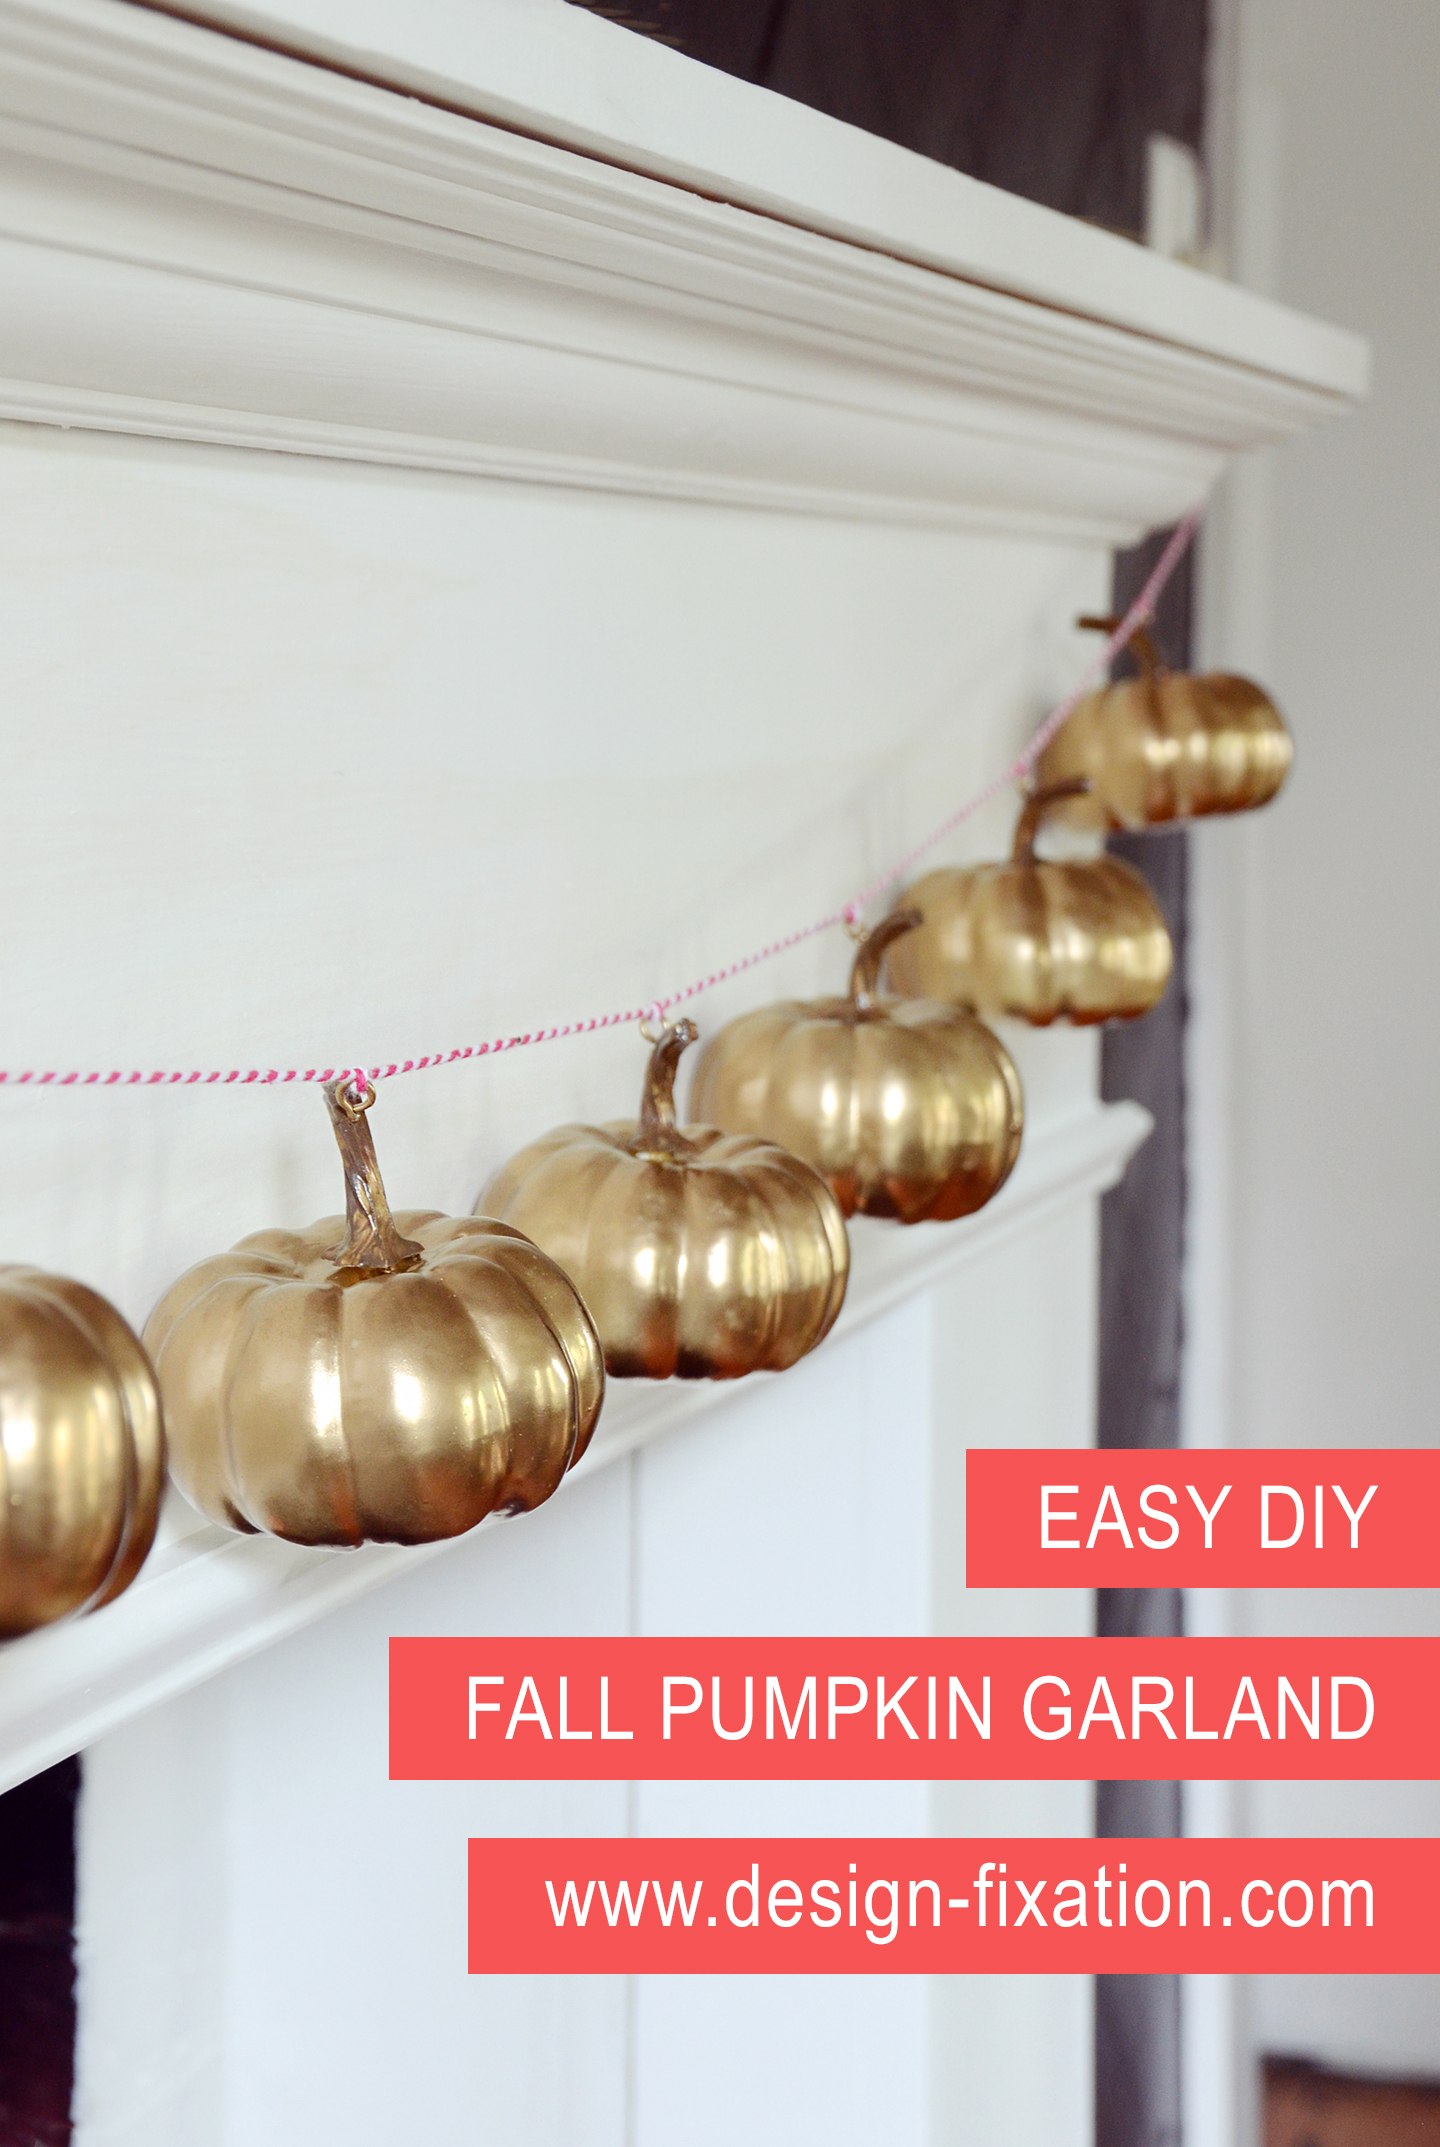
Now that we have a mantel in our dining room, I love decorating it and I always find myself making something new for it every season. This week I made a DIY fall pumpkin garland using a set of plain white mini artificial pumpkins and some pink and white bakers twine. (Because #ihavethisthingwithpink and I can’t seem to do a craft without it.) I used these small pumpkins from Wayfair, and they worked out great… they were super light, and also the perfect size for a garland. Wayfair has a surprising amount of seasonal decor; check out their other fall goodies here. And keep on scrolling to check out my simple tutorial!
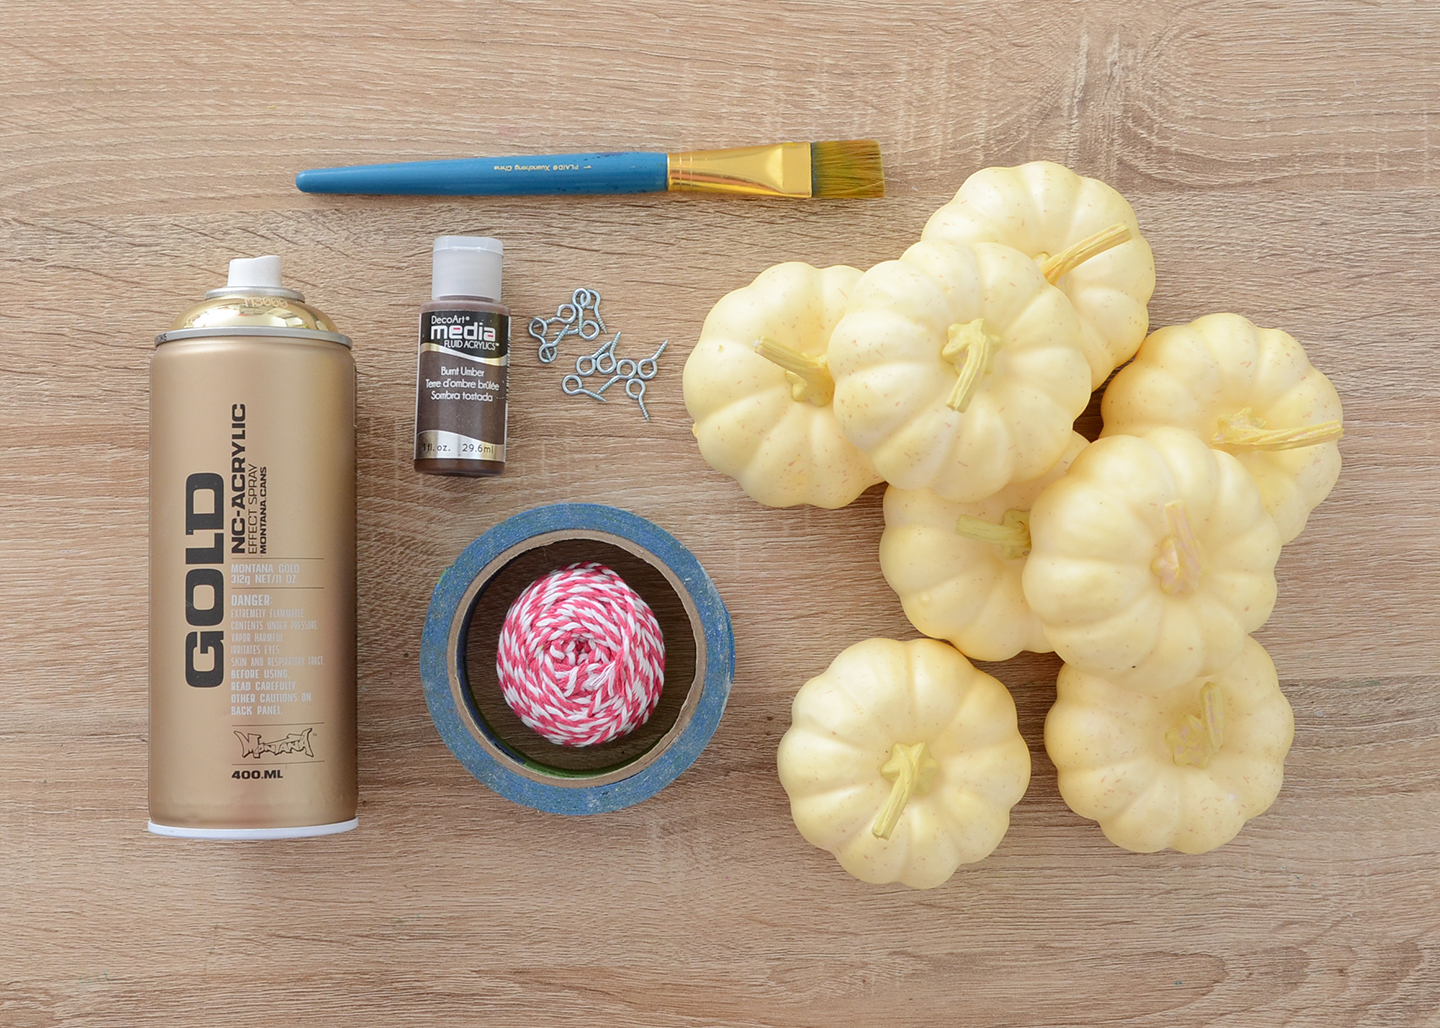
Here’s what you’ll need for your DIY fall pumpkin garland:
- Set of 8 artificial pumpkins
- Gold spray paint
- Brown acrylic paint
- Paintbrush
- Small eye hooks
- Scissors (not pictured)
- Baker’s twine
- Blue painter’s tape (optional)
- Electric drill with matching drill bit (optional)
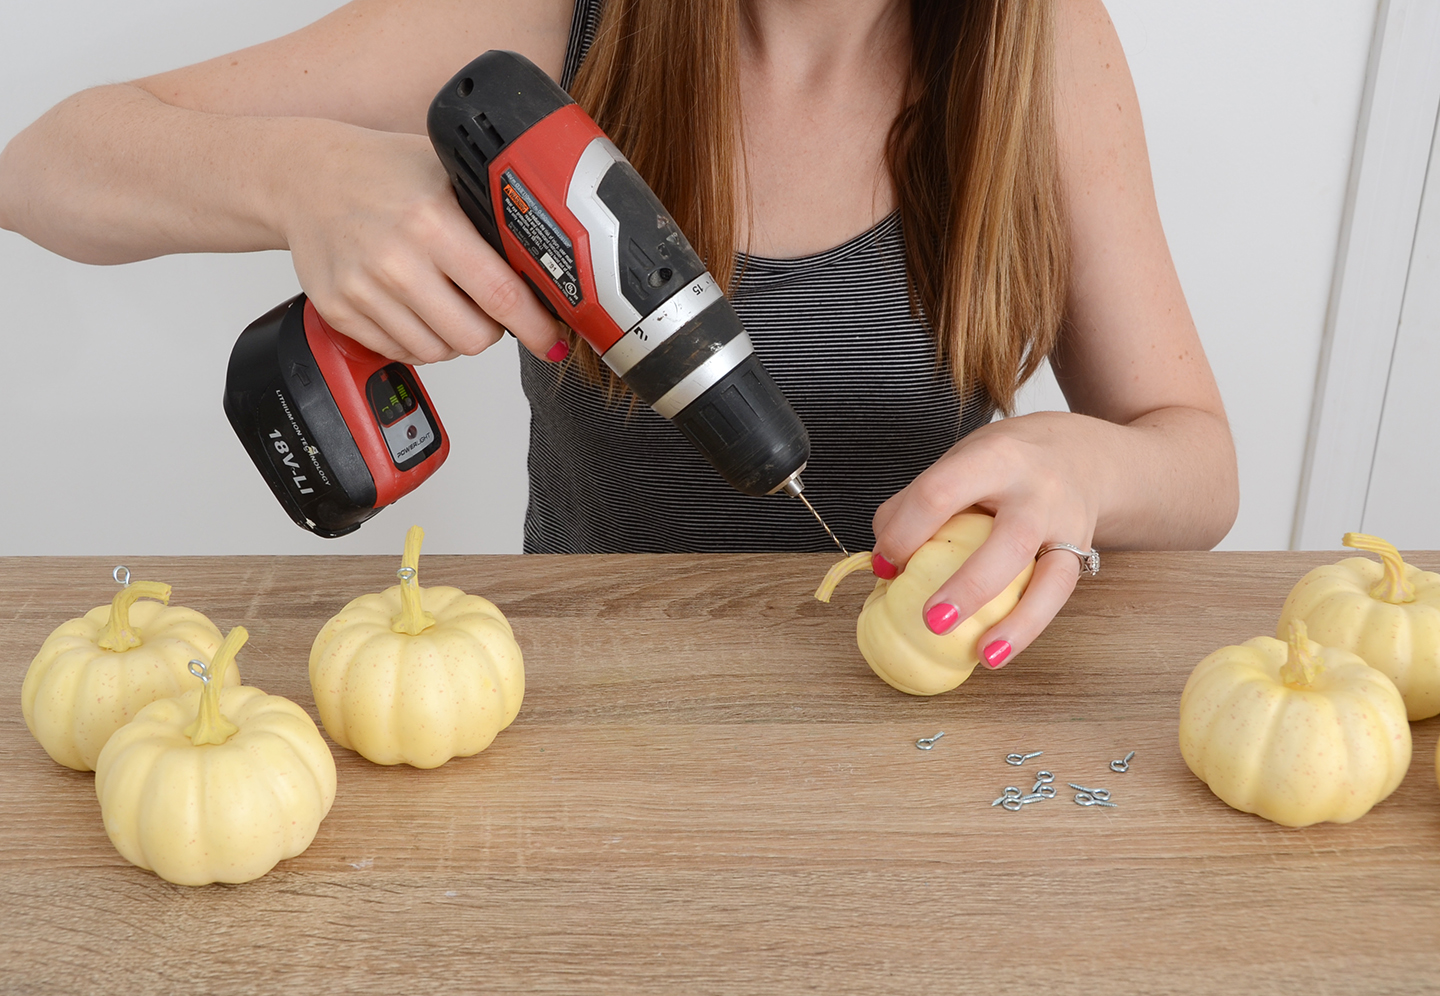
Begin by attaching the eye hooks to your pumpkins. The drill is the easiest method – simply drill a tiny pilot hole into the stem at a right angle to the pumpkin and then screw in the eye hook.
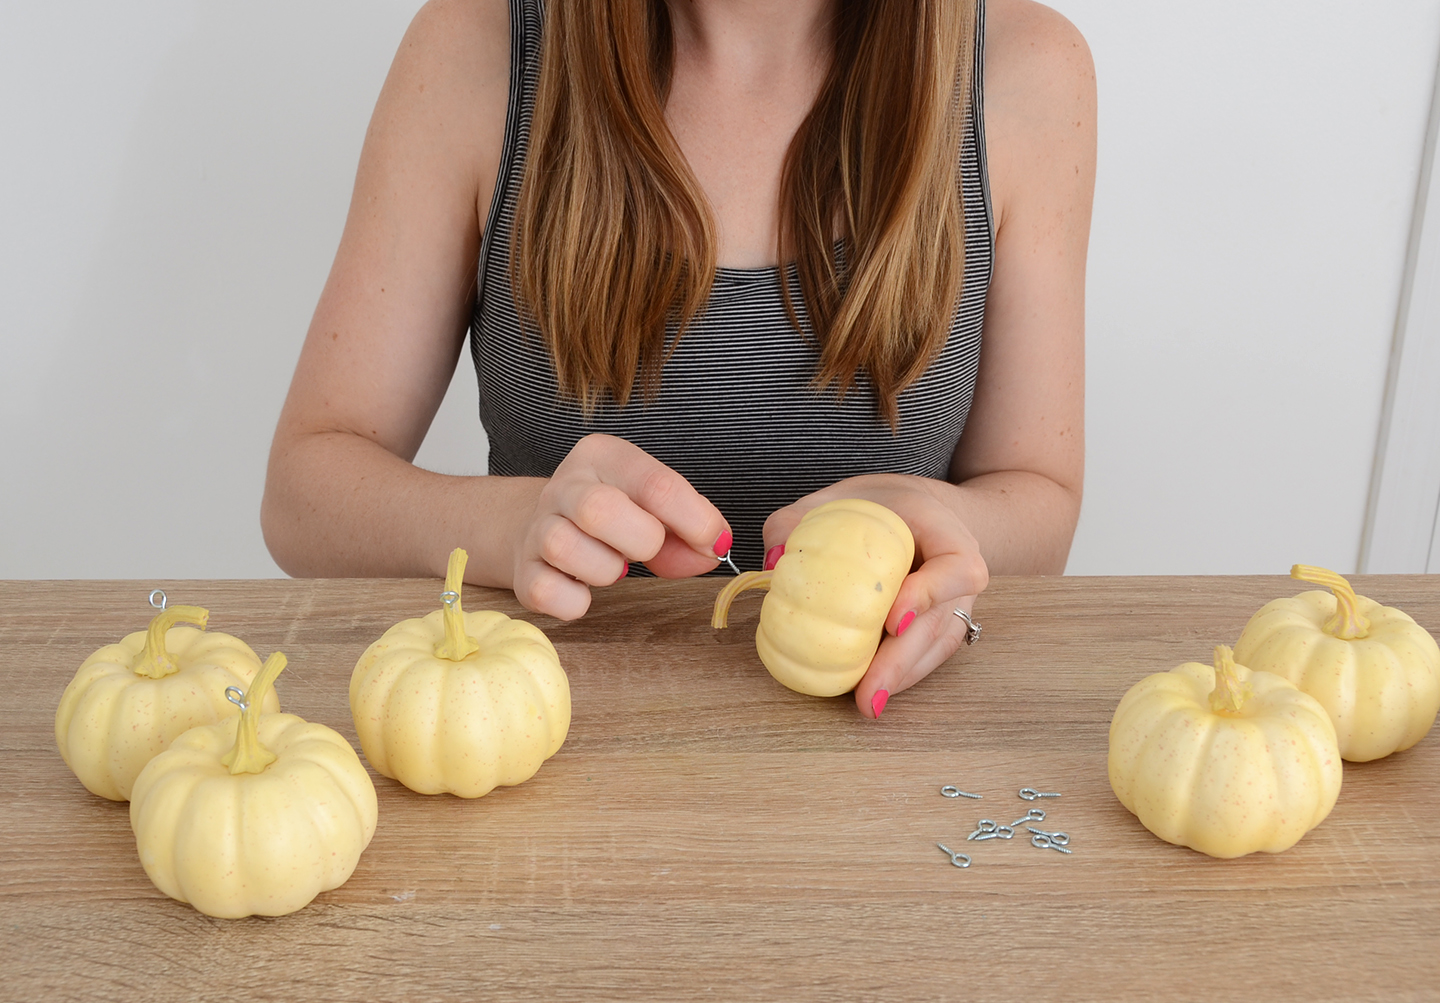
You can screw it in without the drilled pilot hole as well, it will just take a little longer. Repeat the process for all of your pumpkins.
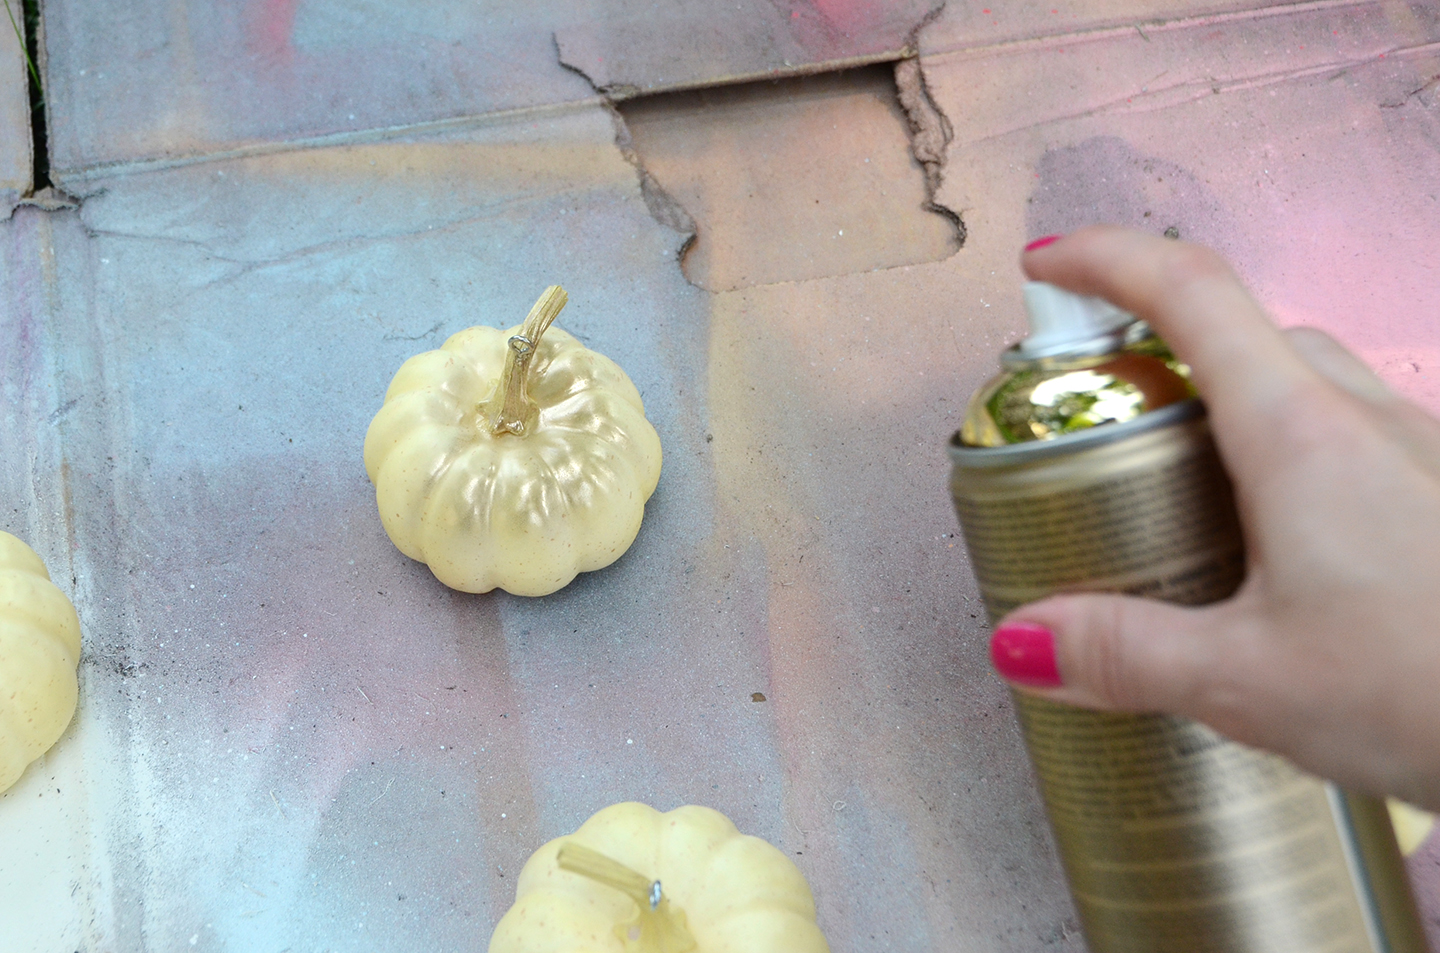
Next, bring them outside and spray paint them gold. You can cover the stems with painters tape if you like, but I actually ended up spray painting them entirely and it worked out fine. Paint them with two thin coats and let them dry thoroughly.
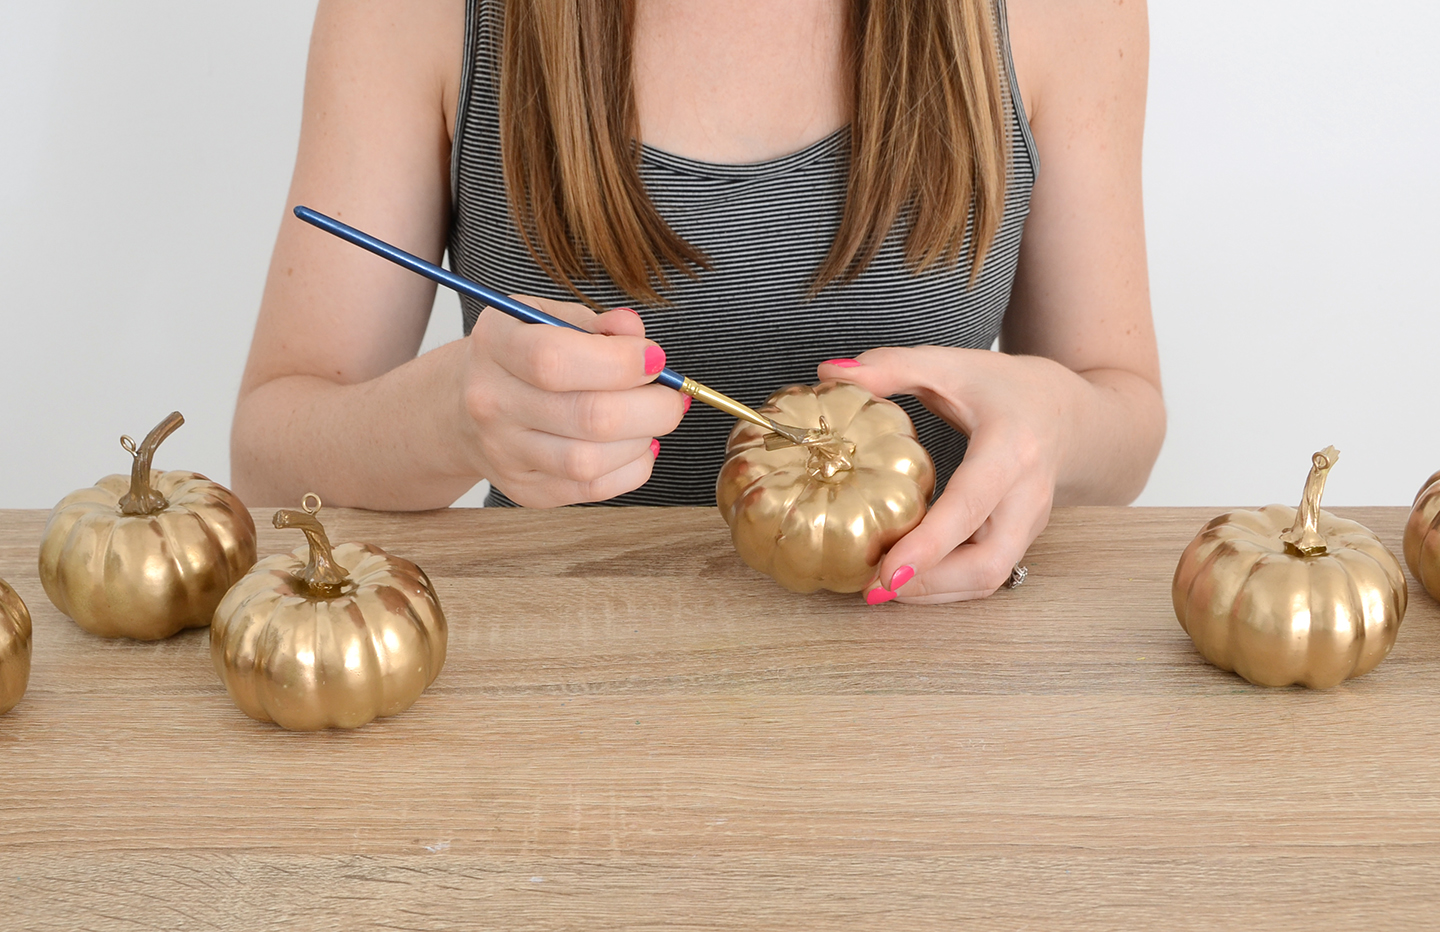
Now grab some brown acrylic craft paint and and coat the stems of each of the pumpkins. I did a light coat on mine so some of the gold showed through to give it some extra texture.
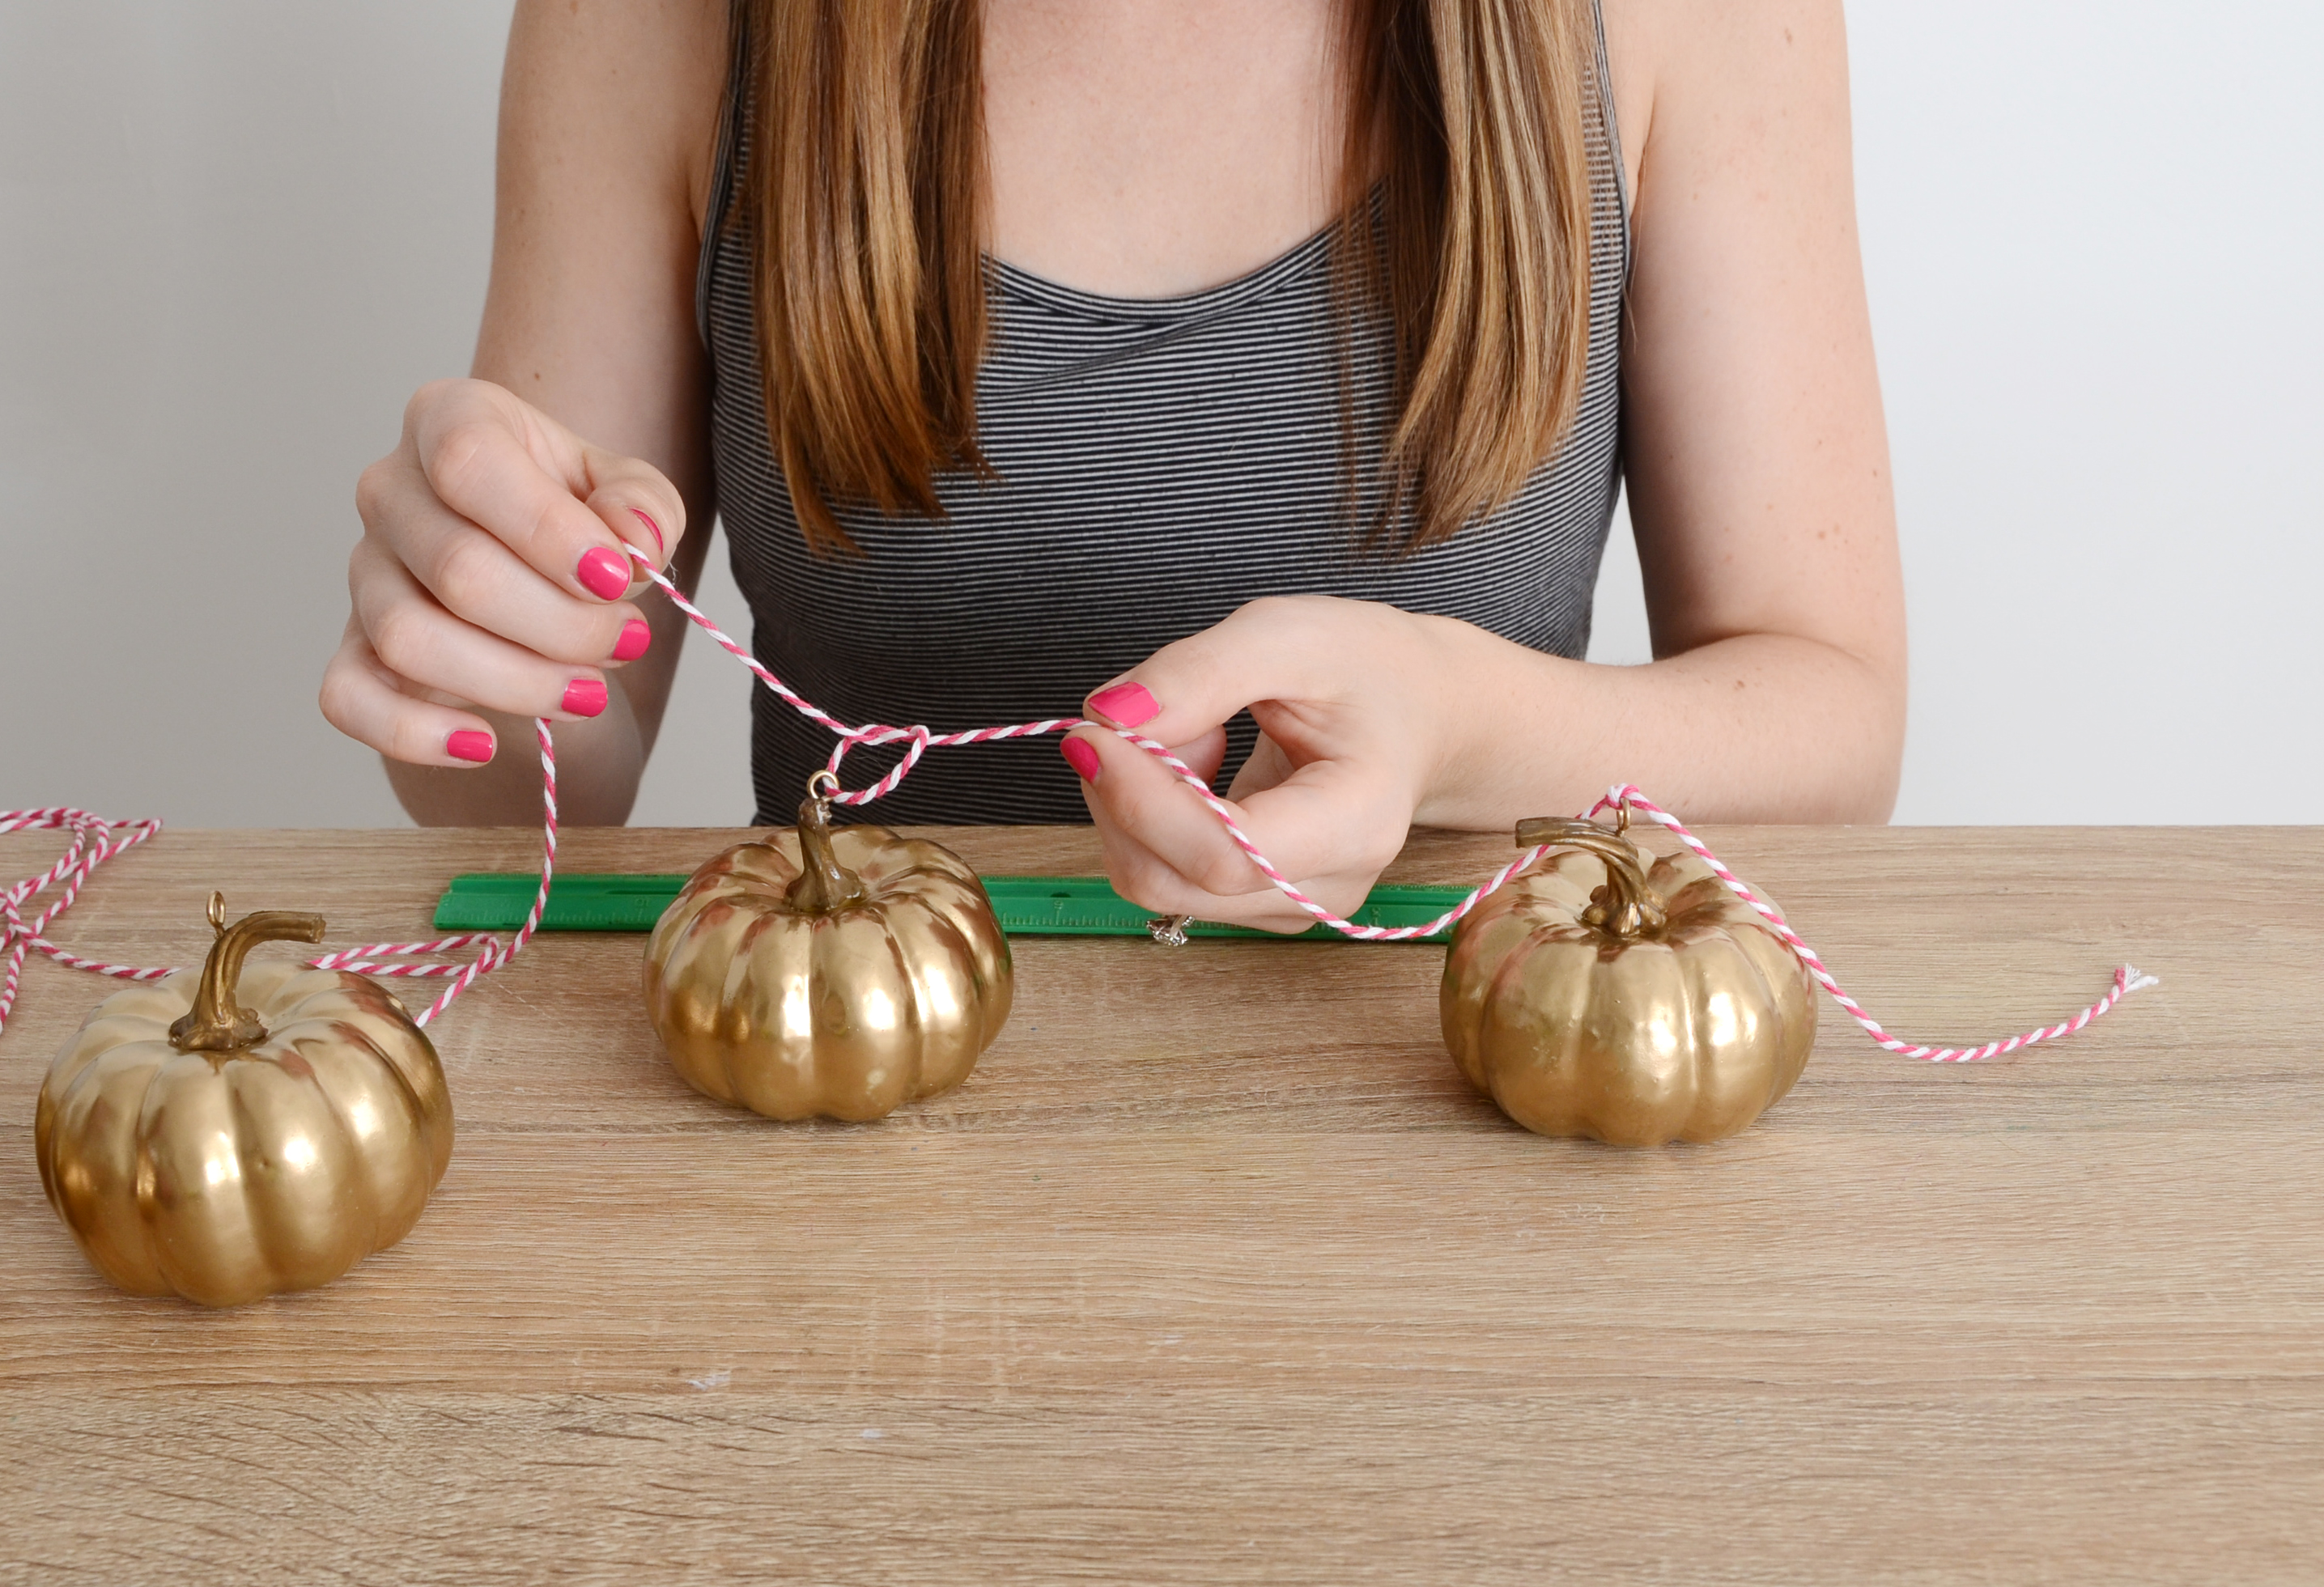
While the stems are drying, measure the width of your mantel and add twelve inches. Then divide by nine (the number of pumpkins plus one). For me, this number was eight… so I tied a pumpkin onto the bakers twine every eight inches.
And your DIY fall pumpkin garland is finished! You can customize this project in a lot of different ways…. paint your pumpkins different colors, choose other twine colors or even decorate your pumpkins with jack-o-lantern faces for Halloween.
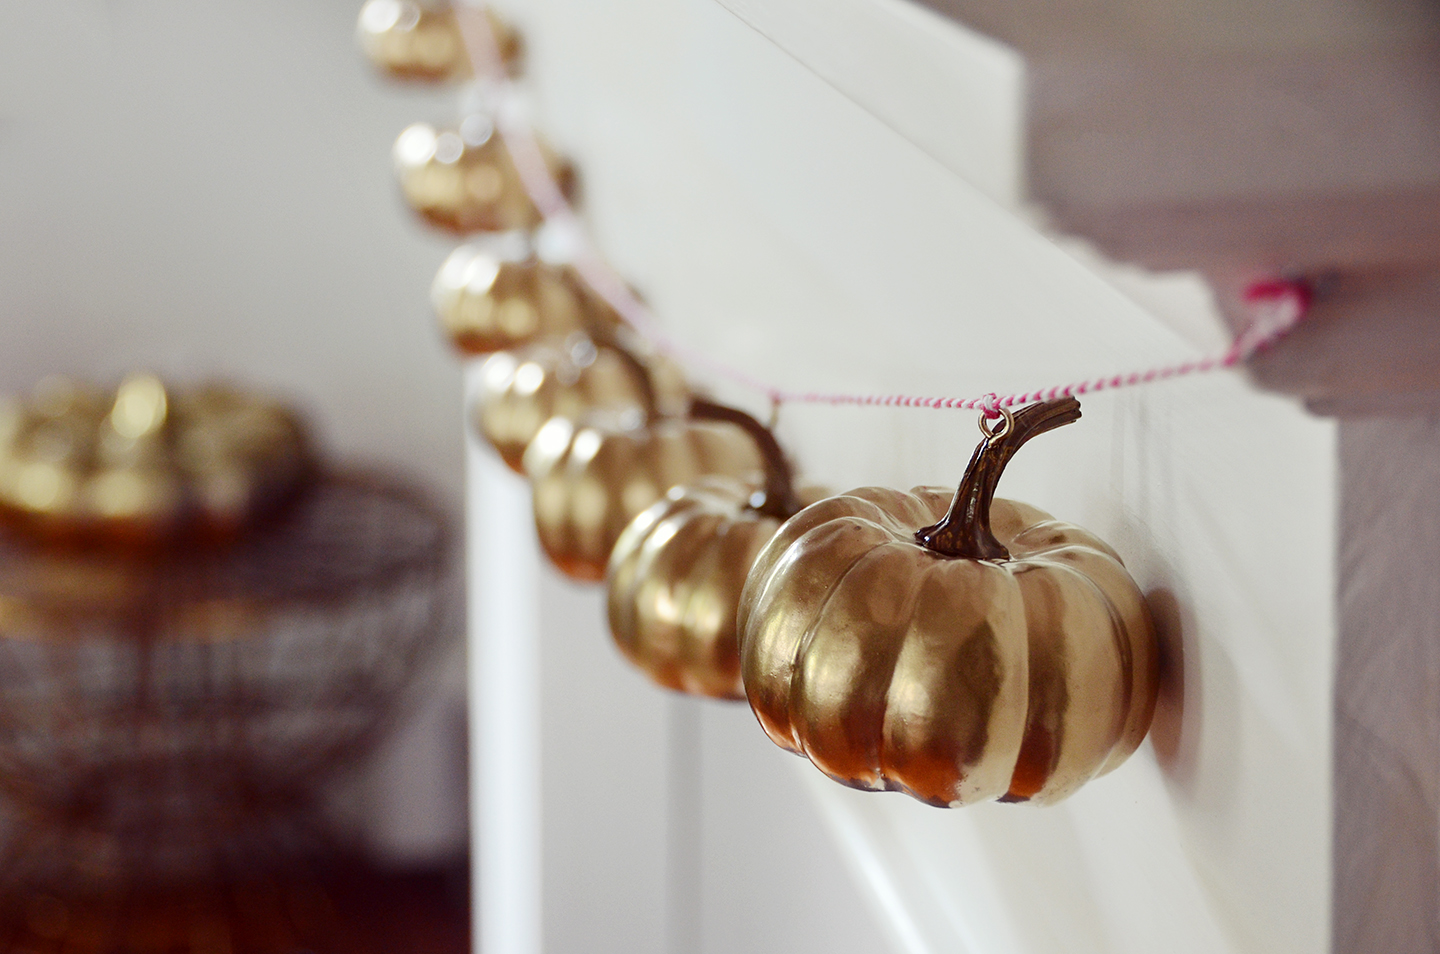
I just love that metallic finish, it gives them such a sophisticated autumnal feel. This is a great example of how easy it can be to upgrade decorations from past years… paint can do wonders, breathing new life into dated seasonal decor.
If you’re in the mood for more fall DIYs to keep you busy this weekend, check these out.
This post was created in partnership with Wayfair.
Thanks for supporting the brands that keep Design Fixation online!
Comments are closed.